Contents
- 1 What Makes This Syrup Special
- 2 Ingredients You’ll Need
- 3 Step-by-Step Instructions
- 4 Ingredient Variations & Substitutions
- 5 Tips for Perfect Texture & Flavor
- 6 How to Can or Bottle for Gifts
- 7 Usage Ideas & Serving Suggestions
- 8 Storage & Shelf Life
- 9 Recipe Troubleshooting
- 10 Frequently Asked Questions (FAQs)
- 11 Nutritional Information (Approx. Per 2‑Tbsp Serving)
- 12 12. Why You’ll Love This Recipe
- 13 ✅ Summary: Quick Steps at a Glance
Indulge in the vibrant taste of summer with this homemade huckleberry syrup. Made from just three wholesome ingredients—wild huckleberries, sugar, and lemon juice—this syrup is thick, sweet, and bursting with berry flavor. It’s perfect drizzled over pancakes and waffles, swirling into yogurt or cheesecake, or stirred into refreshing mocktails. Simple to prepare, easy to store, and even simple to gift, this syrup is a must-have summer staple for your kitchen.
What Makes This Syrup Special
-
Pure, bold flavor: The concentrated essence of summer berries shines through, offering a natural, sweet-tangy burst.
-
Minimal ingredients: Just huckleberries, sugar, and lemon juice—no preservatives, no artificial flavors.
-
Simple to make: Great for beginners. No special equipment needed.
-
Universal usage: Drizzle it on breakfast, desserts, drinks, and more.
-
Perfect as gifts: Jarred or canned, it makes thoughtful, homemade presents.
Ingredients You’ll Need
This version yields about 2 cups of syrup.
Core Ingredients
-
2 cups fresh or frozen huckleberries (150–160 g), washed and stems removed
-
1 cup granulated sugar, classic sweetness and viscosity
-
2 tbsp freshly squeezed lemon juice, brightens and balances flavors
Optional Add-ins
-
Zest of ½ small lemon, adds citrus aroma
-
1 tsp pure vanilla extract, for warm depth
-
Pinch of salt, enriches and accentuates sweetness
Step-by-Step Instructions
Prep the Fruit
Step 1: If using frozen berries, thaw completely and drain excess liquid (reserve it optionally).
Step 2: Rinse fresh berries and remove any stems.
Tip: Choose ripe, firm, and deeply colored huckleberries for the most vibrant flavor.
Cook the Syrup
Step 3: In a saucepan over medium heat, combine berries and sugar. Stir gently until berries give off juice and sugar starts dissolving (about 2–3 minutes).
Step 4: Stir in lemon juice (and optional lemon zest or vanilla). Bring to a low simmer.
Mash & Simmer
Step 5: Use a potato masher or wooden spoon to gently crush berries, releasing their juices.
Step 6: Simmer, stirring occasionally, for 8–12 minutes. Berries should break down, and juice should thicken.
Strain & Reduce
Step 7: Place a fine-mesh sieve over a bowl or saucepan. Pour mixture into sieve. Use a spoon to press solids to extract syrup.
Step 8: Discard or save the pulp for yogurt or oatmeal. Return syrup to heat if it’s not thick enough. Cook on low for another 3–5 minutes, until slightly coats a spoon.
Cool & Store
Step 9: Remove from heat, cool to room temperature. Stir to ensure uniform texture.
Step 10: Pour into sterilized glass bottles or jars. Seal and refrigerate. For canning, follow instructions below.
Ingredient Variations & Substitutions
Mixed Berry Combo
Use equal parts blueberries, raspberries, or blackberries for a nuanced berry blend.
Reduced-Sugar Version
Use only ¾ cup sugar, making sure syrup thickens sufficiently; it’ll be slightly thinner but still delicious.
Sugar-Free Alternatives
Try honey, maple syrup, or coconut sugar—reduce heat and cook slowly to avoid burning.
Fragrant Enhancements
-
Spices: Add a cinnamon stick or star anise while simmering.
-
Citrus Twist: Include orange juice or zest.
-
Floral Notes: Drop in a few edible lavender flowers during simmering, remove before straining.
Thickening Agents
For extra viscosity (like pancake syrup), stir in ½ tsp of cornstarch slurry in the last cooking stage, then cook until bubbly.
Tips for Perfect Texture & Flavor
-
Don’t boil vigorously—gentle simmering preserves color and flavor.
-
Use only fine-mesh strainers to keep liquids smooth and free of seeds.
-
Taste before canning. Adjust sweetness or acidity as desired.
-
Thickness check: If cooled syrup isn’t thick enough, reheat gently to reduce further.
How to Can or Bottle for Gifts
Quick Water-Bath Canning
Step 1: Sterilize jars and lids by boiling for 10 minutes.
Step 2: Fill jars with hot syrup, leaving ¼ inch of headspace.
Step 3: Wipe rims, apply lids and bands fingertip-tight.
Step 4: Place in boiling water-bath (ensure 1 inch water covers jars). Process 10 minutes.
Step 5: Remove jars to a rack, let cool 12–24 hours. Lids should pop (“ping”). Label with date.
No-Cook Bottling (Short-Term)
Suitable for short-term fridge storage: fill sterilized bottles, seal, and refrigerate.
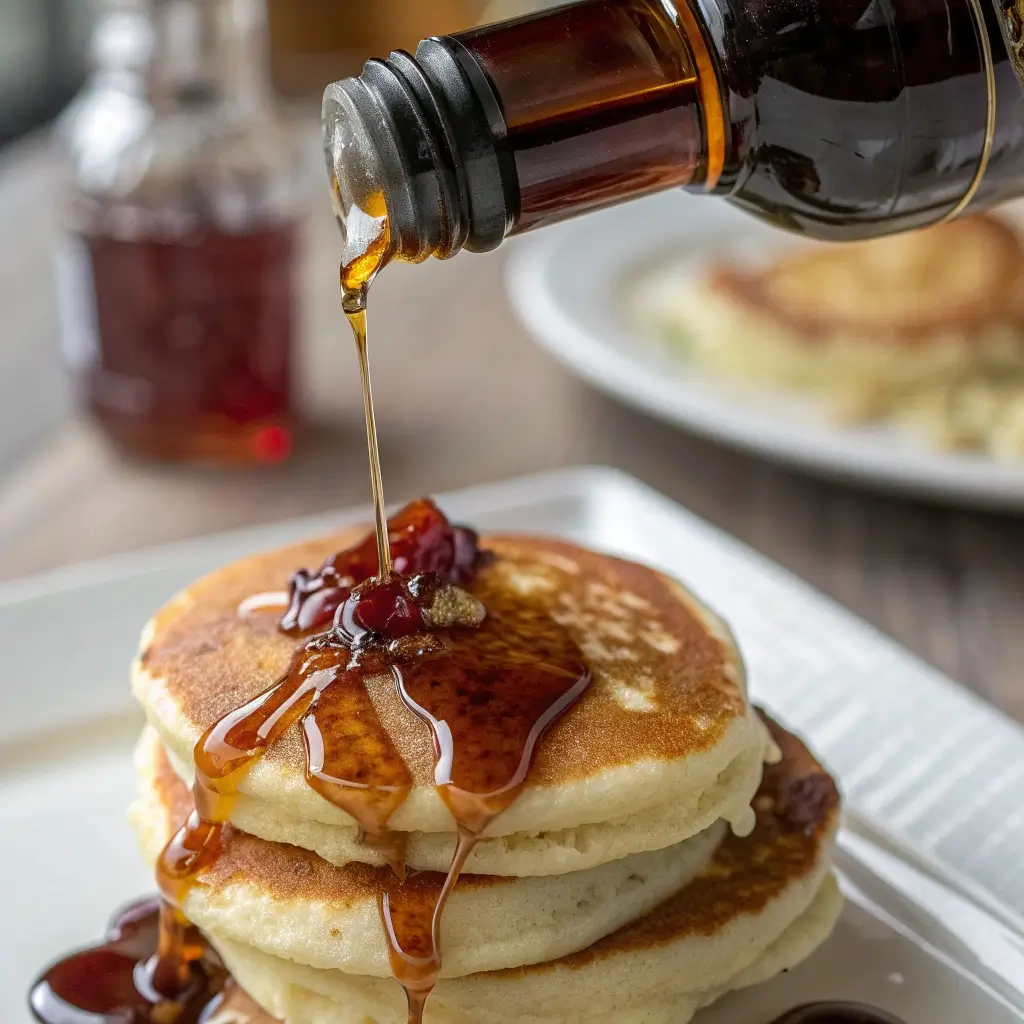
Usage Ideas & Serving Suggestions
On Breakfast Classics
-
Pancakes, waffles, French toast: drizzle hot or cold.
-
Yogurt parfait: swirl into Greek yogurt, granola, and fresh fruit.
-
Oatmeal & porridge: sweeten and brighten.
-
Cottage cheese: add for a fruity topping.
On Desserts
-
Cheesecake: spoon warm syrup over slices.
-
Ice cream: use it like fudge or fruit sauce.
-
Pound cake: drizzle over a warm slice.
-
Panna cotta: enhance with bold berry notes.
In Beverages
-
Mocktails: mix with soda water, iced tea, or lemon-lime drinks.
-
Smoothies: add spoonfuls for sweet berry flavor.
-
Sparkling water or lemonade: create refreshing summertime spritzers.
Gift Ideas
-
Jar it with a ribbon and tag: “Homemade Huckleberry Syrup—Perfect for Pancakes & Desserts!”
-
Include simple instructions or pairing suggestions.
Storage & Shelf Life
-
Refrigerator: Store in airtight container up to 2 weeks.
-
Frozen: Up to 6 months (use freezer-safe jar or pouch).
-
Canned (sealed jars): Shelf-stable up to 1 year. Once opened, refrigerate and use within 2 weeks.
Recipe Troubleshooting
| Problem | Cause | Solution |
|---|---|---|
| Syrup too thin | Not reduced enough; lemon juice not balanced | Reheat gently to reduce; add a little more sugar or juice |
| Too thick or syrup glazes sides | Cooked too long or too high heat | Add a splash of warm water, reheat and mix |
| Grainy or crystallized | Sugar not fully dissolved | Reheat with a little water, stir gently until smooth |
| Syrup too tart | Excess lemon or unripe berries | Stir in extra sugar, simmer briefly, taste again |
| Cloudy color | Impurities left in | Use finer sieve or cheesecloth when straining |
Frequently Asked Questions (FAQs)
Q1: Can I use frozen huckleberries?
Yes! Thaw and drain first. You can also use the berry juices in cooking to intensify flavor. Frozen berries may yield slightly darker syrup.
Q2: Is huckleberry syrup suitable for vegans?
Absolutely! Made with fruit, sugar, and lemon—no animal products.
Q3: Can it ferment?
Yes, if left unrefrigerated or improperly canned. Always sterilize, seal jars properly, and refrigerate if not water-bath canned.
Q4: Can I double the recipe?
Yes! Maintain the 2:1 ratio of berries to sugar. Use larger pot and adjust canning time if needed.
Q5: How long does bottled syrup last unopened?
Properly water-bath canned syrup with good seals lasts up to 1 year. Always label with date.
Q6: Can I use honey instead of sugar?
Yes. Use about ¾ cup honey, simmer gently to avoid burning and reduce until thick.
Q7: Can I add spices like cinnamon?
Sure! Add cinnamon stick or star anise during simmering, remove before straining for subtle flavor.
Nutritional Information (Approx. Per 2‑Tbsp Serving)
-
Calories: 110
-
Carbohydrates: 28 g
-
Sugars: 26 g
-
Vitamin C: 2 mg (~3% DV)
-
No fat, protein, or sodium (except optional pinch of salt)
Note: These values are estimates. Values vary based on ingredients and syrup thickness.
12. Why You’ll Love This Recipe
-
Effortless: Minimal steps, no special tools.
-
Adaptable: Use any similar berries—or mix them up.
-
Long-Lasting Options: Freeze or can for future use.
-
Giftable: Beautiful and thoughtful homemade gift.
-
Delicious: Intense berry flavor with natural sweetness.
✅ Summary: Quick Steps at a Glance
-
Combine 2 cups berries with 1 cup sugar in pan.
-
Add 2 tbsp lemon juice (plus optional zest/spices).
-
Simmer gently 8–12 min, mash berries.
-
Strain through fine sieve.
-
Cook syrup further if thin.
-
Cool, bottle, and refrigerate (or can for long-term).
")


