Contents
- 1 A Cozy, Portion-Controlled Twist on a Classic
- 2 Why You’ll Love This Mini Pumpkin Pie
- 3 Ingredients You’ll Need
- 4 Equipment You’ll Need
- 5 Step-by-Step Recipe
- 6 Tips for Perfect Mini Pies
- 7 Variations & Dietary Swaps
- 8 Serving Suggestions & Pairings
- 9 Make-Ahead, Storage, and Reheating
- 10 Frequently Asked Questions (FAQs)
- 11 Why This Mini Pie is a Fall Favorite
- 12 Nutrition Overview (per mini pie, approximate)
- 13 Conclusion
A Cozy, Portion-Controlled Twist on a Classic
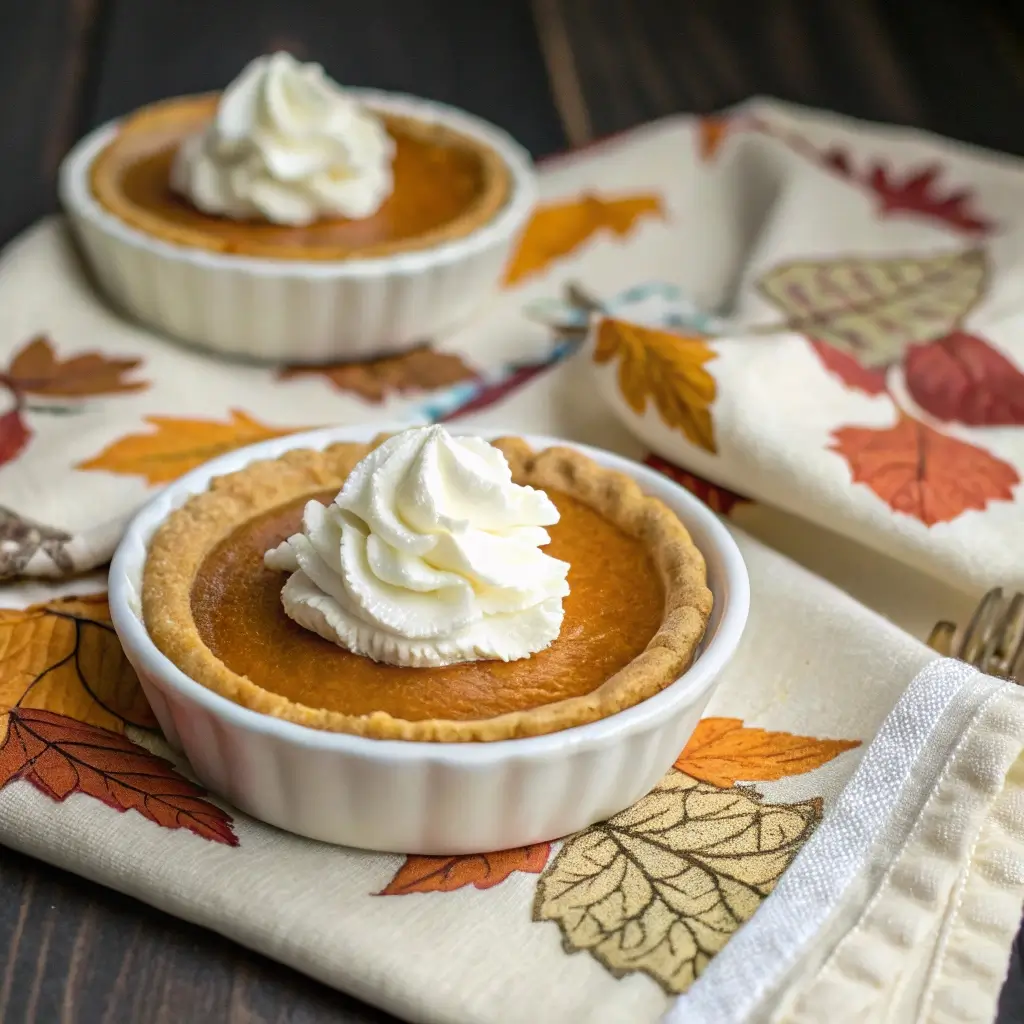
Nothing says fall like pumpkin pie. But when it’s just you and someone special—or you want dessert without wasting half a pie—this Mini Pumpkin Pie for Two is the perfect solution. With all the warm spices, creamy texture, and golden crust, it delivers full-sized flavor in individual dishes that are elegant, easy, and irresistibly charming.
Crafted for date nights, small celebrations, or solo indulgence, these petite pies eliminate leftovers while maintaining all the cozy comforts of traditional pumpkin pie. Plus, serving them in ramekins makes presentation effortless and sweet.
Why You’ll Love This Mini Pumpkin Pie
-
Portion-perfect: No oversized pies and no leftovers—just the right amount.
-
Elegant presentation: Romantic and visually appealing in individual ramekins.
-
Quick prep: One batch of filling baked simultaneously in two dishes.
-
Customizable: Adjust crust type or toppings to suit your dietary preferences.
-
Great for small occasions: Ideal for intimate holiday dinners or daily treat.
Ingredients You’ll Need
Crust Options (choose one)
-
Pre-made pie dough: Cut into 4–5″ rounds.
-
Crunchy crust: ¼ cup graham cracker crumbs + 1 Tbsp melted butter per pie.
-
Gluten-free option: Use GF pie crust or GF graham crumbs.
Filling (makes two 5″ pies)
-
½ cup (4 oz) pumpkin purée
-
2 Tbsp granulated sugar
-
1 Tbsp light brown sugar
-
½ tsp pumpkin pie spice (or cinnamon + pinch of nutmeg/ginger/cloves)
-
Pinch of salt
-
1 large egg
-
¼ cup heavy cream or half-and-half (dairy or coconut milk for dairy-free)
-
½ tsp vanilla extract
Optional Toppings
-
Whipped cream or coconut whipped cream
-
Cinnamon or nutmeg sprinkle
-
Chopped pecans or candied ginger
Equipment You’ll Need
-
Two 5″ ramekins (5–6 oz) or small tart tins
-
Mixing bowls
-
Measuring utensils
-
Whisk or fork
-
Rolling pin (if using rolled crust)
-
Baking sheet or shallow pan
-
Cooling rack
Step-by-Step Recipe
1. Preheat the Oven
Heat oven to 350°F (175 °C). Arrange ramekins on a baking sheet for stability.
2. Prepare the Crust
Pie dough: Roll lightly, cut a 5″ round per ramekin, and press gently.
Graham crust: Mix crumbs and melted butter; press firmly into ramekin bottoms and up the sides. Bake for 5 minutes to set; cool slightly before filling.
3. Mix the Filling
In a bowl, whisk pumpkin purée, both sugars, pumpkin pie spice, salt, egg, cream, and vanilla until smooth and silky.
4. Fill the Ramekins
Pour evenly into prepared ramekins, filling about ¾ full. Smooth the top.
5. Bake to Custard Perfection
Bake 30–35 minutes until edges are set with slight jiggle in the center. Avoid overbaking for silky custard.
6. Cool Before Serving
Let pies cool on a rack for 30 minutes, then chill in the fridge for at least 1 hour (or overnight) for best texture.
7. Garnish & Serve
Top with whipped cream or coconut whipped cream and sprinkle with cinnamon and pecans or candied ginger. Serve chilled or at room temperature.
Tips for Perfect Mini Pies
-
Avoid overfilling: Leave room for expansion during baking.
-
Use room-temperature ingredients: Helps the filling blend evenly.
-
Check doneness with touch: Edges should be firm; center slightly jiggly.
-
Blind-bake the crust: Especially for graham crust, it helps prevent sogginess.
-
Chill before serving: Improves slice clean-up and creaminess.
Variations & Dietary Swaps
Gluten-Free
Use GF pie crust or graham crumbs. Bake as directed.
Vegan & Dairy-Free
Use coconut milk or oat milk and a flax egg (1 Tbsp flaxmeal + 3 Tbsp water). The texture will be slightly softer.
Sugar-Free Version
Swap sugar with erythritol or monk fruit sweetener at a 1:1 ratio. You may prefer adding a touch of molasses for flavor.
Spice-Lovers’ Version
Add ½ tsp ginger, pinch of allspice, or drizzle with maple syrup and pecans after baking.
Serving Suggestions & Pairings
-
With warm vanilla lattes or hot mulled cider.
-
Garnish with candied pecans or thin apple slices for a fresh twist.
-
For a breakfast treat, top with yogurt and granola.
-
Wrap in parchment with ribbon for thoughtful hostess gifts.
Make-Ahead, Storage, and Reheating
Make-Ahead Tips
Assemble pies up to a day ahead and store covered in the fridge. Bake just before serving for freshness.
Storage
Refrigerate baked pies, covered, for up to 4 days.
Reheating
Warm gently in a 300°F oven for 8–10 minutes. Serve topped with fresh cream.
Frequently Asked Questions (FAQs)
Can I make more than two pies?
Yes! Simply double the filling and crust ingredients, and bake in multiple ramekins.
Why did my custard crack?
Likely due to overbaking or rapid cooling. Bake until slightly jiggly and cool gradually.
Can I freeze these pies?
Absolutely. Freeze once baked and cooled, well-wrapped, for up to 2 months. Thaw in the fridge.
Can I use canned pie filling?
No, canned filling contains sugars and stabilizers. Use pure pumpkin purée.
Can I bake in silicone molds?
Yes, but wear parchment or coat well to prevent sticking.
Why This Mini Pie is a Fall Favorite
-
Perfect portion control – No guilt from too-large servings.
-
Banner flavor in small size – Cozy spices and creamy filling present beautifully.
-
Visually charming – Ideal for photos, social media, and holiday tables.
-
Fuss-free baking – Minimal prep and tools, maximal flavor.
-
Custom-friendly – Easily adapt to dietary needs and flavors.
Nutrition Overview (per mini pie, approximate)
-
Calories: 300
-
Fat: 16 g
-
Carbs: 34 g
-
Sugar: 18 g
-
Protein: 6 g
-
Fiber: 2 g
(Using whipping cream and standard crust; varies by substitutions.)
Conclusion
Whether you’re treating yourself or creating a romantic dessert for two, this Mini Pumpkin Pie for Two brings fall coziness in every spoonful. With simple prep, elegant presentation, and rich flavor, it’s a small-batch dessert you’ll revisit all season.
")


