Contents
- 1 Why One‑Pot Chili Is a Weeknight Game Changer
- 2 Ingredients (Serves ~6–8)
- 3 Step‑by‑Step Instructions
- 4 Tips & Tricks for One‑Pot Chili Success
- 5 Variations & Flavor Twists
- 6 Serving Suggestions & Pairings
- 7 Storage, Reheating & Leftovers
- 8 Nutrition Snapshot (Approximate per Serving)
- 9 Frequently Asked Questions
- 10 Final Thoughts
When work, school, and life pull you in a dozen directions, the last thing you want is a sink full of dishes. That’s where one‑pot chili comes in—hearty, deeply flavored, and entirely contained in one vessel from start to finish. No multiple pans, no transfer, no cleanup chaos.
This article delivers a unique, robust one‑pot chili recipe, along with tips, variations, and FAQs so that you can enjoy cozy, satisfying dinners without the post-dinner dread. Let’s cook something delicious and simple.
Why One‑Pot Chili Is a Weeknight Game Changer
-
Minimal cleanup: Only one pot to wash—that’s a major win.
-
Flavor development: All ingredients cook together, maximizing depth and melding flavors.
-
Flexible & forgiving: This style tolerates tweaks—swap proteins, adjust spices, go vegetarian, etc.
-
Great for leftovers: Chili tends to taste better the next day, and this method reheats beautifully.
-
Efficient cooking: You sauté, simmer, and finish all in that same pot, so it’s compact and streamlined.
Ingredients (Serves ~6–8)
Here’s a well-balanced chili built for flavor and ease. Adjust quantities to your taste or serving needs.
| Ingredient | Amount | Notes / Options |
|---|---|---|
| Olive oil or avocado oil | 1 Tbsp | For sautéing |
| Onion, diced | 1 large | Yellow or white |
| Bell pepper, diced | 1 medium | Any color, optional |
| Garlic, minced | 3 cloves | Fresh gives best aroma |
| Ground meat (beef, turkey, or chicken) | 1.5 lb | Use lean to reduce excess fat |
| Diced tomatoes (canned) | 2 cans (14–15 oz each) | With juices |
| Tomato sauce | 1 can (15 oz) | Adds smooth tomato body |
| Tomato paste | 1–2 Tbsp | For richness and thickness |
| Beans (kidney, black, pinto), drained & rinsed | ~2 cups | Use one kind or a mix |
| Broth (beef or vegetable) | 1 to 1½ cups | Adjust depending on desired consistency |
| Chili powder | 1½ Tbsp | Mild or hot, depending on preference |
| Ground cumin | 1 tsp | Earthy warmth |
| Smoked paprika | ½ tsp | Optional but adds depth |
| Oregano (dried) | 1 tsp | Herby tone |
| Salt & freshly ground black pepper | To taste | Add gradually |
| (Optional) Cayenne or red pepper flakes | To taste | For added heat |
Suggested Garnishes
(Added after serving, not in the cooking pot)
-
Chopped cilantro
-
Chopped green onion or red onion
-
Shredded cheese (cheddar, Monterey Jack, or dairy-free alternative)
-
Sour cream or Greek yogurt
-
Sliced jalapeños
-
Avocado or guacamole
-
Lime wedges
-
Tortilla chips or cornbread (on the side)
Step‑by‑Step Instructions
1. Heat the Pot & Sauté Aromatics
Place your pot (a heavy-bottomed Dutch oven or deep soup pot works best) over medium heat. Add the oil.
Once oil shimmers, add diced onion and bell pepper. Sauté for about 4–5 minutes until softened and beginning to turn translucent.
Add minced garlic and sauté another 30 seconds until fragrant, taking care not to let it burn.
2. Brown the Meat
Push the vegetables to the sides (if space allows) and add the ground meat. Break it up with a spatula, and cook until browned and mostly cooked through, about 5–7 minutes.
If excess fat accumulates, you may carefully spoon it out or tilt the pot slightly and absorb with paper towels—but leave enough to carry flavor.
3. Add Spices & Tomato Base
Sprinkle in the chili powder, cumin, smoked paprika, oregano, salt, and pepper. Stir well so spices coat the meat and vegetables. Let them toast for about 1 minute.
Add tomato paste, stirring to integrate it. This deepens the flavor base.
4. Add Tomatoes, Beans & Broth
Pour in the diced tomatoes (with juices) and tomato sauce. Stir to combine. Add the drained beans.
Pour in 1 cup of broth initially and stir. If the mixture seems too thick or dry, add additional broth up to your 1½ cups. You want a saucy consistency that can reduce a bit as it simmers.
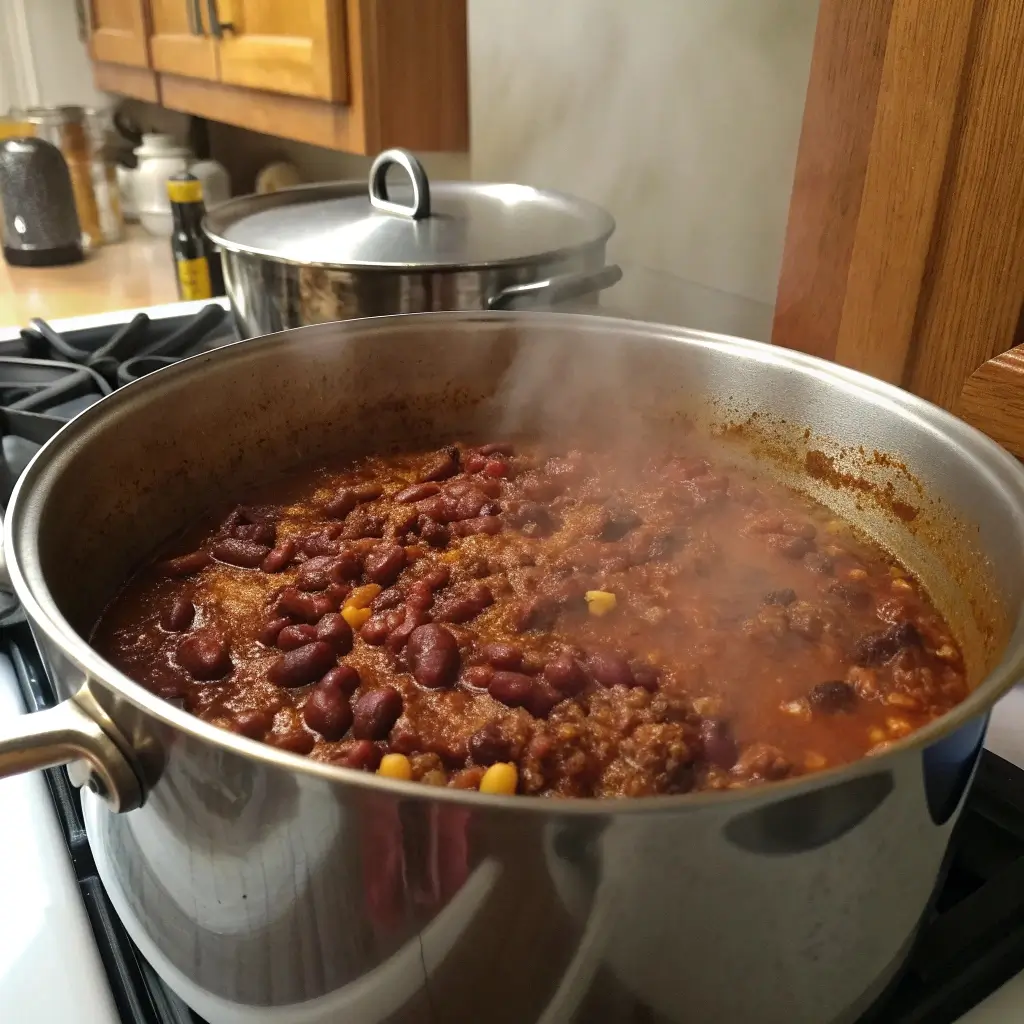
5. Simmer & Meld Flavors
Bring chili to a gentle boil, then reduce heat to low. Cover partially with the lid (leave a crack) and simmer for 25–35 minutes, stirring occasionally.
During this time, the flavors deepen, vegetables soften, and the chili thickens naturally.
6. Adjust Consistency & Seasoning
If the chili is too thin, remove lid for the last 10 minutes to reduce. If it’s too thick, stir in a little more broth or water, a quarter cup at a time.
Taste and adjust salt, pepper, or extra chili powder to your preference.
7. Serve & Garnish
Ladle the chili into bowls and top with your favorite garnishes. Serve with chips, cornbread, rice, or a simple side salad.
Tips & Tricks for One‑Pot Chili Success
-
Use a heavy pot: Cast iron or enameled Dutch ovens hold heat well and reduce scorching.
-
Don’t overcrowd: If your pot is small, cook in two batches or reduce volume so the ingredients can sauté properly.
-
Toast spices: Let the dry spices cook with the meat/veggies for a moment to unlock aroma and flavor.
-
Moderate liquid: The one-pot method demands careful control of liquids—start with less broth, add as needed.
-
Stir occasionally: Especially toward the end to prevent sticking or burning on the pot’s bottom.
-
Add fresh flavors at the end: A squeeze of lime or bit of fresh cilantro brightens the completed dish.
-
Make ahead: The chili can be made a day ahead and reheated. One‑pot ease extends to leftovers.
Variations & Flavor Twists
-
Turkey/Chicken One‑Pot Chili: Use ground turkey or chicken instead of beef. You may want to reduce broth slightly because poultry releases less fat.
-
Beanless (no‑bean) version: Omit beans and increase vegetables (zucchini, mushrooms, squash) or add more meat. Adjust cooking time to accommodate.
-
Vegetarian one‑pot chili: Replace meat with extra beans or plant-based meat crumbles. Use vegetable broth.
-
Smoky chipotle twist: Add minced chipotle in adobo or chipotle powder for smoky heat.
-
Southwest style: Add corn, black beans, and a splash of lime juice before serving.
-
Pumpkin or sweet potato chili: Stir in some pumpkin puree or diced sweet potato early for seasonal flair (watch liquid balance).
-
Spicy heat version: Increase cayenne, add fresh diced jalapeños or serranos, or top servings with hot sauce or crushed red pepper.
Serving Suggestions & Pairings
-
Rice or quinoa: Serve chili over cooked grains for a hearty meal.
-
Cornbread, biscuits, or rolls: The classic side to dunk or sop up sauce.
-
Tortilla chips: For scooping or adding crunch.
-
Green salad: A crisp, light side to contrast richness.
-
Roasted vegetables: Broccoli, cauliflower, or green beans on the side.
-
Lime wedges or pickled onions: Add acidity and balance.
Storage, Reheating & Leftovers
-
Refrigerator: Let chili cool, then store in airtight containers. Use within 3–4 days.
-
Freezer: Let the chili cool fully before freezing in freezer-safe containers. It will last up to ~3 months.
-
Reheating:
• Stovetop: Reheat gently over medium-low heat, stirring and adding a splash of broth if thickened.
• Microwave: Reheat in bowls in 1‑minute increments, stirring in between. -
Leftovers tip: When reheating, the chili may thicken—add a bit of broth or water if necessary.
Nutrition Snapshot (Approximate per Serving)
-
Calories: ~ 350–450 (depending on meat choice, beans, portion)
-
Protein: ~25–30 g
-
Carbohydrates: ~30–35 g
-
Fat: ~10–15 g
-
Fiber: ~8–10 g
-
Sugar: ~4–6 g
Nutritional values will vary based on ingredient choices and serving size. For precise tracking, use a nutrition calculator with your specific ingredients.
Frequently Asked Questions
Is it really possible to do chili in one pot and still get depth?
Absolutely. Layering flavor through sautéed aromatics, toasted spices, simmering, and seasoning adjustments allows one‑pot chili to be rich and satisfying.
Can I skip browning meat and still use one pot?
You can, but browning adds caramelization and flavor depth. If you skip it, you may want to increase spices or simmer longer.
What kind of pot is best?
Use a deep, heavy-bottomed pot or Dutch oven that distributes heat evenly and resists scorching.
Can I make this in a slow cooker or Instant Pot?
Yes. For slow cooker: brown ingredients in a skillet then transfer to slow cooker, cook low for 6–8 hours or high for 3–4. For Instant Pot: sauté within the pot, then pressure cook ~10–12 minutes, release, and adjust consistency.
Will the beans fall apart in the pot?
Not if you stir gently and avoid overcooking. Use firmer bean types (kidney, black) and don’t stir constantly.
How do I reduce cleanup even more?
Use liners (if your pot supports), wipe off residue while warm, or soak the pot before washing.
Final Thoughts
One‑pot chili is the ultimate companion for busy weeknights. It delivers the heartiness and satisfaction of classic chili, but with the ease and sanity of minimal cleanup. With flexibility in ingredients, the ability to tailor heat, and leftovers that reheat beautifully, this recipe is a weeknight hero.
Pin or bookmark this one‑pot chili method, adapt it to your preferences, and let it become your go-to for cozy, low-effort dinners that don’t sacrifice flavor.
")


