These Lucky Charms Rice Crispy Treats Will Steal Your Pot of Gold
There’s something magical about the simple joy of rice crispy treats—that perfect marriage of crispy, airy cereal and gooey sweet marshmallow that takes us all back to childhood lunchboxes. But when you add the rainbow of marshmallow charms from everyone’s favorite cereal? You create edible happiness that makes grown-ups grin and kids’ eyes light up like fireworks.
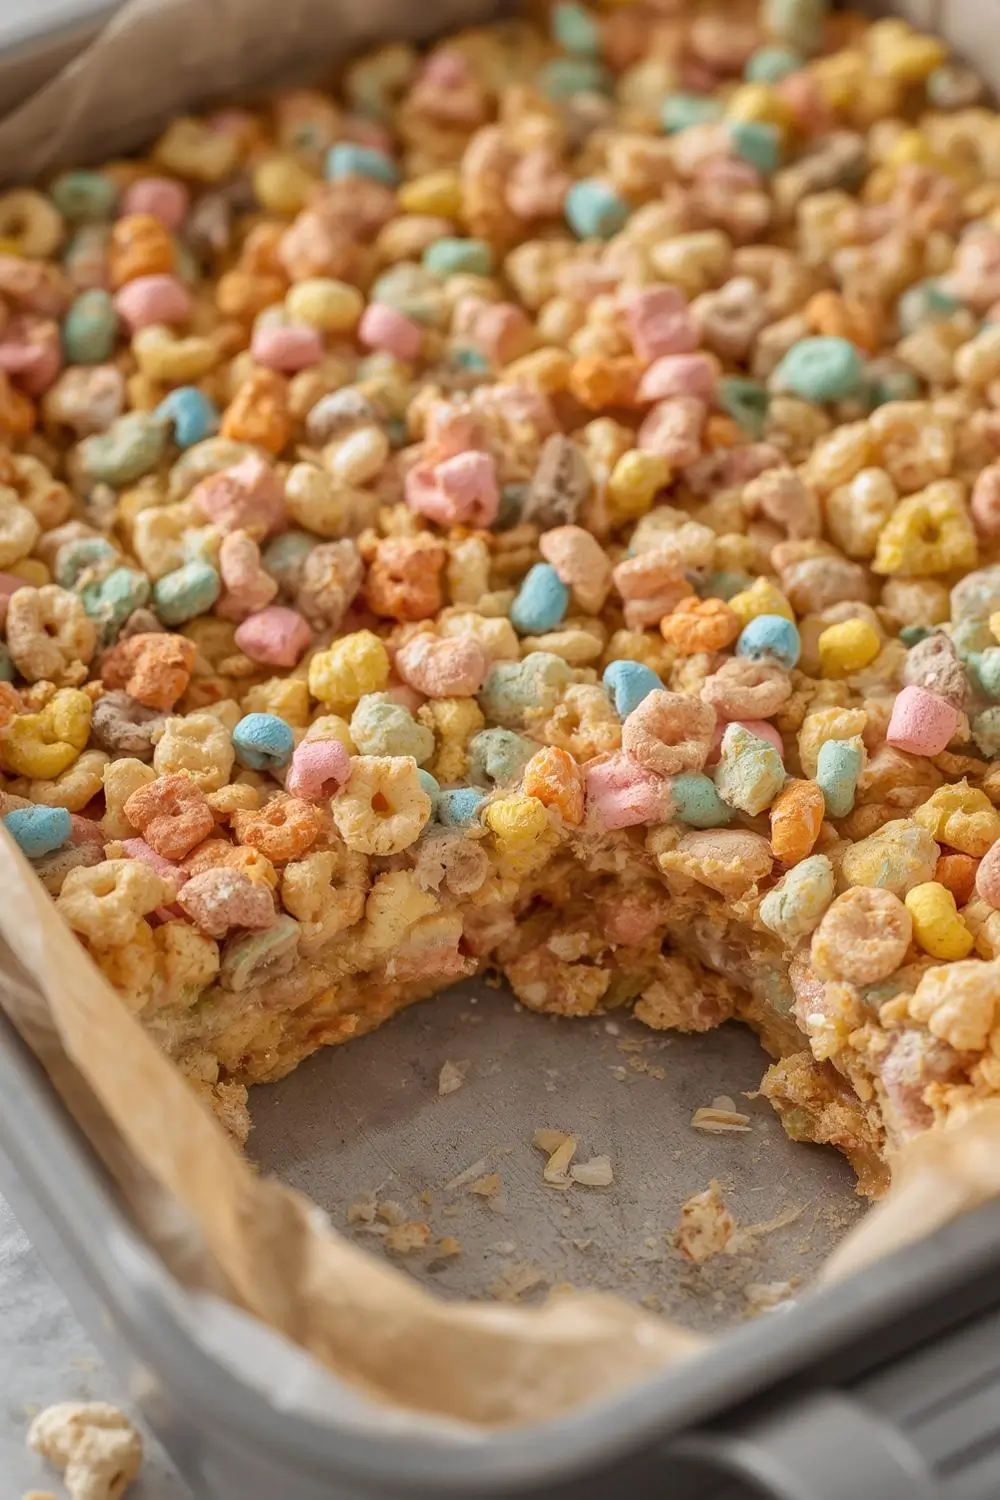
These Lucky Charms Rice Crispy Treats aren’t just treats—they’re edible confetti ready to turn any ordinary day into a celebration. With their cheerful colors peeking through every bite, they’re perfect for St. Patrick’s Day parties, classroom treats, or simply brightening up a rainy afternoon. Best of all, they come together in just 15 minutes with zero baking required, making them the ultimate last-minute hero when you need something special without the fuss.
The secret lies in balancing textures—crunchy rice cereal meets those soft, pastel marshmallow bits, all held together by that perfect blanket of melted marshmallow fluff. We’ll walk through every step to ensure you get that signature golden color and satisfying “snap” when you break them apart—no gummy, hard, or crumbly mishaps here!
Gather Your Magical Ingredients
Let’s break down exactly what you’ll need to create these enchanted bars. Precision matters with simple recipes—but we’ve included smart substitutions for all your needs.
The Foundation Trio:
1. Rice Krispies Cereal (6 cups): The crispy backbone. For best results, use fresh cereal—stale rice cereal won’t give you that satisfying crunch.
Substitute Options: Brown rice crisps for whole grain, gluten-free crisps for dietary needs
2. Lucky Charms Cereal (2 cups): Reserve just the marshmallow bits from a standard box—you’ll need about 1 ½ cups of charms. Save the cereal pieces for breakfast!
Pro Tip: Use kitchen scissors to halve larger marshmallow shapes if needed for even distribution
3. Unsalted Butter (¼ cup): Creates richness and prevents sticking. Salted butter works too—just reduce added salt later
Vegan Swap: Coconut oil or high-quality vegan butter sticks (melt 1-2 minutes longer)
The Glue That Binds:
4. Mini Marshmallows (10 oz bag): Mini mallows melt faster and more evenly than large ones. Keep extras on hand for quick fixes if your mixture seems dry
Allergy-Friendly Note: Look for gelatin-free brands if needed
5. Vanilla Extract (1 tsp): The flavor enhancer that makes all the difference. Pure extract adds depth—avoid artificial imitations
Optional Twist: Almond extract makes it taste like birthday cake!
The Secret Weapons:
6. Fine Sea Salt (¼ tsp): Balances sweetness—don’t skip this!
Alternative: Crumbled flaky salt sprinkled on top after pressing for gourmet flair
7. Cooking Spray or Butter for Pan: Prevent sticking disasters—don’t rely on parchment alone
Measuring Tools You Can’t Wing:
– Heavy-bottomed pot (prevents scorching)
– Wooden spoon or heatproof spatula
– 9×13-inch baking pan (metal gives cleaner cuts than glass)
Crafting Your Enchanted Treats: Step-by-Step Magic
1. Prepare Your Cauldron (a.k.a. Baking Pan)
Butter your 9×13-inch pan generously—edges included! Line with parchment paper with overhanging edges (your future self will thank you when lifting out bars). Set aside.
2. Melt Your Golden Foundation
– Melt butter over LOW heat in a large pot (twice as big as you think—room to stir is key)
– Once melted (not browned!), add entire bag of mini marshmallows
– Stir CONSTANTLY with wooden spoon until 90% melted—remove from heat immediately. Residual heat will finish melting.
Critical Tip: Overheating marshmallows makes treats hard. Low-and-slow prevents disaster!
3. Create the Spellbinding Blend
– Off heat, stir in vanilla and salt until fully combined
– Working quickly, mix in Rice Krispies until fully coated—no dry spots!
– Let mixture cool 60 seconds (prevents marshmallows from melting when added)
– Gently fold in Lucky Charms marshmallows—some will melt slightly, creating colorful swirls
4. Shape Your Treasure Bars
– Transfer mixture to prepared pan
– Butter your hands lightly—no clean hands trick here—and press mixture FLAT with firm, even pressure
Pro Technique: Place parchment on top and use a flat-bottomed glass to press evenly without sticking
5. The Patient Mage’s Reward
Let cool COMPLETELY at room temperature (1 hour minimum—refrigerate 20 minutes if impatient). Cutting too soon creates crumbly chaos!
6. Slice for Maximum Magic
Lift bars from pan using parchment overhang. Use a sharp knife warmed under hot water (wiped dry) for clean cuts. Slice into 12 large or 24 snack-sized bars.
Creative Variations for Every Occasion
Rainbow Unicorn Bars:
Add freeze-dried fruit powder to marshmallow mix—blue raspberry, strawberry, mango
Finish with gold edible glitter
Chocolate Covered Clovers:
Dip fully cooled bars halfway in melted white chocolate
Immediately sprinkle with green sanding sugar
Cookies & Cream Enchantment:
Replace 1 cup Rice Krispies with crushed chocolate sandwich cookies
Add extra marshmallow bits from Lucky Charms
Gluten-Free Leprechaun Hack
– Use certified GF rice cereal
– Sort Lucky Charms marshmallows from gluten-containing cereal pieces (call manufacturer to confirm gluten status) OR use stand-alone marshmallow bits
Keeping the Magic Alive: Storage Secrets
Room Temperature (3-5 Days):
Store in airtight container between wax paper layers
Freezer (2 Months):
Individually wrap bars in plastic wrap
Thaw 15 minutes before serving—surprisingly perfect texture!
Reviving Stale Treats:
Place on parchment-lined baking sheet
Warm at 275°F for 5 minutes to restore gooeyness
Beware These Common Cauldron Mishaps
Problem: Rock-hard bars
Solution: Lower heat when melting mallows—high temps create cement
Problem: Crumbly mess
Solution: Use fresh marshmallows + increase butter by 1 tbsp
Problem: Marshmallows melt into nothing
Solution: Let mixture cool slightly before adding cereal charms
Your Lucky Charms Treat FAQs Answered
Can I use Jet-Puffed marshmallow creme instead?
Absolutely! Substitute 1 (7 oz) jar marshmallow creme for mini mallows. Melt with butter same way.
Why did my colors bleed into the bars?
Over-stirring charms causes colors to run. Gently fold just until combined.
Can I add food coloring for brighter bars?
Yes! Add 3-4 drops green gel coloring at butter/marshmallow stage for St. Paddy’s flair.
Help! My treats stuck to the pan!
Next time butter pan AND use parchment. To salvage stuck ones: microwave entire pan 10 seconds to loosen edges.
Are these nut-free?
Depends on your cereals—check labels. Most Rice Krispies and Lucky Charms are nut-free, but facilities vary.
Can I use homemade marshmallows?
Not recommended—their lower gelatin content creates mushy bars. Stick with commercial.
A Sweet Ending Full of Rainbow Smiles
In the time it takes to watch half a cartoon episode, you can create a treat that sparks instant joy—and isn’t that the best kind of kitchen magic? These Lucky Charms Rice Crispy Treats aren’t just desserts; they’re edible love notes to younger selves, celebrations of whimsy in grown-up life, and guaranteed crowd-pleasers that disappear faster than a leprechaun chasing his gold.
The beauty lies in their adaptability—swap colors for birthdays, add sprinkles for holidays, or keep them classic when nostalgia hits. Whatever version you create will be perfect because you made it with that secret ingredient only human hands can provide: the willingness to create moments of sweetness.
So grab that wooden spoon and pot—your marshmallow-laced adventure awaits! Share them with coworkers, bribe your kids into cleaning their rooms with them, or keep the whole pan for yourself (we won’t judge). May your treats be crispy, your marshmallows gooey, and your days filled with edible rainbows. Happy crafting!
")


