The Ultimate Guide to Soft, Gooey Cinnamon Rolls You Can Master
There’s something undeniably magical about the scent of cinnamon rolls baking in the oven. That warm, sweet, buttery aroma promises comfort and indulgence. But for many home bakers, the idea of tackling yeast dough can feel intimidating. Fear not! This comprehensive guide is your key to unlocking the perfect, no-fail homemade cinnamon rolls. Designed specifically for beginners, this recipe breaks down every step with clear explanations, helpful tips, and troubleshooting advice. You’ll learn the secrets to achieving that coveted soft, gooey center and a beautifully caramelized topping, all without the usual stress. Let’s transform your kitchen into a cinnamon roll haven!
Why This Recipe is Your New Best Friend:
- Beginner-Friendly: Every step is explained in simple terms. No prior baking experience needed!
- Guaranteed Success: We focus on techniques that prevent common pitfalls like dense rolls or flat tops.
- Soft & Gooey Perfection: The right dough hydration and resting times ensure melt-in-your-mouth tenderness.
- Customizable: Easily adapt fillings and toppings to suit your taste.
- Make-Ahead Magic: Prepare the rolls ahead for fresh-out-of-the-oven goodness whenever you crave it.
- Storage & Reheating Made Easy: Keep those leftovers delicious!
The Essential Ingredients: Understanding Your Tools
Before we dive into the process, let’s get to know the ingredients that will become your cinnamon roll masterpiece. Understanding why we use each one is key to success.
- Warm Water (105-110°F / 40-43°C): This is the lifeblood for activating the yeast. Too hot, and you kill it; too cold, and it won’t activate. A simple finger test (warm, not hot) works perfectly.
- Active Dry Yeast (2 1/4 tsp / 1 standard packet): The magical ingredient that makes the dough rise. Ensure it’s fresh and within its expiration date.
- Milk (Whole or 2% preferred): Adds richness and tenderness. Warm it slightly to help the yeast activate faster.
- Unsalted Butter (1/2 cup / 1 stick): Used both in the dough and melted for the filling. Provides essential flavor and tenderness.
- Large Eggs (2): Adds structure, richness, and helps the dough rise. Use room temperature eggs for better incorporation.
- Granulated Sugar (1/4 cup): Sweetens the dough and feeds the yeast.
- Salt (1 1/2 tsp): Crucial for flavor balance. Don’t skip it!
- Bread Flour (4 1/2 cups / 22.5 oz / 640g): The protein content in bread flour creates the strong gluten network needed for a soft, chewy yet tender roll. All-purpose flour can be used, but the texture will be slightly different.
- Light Brown Sugar (1 cup packed): Adds moisture and a deeper caramel flavor to the filling compared to white sugar.
- Ground Cinnamon (2 tbsp): The star of the show! Use high-quality cinnamon for the best flavor.
- Cream Cheese (8 oz / 225g, softened): The base for the luxurious cream cheese frosting. Full-fat is best.
- Powdered Sugar (2 1/2 – 3 cups): Sweetens the frosting and gives it the perfect spreadable consistency.
- Vanilla Extract (1 tsp): Enhances all the other flavors beautifully.
- Salt (1/4 tsp): A tiny pinch balances the sweetness in the frosting.
The Step-by-Step Journey: From Dough to Delicious
Now, let’s walk through the process together. Baking is a science, but with patience and attention, you’ll master it.
1. Activating the Yeast (The Magical Start):
* In a large mixing bowl (or the bowl of a stand mixer), combine the warm water, milk, and 1 teaspoon of the granulated sugar. Stir gently.
* Sprinkle the yeast evenly over the top. Let it sit undisturbed for 5-10 minutes. You’ll see it become foamy and bubbly – this means it’s alive and active! If it doesn’t foam, your yeast might be expired, and you’ll need to start over.
2. Building the Dough Base:
* Add the melted butter (cooled slightly so it doesn’t cook the eggs), eggs, salt, and the remaining 1/4 cup granulated sugar to the yeast mixture. Whisk until well combined.
* Gradually add the bread flour, about 1 cup at a time, mixing on low speed with a dough hook (if using a mixer) or stirring vigorously with a sturdy spoon or spatula. The dough will start to come together but will be quite sticky.
3. Kneading for Perfection:
* If using a stand mixer, switch to a dough hook and knead on medium-low speed for about 8-10 minutes. If kneading by hand, turn the dough out onto a lightly floured surface and knead vigorously for 8-10 minutes. The dough is ready when it becomes smooth, elastic, and slightly tacky but not sticky. It should pass the “windowpane test” – stretching thinly without tearing.
Tip:* Avoid adding too much extra flour during kneading. The dough needs to be slightly sticky to develop the right texture. If it’s too dry, add a teaspoon of warm water; if too sticky, a teaspoon of flour.
4. The First Rise: Patience is a Virtue:
* Lightly grease a large bowl with a little oil or butter. Place the kneaded dough ball into the bowl, turning it once to coat it lightly with oil. Cover the bowl tightly with plastic wrap or a damp kitchen towel.
* Place the bowl in a warm, draft-free spot. An oven with the light on (turned off) works well, or near a sunny window. Let the dough rise until it has doubled in size, which usually takes 1 to 1.5 hours. Don’t rush this step! The yeast needs time to work its magic.
5. Preparing the Filling & Rolling:
* While the dough rises, make the cinnamon sugar filling. In a small bowl, combine the light brown sugar, cinnamon, and a pinch of salt. Mix well.
* Once the dough has doubled, punch it down gently to release the air bubbles. Turn it out onto a lightly floured surface.
* Roll the dough into a large rectangle, roughly 12 inches by 18 inches. Aim for an even thickness, about 1/4 inch thick. Use a rolling pin and apply even pressure.
6. Adding the Butter & Filling:
* Spread the softened butter evenly over the entire surface of the dough, leaving a small border around the edges.
* Sprinkle the cinnamon sugar mixture evenly over the butter, also leaving a small border. Press it gently into the butter so it adheres well.
7. Rolling & Cutting:
* Starting from the long edge, carefully roll the dough up tightly into a log. Pinch the seam gently to seal it.
* Using a sharp knife or dental floss (for cleaner cuts), cut the log into 12 equal pieces. A piece of unflavored dental floss works wonders for getting clean cuts without squishing the dough. Place the rolls cut-side up in a lightly greased 9×13 inch baking pan, leaving a little space between them. They will expand significantly.
8. The Second Rise: The Final Proof:
* Cover the pan loosely with plastic wrap or a damp towel. Let the rolls rise again in a warm place until they are noticeably puffy and have nearly doubled in size, about 30-45 minutes. This second rise is crucial for light, airy rolls.
9. Baking to Golden Perfection:
* Preheat your oven to 350°F (175°C) during the last 10 minutes of the second rise.
* Bake the rolls for 25-35 minutes, or until they are deeply golden brown on top and the edges look cooked through. The internal temperature should reach about 190°F (88°C) if you have a thermometer. They should sound hollow when tapped on the bottom.
10. Creating the Cream Cheese Frosting:
* While the rolls bake, make the frosting. In a medium bowl, beat the softened cream cheese and butter together until smooth and creamy.
* Gradually add the powdered sugar, beating well after each addition. Mix in the vanilla extract and a pinch of salt. The frosting should be thick but spreadable. If it’s too thick, add a teaspoon of milk; if too thin, add a tablespoon of powdered sugar.
11. The Grand Finale: Frosting & Serving:
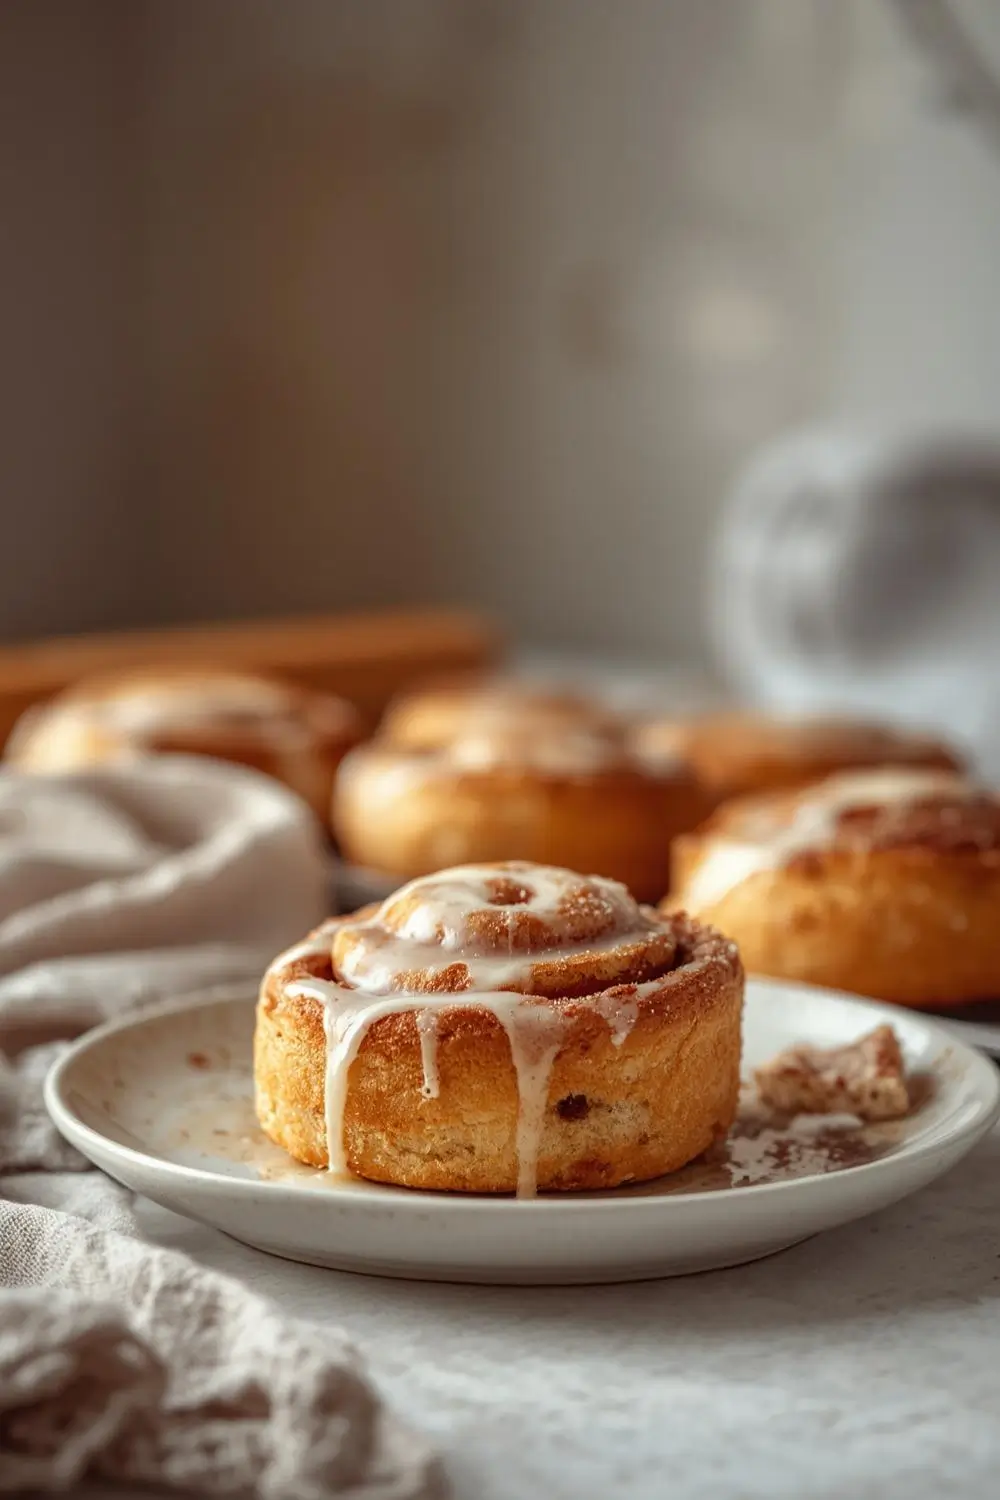
* As soon as the rolls come out of the oven, spread or drizzle the warm frosting over the hot rolls. The heat will melt the frosting slightly, creating a beautiful, glossy glaze that seeps into every crevice. This is the moment of truth – the gooey, cinnamon-scented perfection you’ve been waiting for!
* Let the rolls cool in the pan for 10-15 minutes before serving. They are best enjoyed warm, but leftovers are still delicious!
Variations & Substitutions: Making it Your Own
- Different Fillings: Swap the cinnamon sugar for a brown sugar and cinnamon filling, or add chopped nuts (walnuts, pecans), raisins, or even diced apples or pears. For a richer filling, mix in 1/4 cup melted butter with the sugar and cinnamon.
- Different Sugars: Use all granulated sugar in the dough and filling if preferred. For a deeper flavor, substitute some brown sugar in the filling.
- Different Fats: Use coconut oil (melted and cooled) instead of butter in the dough and filling. Ensure it’s solid at room temperature for the filling.
- Different Milk: Use almond milk, soy milk, or oat milk instead of dairy milk. Ensure it’s unsweetened and warmed.
- Different Frostings: Try a vanilla glaze (powdered sugar + milk + vanilla) or a simple powdered sugar glaze. For a tangier twist, use a lemon glaze (powdered sugar + lemon juice + zest).
- Smaller Rolls: Cut the dough log into 18 smaller rolls for a more delicate bite.
Storage & Reheating: Keeping the Magic Alive
- Room Temperature: Store leftover rolls in an airtight container at room temperature for up to 2 days. They are best enjoyed fresh, but the frosting will soften slightly.
- Refrigeration: For longer storage (up to 4 days), refrigerate the rolls in an airtight container. Let them come to room temperature before serving.
- Freezing: Wrap individual rolls tightly in plastic wrap and then foil, or place in a freezer-safe bag. Freeze for up to 3 months. Thaw overnight in the refrigerator, then warm in the oven or microwave before serving.
- Reheating: Reheat leftover rolls gently in a preheated 350°F (175°C) oven for 5-10 minutes, or until warmed through. Microwave for 15-30 seconds per roll (wrap in a damp paper towel to prevent drying out).
Common Mistakes to Avoid: Baking Wisdom
- Killing the Yeast: Using water that’s too hot (above 110°F / 43°C) is the most common mistake. Always test the water temperature.
- Over-Kneading or Under-Kneading: Over-kneading can make the dough tough. Under-kneading results in poor structure. Knead until smooth and elastic, but don’t overdo it.
- Rushing the Rises: Yeast needs time. Skipping or shortening the rise times leads to dense, flavorless rolls. Find a warm spot and be patient.
- Too Much Flour: Adding excessive flour during kneading or shaping makes the rolls dry and heavy. The dough should be slightly tacky, not stiff.
- Filling Too Thick: If your filling is too thick (like peanut butter), it can tear the dough when rolling. Ensure it’s spreadable.
- Frosting Too Thin/Thick: Adjust the frosting consistency by adding more powdered sugar (thicken) or a tiny bit of milk (thin). The heat from the rolls helps melt the frosting initially.
- Not Letting Rolls Cool Before Frosting: Frosting hot rolls causes it to melt and slide off. Wait 10-15 minutes.
Frequently Asked Questions: Your Baking Queries Answered
1. Can I use all-purpose flour instead of bread flour?
* Yes, you can! The texture will be slightly less chewy and more tender, but still delicious. You might need a tiny bit more flour during kneading if the dough seems very sticky.
2. My rolls didn’t rise much in the second rise. What happened?
* This is often due to a cold environment or old yeast. Ensure your rising spot is consistently warm (around 75-80°F / 24-27°C). Check the expiration date on your yeast. Also, make sure the dough wasn’t over-kneaded, which can weaken the gluten structure.
3. How do I know when the rolls are done baking?
* They should be a deep golden brown on top and sound hollow when tapped on the bottom. An internal temperature of 190°F (88°C) is a reliable indicator. Avoid overbaking, as they can dry out quickly.
4. Can I make these rolls ahead of time?
* Absolutely! You can make the dough through the first rise, shape the rolls, and let them rise in the pan overnight in the refrigerator. In the morning, let them come to room temperature for 30-45 minutes, then bake as directed. You can also freeze the shaped rolls before the second rise.
5. My frosting is too thick. How can I fix it?
* Add a teaspoon of milk or cream at a time, mixing well, until you reach the desired spreadable consistency. Avoid adding too much liquid at once.
6. Can I use a stand mixer for kneading?
* Yes! Using the dough hook on medium-low speed for 8-10 minutes is perfectly fine. Just ensure the dough doesn’t stick to the bottom of the bowl excessively; add flour sparingly if needed.
The Final Proof: Your Perfect Cinnamon Roll Awaits
Mastering homemade cinnamon rolls is a rewarding journey, and this no-fail recipe is your trusted companion. By understanding the ingredients, respecting the process (especially the crucial rising times), and avoiding common pitfalls, you’ll consistently create rolls that are soft, gooey, and utterly irresistible. The aroma filling your kitchen, the warm, buttery scent mingling with cinnamon – it’s pure comfort. Whether you’re baking for a special occasion, a cozy weekend treat, or simply to brighten someone’s day, these beginner-friendly cinnamon rolls are guaranteed to become a beloved staple. Gather your ingredients, roll up your sleeves, and get ready to experience the pure joy of baking something truly special from scratch. Happy baking!
")


