The Ultimate Weekend Treat: Ultra Fluffy Cinnamon Rolls with Creamy Vanilla Frosting
There’s something undeniably magical about the scent of cinnamon rolls baking. It transforms a simple morning into something special, a promise of warmth and sweetness. But achieving that perfect balance of ultra fluffy dough, swirled with just the right amount of cinnamon sugar, and crowned with a decadent, silky-smooth vanilla frosting can feel like a culinary quest. Forget the dense, doughy rolls of your past; this recipe unlocks the secret to pillowy, cloud-like perfection every single time. These aren’t just cinnamon rolls; they’re an experience, a celebration of comfort baked into every tender bite. Ready to elevate your weekend breakfast or afternoon treat? Let’s dive in.
Why This Recipe Works Wonders
The magic lies in the details. We’re using bread flour for its higher protein content, which creates a stronger gluten network, essential for that coveted light and airy texture. The dough incorporates a touch of milk (whole milk for richness, but any will do) and a small amount of sugar not just for sweetness, but to feed the yeast and encourage a gentle rise. The cinnamon sugar filling is generously spiced, but balanced so it doesn’t overpower the delicate dough. The star, however, is the creamy vanilla frosting. Made with softened butter, powdered sugar, and pure vanilla extract, it’s whipped to a luxurious, spreadable consistency that melts into every crevice. This isn’t a thick, cloying glaze; it’s a silky blanket of vanilla bliss.
Gathering Your Ingredients: The Foundation of Fluff
Before you start mixing, ensure you have everything measured and ready. Baking is a science, and precision matters, especially for something as delicate as cinnamon rolls. Here’s what you’ll need:
- For the Dough:
* 3 ¾ cups (about 480g) Bread Flour: The backbone for structure and fluff.
* 1 cup (240ml) Warm Milk (110°F/43°C): Warm, not hot, to activate the yeast gently.
* ¼ cup (50g) Granulated Sugar: Feeds the yeast and adds sweetness.
* 1 ½ teaspoons Instant Yeast: Quick-acting for faster rising.
* 1 large Egg, at room temperature: Adds richness and binds the dough.
* ¼ cup (60g) Unsalted Butter, melted and slightly cooled: Adds tenderness and flavor.
* 1 ¼ teaspoons Salt: Balances the sweetness and enhances flavor.
- For the Cinnamon Sugar Filling:
* ½ cup (100g) Granulated Sugar: Sweetness for the filling.
* 2 tablespoons Ground Cinnamon: The warm, comforting spice.
* ¼ cup (50g) Unsalted Butter, softened: Creates a spreadable, flavorful layer.
- For the Vanilla Frosting:
* ½ cup (113g) Unsalted Butter, softened: The base for creaminess.
* 2 cups (240g) Powdered Sugar (Confectioners’ Sugar): Provides sweetness and structure.
* 2 tablespoons Heavy Cream or Milk: Adjusts consistency.
* 1 ½ teaspoons Pure Vanilla Extract: The essence of flavor.
(Optional: Pinch of Salt to balance sweetness)*
Step-by-Step: Crafting the Cloud-Like Dough
Now, let’s bring those ingredients together. This process is straightforward, but patience is key, especially during the rising stages. Don’t rush it!
1. Activate the Yeast (The First Rise Begins):
* In a large mixing bowl (or the bowl of a stand mixer), combine the warm milk, ¼ cup of the granulated sugar, and the instant yeast. Stir gently and let it sit for 5-10 minutes. You’ll see it become frothy on top – this means your yeast is active and ready to work its magic. If it doesn’t foam, your yeast might be expired, and you’ll need fresh yeast.
2. Combine Wet Ingredients:
* Add the room-temperature egg and the melted, slightly cooled butter to the yeast mixture. Whisk until well combined.
3. Incorporate the Dry Ingredients:
* Add the bread flour and salt to the wet mixture. Using a sturdy spoon or the paddle attachment of your stand mixer, mix on low speed until a shaggy dough forms. It will be sticky.
4. Knead for Tenderness:
* If using a stand mixer: Switch to the dough hook and knead on medium-low speed for about 8-10 minutes. The dough should pull away from the sides of the bowl and become smooth and elastic. It will still be slightly tacky but shouldn’t stick to your fingers.
If kneading by hand: Turn the dough out onto a lightly floured surface. Knead vigorously for 8-10 minutes, adding only a tiny* bit more flour (1-2 teaspoons at a time) if absolutely necessary to prevent sticking. The goal is a smooth, elastic ball that springs back when poked.
5. First Rise (The Proof):
* Lightly grease a large bowl with oil or non-stick spray. Place the dough ball in the bowl, turning it once to coat it lightly with oil. Cover the bowl tightly with plastic wrap or a damp kitchen towel.
Let the dough rise in a warm, draft-free spot until doubled in size. This usually takes 1 to 1.5 hours. You can test if it’s ready by gently pressing two fingers into the dough; if the indentation remains, it’s risen enough. Avoid placing it near a hot oven or in direct sunlight, as this can cause uneven rising or overheating.*
Rolling, Filling, and Cutting: Creating the Swirls
Once your dough has risen beautifully, it’s time to transform it into cinnamon rolls.
1. Prepare the Filling:
* In a small bowl, combine the ½ cup granulated sugar and 2 tablespoons ground cinnamon. Add the ¼ cup softened butter and mix until it forms a thick, spreadable paste. Set aside.
2. Shape the Dough:
* Punch down the risen dough gently to release any large air bubbles. Turn it out onto a lightly floured surface. Using a rolling pin, roll the dough into a large rectangle, roughly 12 inches by 18 inches and about ¼ inch thick. Aim for even thickness.
3. Spread the Filling:
* Spread the cinnamon sugar butter mixture evenly over the entire surface of the dough, leaving a ½-inch border along one of the longer edges. This border helps seal the roll later.
4. Roll it Up:
* Starting from the long edge opposite the border, carefully roll the dough tightly into a log. Pinch the seam firmly to seal. You should have a long, tight roll.
5. Cut the Rolls:
* Using a sharp knife or dental floss (dental floss works wonderfully for clean cuts), slice the log into 12 equal pieces (about 1.5 inches thick each). Place the rolls cut-side up in a lightly greased 9×13 inch baking dish or two 9-inch round pans, leaving a little space between them for rising.
6. Second Rise (The Proof Again):
* Cover the dish loosely with plastic wrap or a damp towel. Let the rolls rise again in a warm spot until they look puffy and have nearly doubled in size, about 30-45 minutes. They should look much fuller than before.
Baking: Golden Perfection
The moment of truth! Baking transforms the dough into the final, glorious cinnamon roll.
1. Preheat and Bake:
* Preheat your oven to 350°F (175°C) while the rolls are rising.
* Once the rolls have risen, place them in the preheated oven. Bake for 25-30 minutes, or until the tops are a deep, golden brown and the rolls are cooked through. The internal temperature should reach about 190°F (88°C) if you have a thermometer.
2. Cool Slightly:
* Remove the pan from the oven and let the rolls cool in the pan for at least 10-15 minutes. This allows them to set slightly and makes frosting easier. They will continue to firm up as they cool.
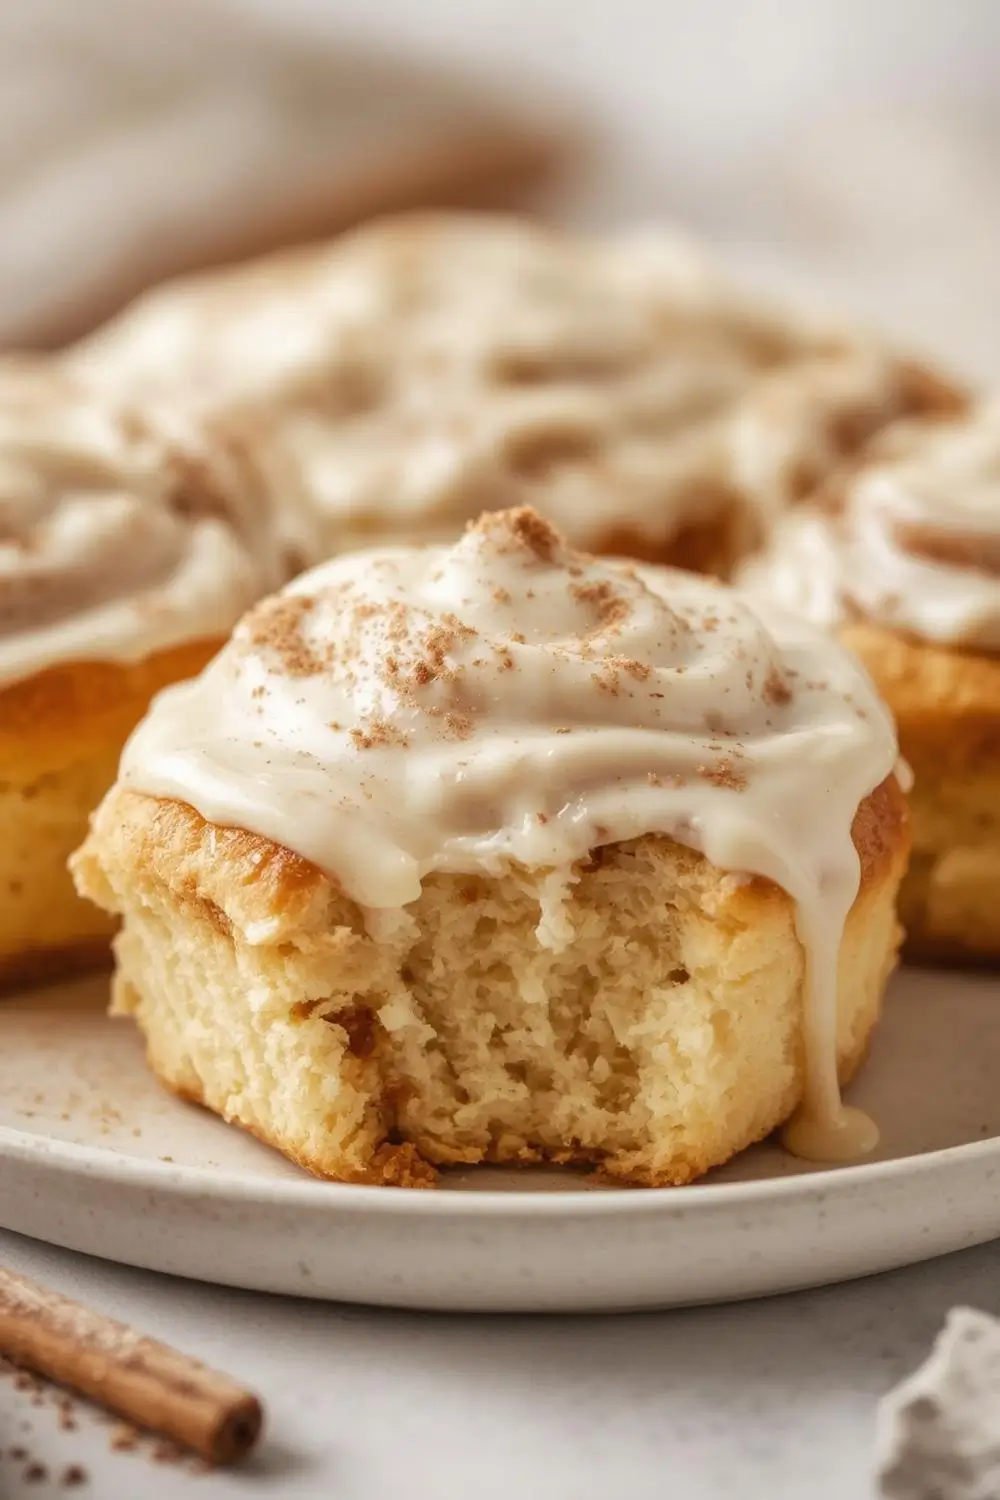
The Creamy Crown: Vanilla Frosting Perfection
While the rolls cool, whip up the frosting. It’s the final, luxurious touch.
1. Whip the Butter:
* In a medium bowl, beat the softened butter with an electric mixer on medium speed until smooth and creamy, about 1-2 minutes.
2. Add Powdered Sugar Gradually:
* Reduce the mixer speed to low. Add the powdered sugar gradually, about ½ cup at a time, mixing well after each addition until fully incorporated. Scrape down the sides of the bowl as needed.
3. Incorporate Vanilla and Cream:
* Add the vanilla extract and 1 tablespoon of the heavy cream or milk. Beat on low until combined.
4. Achieve the Perfect Consistency:
* Increase the mixer speed to medium-high. Beat for another 2-3 minutes. The frosting should be light, fluffy, and spreadable. If it’s too thick, add another tablespoon of cream or milk, one teaspoon at a time. If it’s too thin, add a little more powdered sugar.
5. Frost and Serve:
* Once the rolls are cool, spread or drizzle the frosting generously over the top. The warmth of the rolls will help the frosting melt slightly into the crevices, creating pure bliss. Serve immediately and enjoy the heavenly aroma and taste!
Variations and Substitutions: Making it Your Own
The beauty of this recipe is its adaptability. Here are some ideas to customize your cinnamon rolls:
- Add-Ins: Fold in ½ cup of chopped pecans, walnuts, or raisins into the cinnamon sugar filling before spreading. Sprinkle a few extra nuts on top before baking.
- Different Frostings: Swap the vanilla frosting for a cream cheese frosting (beat 4 oz softened cream cheese with the butter, vanilla, and powdered sugar). Or try a simple brown sugar cinnamon glaze (mix 1 cup powdered sugar, 2-3 tablespoons milk, 1 tsp vanilla, and a pinch of cinnamon).
- Whole Wheat Twist: Substitute up to 1 cup of the bread flour with whole wheat flour for a nuttier flavor and added fiber (expect slightly denser rolls).
- Vegan Option: Use a plant-based milk (like oat or almond milk) and a flax egg (1 tbsp ground flaxseed + 3 tbsp water, mixed and rested 5 mins) instead of the regular egg. Use vegan butter and a vegan cream cheese frosting.
- Smaller Rolls: For more rolls, cut the dough log into 18 pieces instead of 12.
Storage and Reheating: Keeping the Magic Alive
Want to enjoy these rolls beyond the first day? Here’s how:
- Room Temperature: Store cooled, frosted rolls in an airtight container at room temperature for up to 2 days. The frosting might soften slightly, but they’ll still be delicious.
Refrigeration: For longer storage (up to 5 days), refrigerate the rolls without* frosting. Wrap them tightly in plastic wrap or place in an airtight container. When ready to eat, bring them to room temperature, then frost and enjoy.
Freezing: For the absolute longest storage (up to 3 months), freeze the unfrosted* rolls. Place them in a single layer on a baking sheet lined with parchment paper and freeze until solid (about 1-2 hours). Then transfer to a freezer-safe bag or container, squeezing out excess air. To reheat, thaw overnight in the fridge, then warm gently in a 300°F (150°C) oven for 10-15 minutes. Frost immediately before serving.
Avoiding Common Pitfalls: Tips for Success
Even the best recipes can hit a snag. Here’s how to avoid the most frequent issues:
- Dough Not Rising: Ensure your yeast is fresh and the milk is the correct temperature (warm, not hot). The environment needs to be warm and draft-free. Don’t skip the first rise!
- Dense Rolls: Over-kneading can develop too much gluten, leading to toughness. Knead just until smooth and elastic. Also, ensure you’re using bread flour for the right structure.
- Filling Slipping Off: Make sure the filling is spreadable but not runny. If it’s too soft, chill it for 10 minutes before spreading. Ensure the dough isn’t too cold when rolling.
- Frosting Too Thick/Thin: Start with less liquid and add gradually. The consistency should be spreadable but not runny. Taste and adjust sweetness if needed.
- Rolls Sticking to Pan: Generously grease your baking dish or pan. Using parchment paper under the rolls is also a great trick.
Your Questions Answered: FAQs
We’ve covered the basics, but you might still have questions. Here are the most common ones:
1. Can I make these ahead of time? Absolutely! You can shape the rolls, let them rise once, then refrigerate them overnight (cover tightly). The next morning, let them come to room temperature for about 30 minutes, then bake as directed. The second rise might take a bit longer.
2. Why are my rolls not fluffy? This usually points to under-proofing (not rising enough) or using all-purpose flour instead of bread flour. Ensure you give the dough sufficient time to rise both times. Bread flour is crucial for the right gluten structure.
3. Can I use instant yeast instead of active dry? Yes! Instant yeast can be mixed directly with the dry ingredients. You don’t need to activate it in warm milk first. Just add it to the flour mixture.
4. My frosting is too thick. What can I do? Add a teaspoon of milk or cream at a time, beating well after each addition, until you reach the desired spreadable consistency.
5. Can I use a different type of milk? Yes! Whole milk is ideal for richness, but 2% or even skim milk will work. Oat milk is a great dairy-free option. Avoid very low-fat milks if possible.
6. How do I know when the rolls are done baking? They should be a deep golden brown on top. A simple test is to insert a toothpick into the center of a roll; it should come out clean or with just a few moist crumbs, not wet batter. An internal temperature of 190°F (88°C) is a reliable indicator.
7. Can I freeze the baked rolls? Yes! Let them cool completely, then wrap them tightly in plastic wrap and place in a freezer bag. Freeze for up to 3 months. Thaw at room temperature or reheat gently in the oven as described earlier. Frost after thawing and reheating.
8. Why did my frosting split or become grainy? This often happens if the butter is too cold when you start whipping it. Ensure both the butter and the bowl are at room temperature. Beat the butter until very smooth and creamy before adding the powdered sugar. Adding the sugar gradually helps prevent lumps.
9. Can I make these without a stand mixer? Definitely! You can knead the dough by hand on a lightly floured surface for about 10 minutes until smooth and elastic. It takes a bit more effort, but it’s very achievable.
10. What’s the best way to store frosted rolls? If you’re serving them the same day, storing them uncovered on a plate is fine. For longer storage (up to 2 days), cover loosely with plastic wrap or place in an airtight container. Avoid storing them in a very humid place.
The Final Slice: A Celebration of Comfort
There you have it – the blueprint for creating the most ultra fluffy cinnamon rolls you’ve ever tasted, crowned with a creamy vanilla frosting that’s pure indulgence. This recipe is more than just instructions; it’s an invitation to slow down, savor the process, and create something truly special. The aroma filling your kitchen, the anticipation as they bake, the first heavenly bite – these rolls are a testament to the simple, profound joy of baking. They’re perfect for a lazy weekend brunch, a surprise breakfast for loved ones, or simply a moment of pure, sweet comfort. So, gather your ingredients, roll up your sleeves, and get ready to bake a batch of happiness. Enjoy every fluffy, frosted moment!
Remember: Baking is an art, and your rolls will be perfect just the way you make them. Happy baking!
")


