FluffySourdough Discard Muffins: Easy Bake Recipe!
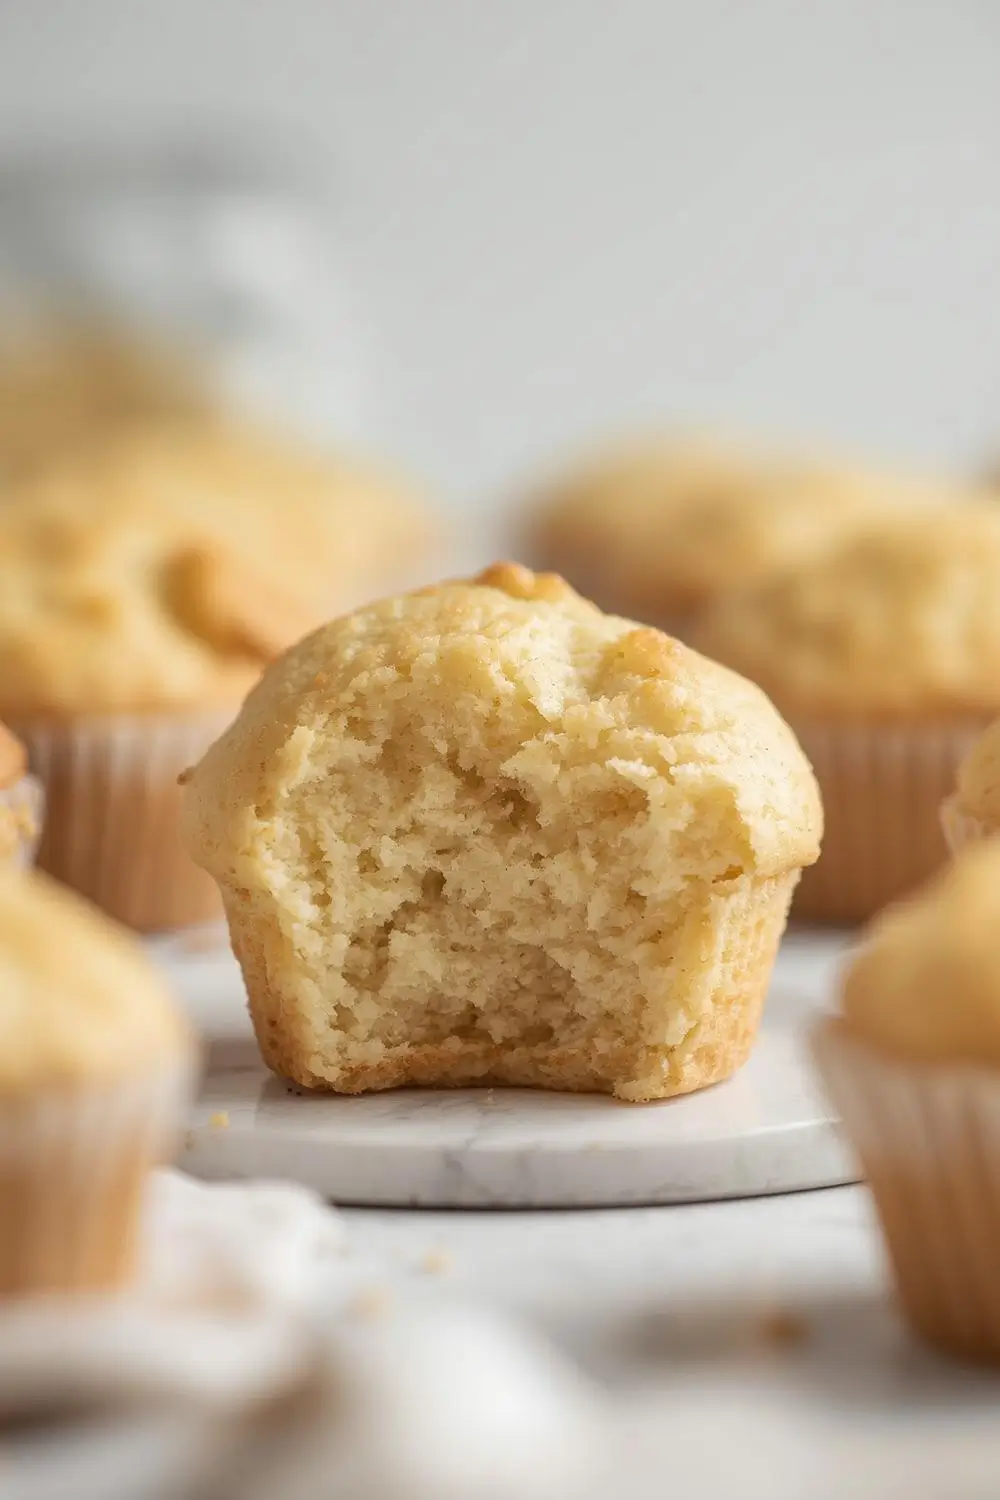
Imagine transforming that seemingly useless sourdough discard into something incredibly delicious and satisfying. These Fluffy Sourdough Discard Muffins are your answer! They’re incredibly light, airy, and boast that wonderful tangy sourdough flavor you love, all achieved with minimal effort and no kneading required. Perfect for using up that discard and whipping up a batch of irresistible treats in no time. Let’s dive into creating these bakery-worthy muffins right in your own kitchen.
Why Sourdough Discard Muffins?
Sourdough discard often gets a bad rap – it’s that leftover starter you need to use up to keep your starter healthy. But instead of tossing it, why not bake something wonderful? These muffins harness the natural leavening power of your discard, creating a texture that’s uniquely tender and flavorful. They’re incredibly forgiving, making them perfect for baking beginners, and the result is pure comfort in every bite. Plus, they’re naturally vegan if you use plant-based milk and oil!
The Magic of Sourdough in Muffins
The beauty of sourdough discard in muffins lies in its dual role. The natural yeast and bacteria in the discard provide gentle leavening, while the acidity helps tenderize the gluten, contributing to that signature light and fluffy crumb. Combined with baking powder for an extra lift, these muffins rise beautifully without needing complex techniques. It’s a simple, effective way to utilize your starter and enjoy its distinct taste.
Your Ingredients: Simple & Effective
Here’s what you’ll need to create these fluffy wonders. Measurements are given in both cups and grams for accuracy, especially important for consistent baking results.
- 1 1/2 cups (180g) All-Purpose Flour: The backbone of the muffin. All-purpose works perfectly here, though bread flour can be used for a slightly chewier texture.
- 1/2 cup (60g) Whole Wheat Flour (Optional): Adds a touch of nuttiness and fiber. Omit if you prefer a lighter texture.
- 1 1/2 teaspoons Baking Powder: Provides the essential lift. Make sure it’s fresh!
- 1/2 teaspoon Baking Soda: Works in tandem with the acidity of the sourdough discard to create bubbles.
- 1/2 teaspoon Salt: Enhances all the flavors beautifully.
- 1 cup (240ml) Sourdough Discard: This is the star! Use discard that’s been fed recently (about 1-2 days old) for best flavor and activity. It should be thick and pourable, not runny.
- 1/2 cup (120ml) Buttermilk or Milk: Adds moisture and tenderness. Buttermilk gives a slight tang and extra lift.
- 1/4 cup (60ml) Neutral Oil (like Vegetable or Canola) or Melted Butter: Keeps the muffins moist and tender. Oil yields a slightly more tender crumb.
- 1/4 cup (50g) Granulated Sugar: Balances the tang of the sourdough and adds sweetness.
- 1 Large Egg: Binds the ingredients together and adds richness.
- 1 teaspoon Vanilla Extract: A classic flavor enhancer that pairs beautifully with sourdough.
- Optional Add-ins: 1/2 cup (90g) Chocolate Chips, 1/2 cup (60g) Chopped Nuts, 1/2 cup (60g) Dried Fruit, 1/2 cup (60g) Blueberries, etc. Fold these in gently after mixing the wet and dry ingredients.
Step-by-Step: Creating Fluffy Perfection
Now, let’s bring it all together. This process is straightforward and doesn’t require any fancy equipment.
1. Preheat & Prep: Start by preheating your oven to 375°F (190°C). Line a standard 12-cup muffin tin with paper liners or lightly grease the cups. This ensures easy removal later.
2. Combine Dry Ingredients: In a large mixing bowl, whisk together the all-purpose flour (and whole wheat flour, if using), baking powder, baking soda, and salt. Whisk thoroughly to ensure even distribution of the leavening agents. This step is crucial for even rising.
3. Combine Wet Ingredients: In a separate medium bowl, whisk together the sourdough discard, buttermilk (or milk), oil (or melted butter), sugar, egg, and vanilla extract until smooth. The sourdough discard might look a bit lumpy – that’s perfectly normal.
4. Merge Wet & Dry (The Gentle Way): Pour the wet ingredients into the bowl with the dry ingredients. Using a spatula or wooden spoon, gently fold the mixtures together just until combined. It’s okay if there are a few small lumps remaining – overmixing develops gluten and leads to tough muffins. The batter should be thick but pourable.
5. Fold in Add-ins (Optional): If using any mix-ins like chocolate chips or nuts, gently fold them in now. Be careful not to crush delicate add-ins like berries.
6. Fill the Tins: Divide the batter evenly among the prepared muffin cups, filling each about 3/4 full. A standard ice cream scoop works perfectly for this. Smooth the tops slightly with the back of a spoon if needed.
7. Bake to Golden Perfection: Place the muffin tin in the preheated oven. Bake for approximately 18-22 minutes. The muffins are done when the tops are deeply golden brown, spring back lightly when touched in the center, and a toothpick inserted into the center comes out clean or with just a few moist crumbs (not wet batter). Avoid opening the oven door too early, as this can cause them to fall.
8. Cool Completely: Once baked, remove the muffin tin from the oven. Let the muffins cool in the tin for about 5 minutes. Then, carefully transfer them to a wire rack to cool completely. This cooling period is vital for the texture – it allows the internal structure to set and prevents sogginess.
Variations & Substitutions: Make it Your Own
The beauty of these muffins is their adaptability. Here are some ideas to customize them:
- Flavored Buttermilk: Substitute regular milk with buttermilk for a tangier muffin. For a sweeter version, use sweetened condensed milk thinned with a splash of milk.
- Oil vs. Butter: Use melted butter for a richer flavor and slightly denser crumb. Oil keeps them incredibly moist.
- Sweetener Swap: Replace granulated sugar with brown sugar for deeper caramel notes. Honey or maple syrup can be used, but reduce the liquid slightly (by about 1-2 tablespoons) and ensure it’s well incorporated.
- Add-Ins Galore: Get creative! Try cinnamon chips, lemon zest, orange zest, pumpkin puree, or even a pinch of cinnamon or nutmeg in the dry ingredients. Fold in chopped apples, pears, or even a handful of oats.
- Gluten-Free Option: Substitute a 1:1 gluten-free flour blend for the all-purpose flour. You may need a touch more liquid (1-2 tablespoons) and ensure your baking powder is gluten-free.
- Vegan Version: Use a flax egg (1 tbsp ground flaxseed + 3 tbsp water, let sit 5 mins) instead of the egg. Use plant-based milk and oil or melted vegan butter.
Storage & Reheating: Keeping Them Fresh
These muffins are best enjoyed fresh out of the oven, but they store well:
- Room Temperature: Place cooled muffins in an airtight container or resealable bag. They’ll stay fresh for 2-3 days at room temperature. If they start to lose a bit of moisture, you can refresh them by placing them in a warm oven (300°F/150°C) for 5-10 minutes.
- Refrigerator: For longer storage (up to 5 days), wrap individual muffins tightly in plastic wrap or place them in an airtight container. They may dry out slightly faster in the fridge.
- Freezing: These muffins freeze exceptionally well! Wrap cooled muffins tightly in plastic wrap, then place them in a freezer-safe bag or container. They’ll keep for up to 3 months. To thaw, leave at room temperature or warm gently in the microwave for 15-20 seconds.
Common Mistakes to Avoid: Baking Success
Even simple recipes can have pitfalls. Here’s how to avoid them:
- Overmixing: This is the #1 culprit for tough muffins. Mix just* until the dry ingredients are incorporated. Lumps are okay!
- Old Leavening Agents: Baking powder and baking soda lose potency over time. Test yours! Mix 1 tsp baking powder with 1/3 cup hot water – it should fizz vigorously. If not, replace them.
- Too Much Sourdough Discard: If your discard is very runny, it will make the batter too wet and the muffins dense. Ensure your discard is thick and pourable.
- Overfilling the Tins: Fill cups only 3/4 full. Overfilling leads to muffins that overflow and have a flat top.
- Opening the Oven Door Early: This causes temperature fluctuations and can make muffins sink. Resist peeking until the minimum baking time has passed.
- Using Cold Ingredients: Room temperature ingredients (especially the egg and buttermilk) incorporate more easily and create a smoother batter, leading to better texture.
Frequently Asked Questions (FAQs)
- Q: What if my sourdough discard isn’t active enough? A: As long as it’s thick and pourable, it will still provide flavor and some leavening. For maximum rise, use discard that’s been fed within the last 24 hours.
- Q: Can I use sourdough starter instead of discard? A: Yes, but discard is specifically the portion you remove to maintain your starter’s health. Using starter will make the batter thinner and the muffins denser. You might need to add a bit more flour.
- Q: Why are my muffins dense? A: This is usually due to overmixing, using old leavening agents, or too much liquid (runny discard). Ensure you mix gently and use fresh baking powder/soda.
- Q: Can I make these muffins ahead of time? A: Absolutely! Bake them, let them cool completely, store in an airtight container at room temperature for 2-3 days, or freeze for up to 3 months.
- Q: How do I know when they’re done baking? A: The tops should be golden brown, spring back when lightly pressed, and a toothpick inserted into the center should come out clean or with just a few moist crumbs (no wet batter).
- Q: Can I add nuts or chocolate chips? A: Yes! Fold them in gently after combining the wet and dry ingredients. Adjust the baking time by 1-2 minutes if adding heavier add-ins.
The Final Flourish: Enjoy Your Creation!
There you have it – fluffy, tangy, and utterly delicious Sourdough Discard Muffins, ready to brighten your day. The process is simple, the ingredients are likely already in your pantry, and the results are pure baking joy. These muffins are a fantastic way to embrace your sourdough journey, reduce waste, and enjoy a truly homemade treat. The next time you have sourdough discard, skip the discard and bake these muffins instead! They’re the perfect example of turning something ordinary into something extraordinary. Happy baking!
")


