Crispy Sourdough Discard HashBrowns: Waffle Iron Magic for Zero-Waste Breakfast Bliss
Imagine transforming something many bakers toss aside into a breakfast sensation that’s crispy, golden, and utterly addictive. That’s the magic of sourdough discard hash browns cooked in a hot waffle iron. This recipe isn’t just about delicious food; it’s a celebration of reducing waste and finding incredible flavor in unexpected places. Perfect for a lazy weekend brunch, a quick weekday meal, or even a satisfying snack, these hash browns deliver that satisfying crunch and fluffy interior we all crave, all without any pork, bacon, wine, or alcohol. Let’s dive into how you can create these addictive, zero-waste breakfast gems right in your own kitchen.
Why Sourdough Discard?
Sourdough discard is the leftover starter you feed your starter with flour and water. Instead of letting it go to waste, it becomes the star ingredient here. Its tangy flavor and natural leavening properties create hash browns with a unique depth and a slightly chewy texture that regular potatoes just can’t match. Plus, it’s incredibly budget-friendly and eco-conscious.
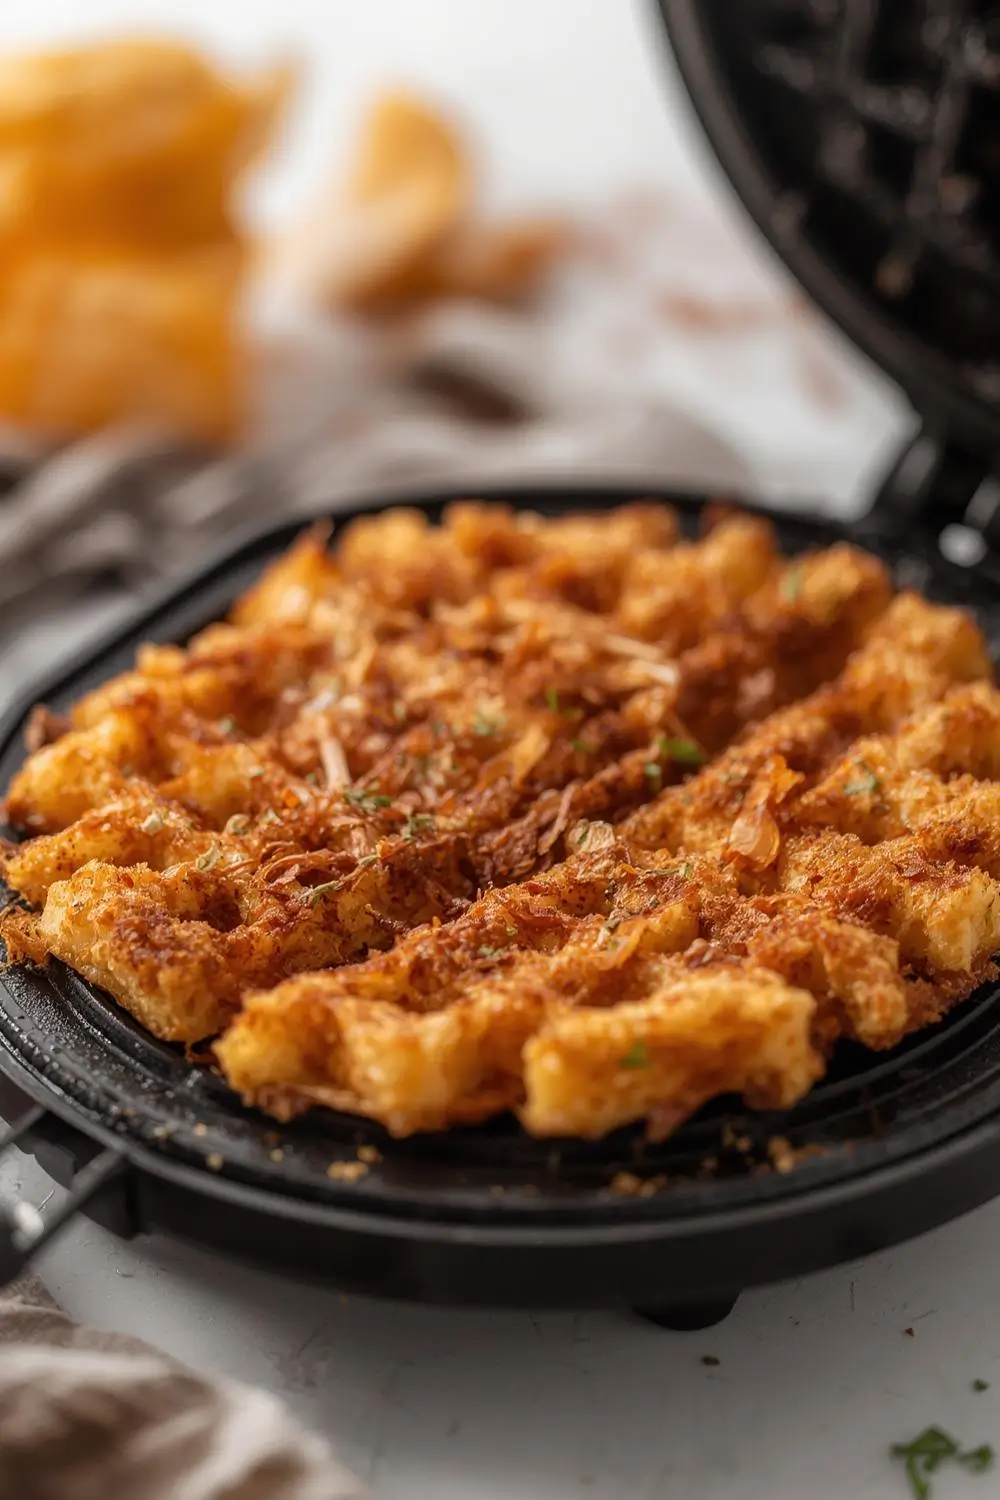
The Beauty of the Waffle Iron Method
Using a hot waffle iron is a game-changer. It provides intense, even heat that crisps the outside to perfection while trapping steam inside to keep the center fluffy. The result is hash browns with beautifully browned, crunchy edges and a tender, satisfying core – a texture combination that’s hard to beat. Cleanup is a breeze compared to a skillet, making this method ideal for busy mornings.
Ingredients: Simplicity at Its Finest
This recipe relies on just a few key players, each playing a vital role:
- Sourdough Discard: The hero! Use about 1 1/2 to 2 cups of discard. The exact amount can vary slightly depending on your discard’s consistency and how thick you like your hash browns. It should be fairly thick, not soupy.
- All-Purpose Flour: A small amount (about 2-3 tablespoons) is added to help bind the mixture and absorb any excess moisture, ensuring the hash browns hold together when pressed into the waffle iron. It also contributes to the golden color.
- Neutral Oil (or Melted Butter): Approximately 1-2 tablespoons. This is crucial for achieving that incredible crispiness on the outside. Vegetable, canola, or avocado oil work well. Melted butter adds fantastic flavor but can brown faster, so keep an eye on it.
- Salt: A generous pinch (about 1/4 to 1/2 teaspoon) enhances all the other flavors. Taste before adding more.
- Optional Flavor Boosters (See Variations): A sprinkle of dried herbs (dried chives, parsley, dill), a pinch of garlic powder, onion powder, or a dash of black pepper can elevate the flavor profile. A small amount of grated cheese (like cheddar or Parmesan) stirred in adds richness.
Equipment You’ll Need:
- Waffle Iron: A standard 4-5 inch square waffle iron works perfectly. Ensure it’s clean and preheated.
- Mixing Bowl: For combining the ingredients.
- Spatula or Wooden Spoon: For mixing.
- Measuring Cups and Spoons: For accuracy.
- Paper Towels: For wiping the waffle iron if needed.
Step-by-Step Instructions: From Discard to Deliciousness
1. Prepare Your Discard: Ensure your sourdough discard is at room temperature. If it’s very thick, you might need to add a tiny splash of water to make it easier to mix, but aim for a thick batter consistency – similar to thick pancake batter or soft cookie dough. It shouldn’t be runny.
2. Combine Dry Ingredients: In your mixing bowl, whisk together the all-purpose flour and salt (and any optional dry seasonings like garlic powder or onion powder).
3. Incorporate the Discard: Add the sourdough discard to the dry ingredients. Using a spatula or wooden spoon, mix gently until just combined. Be careful not to overmix; a few lumps are perfectly fine and even desirable. The mixture should be thick enough to hold its shape when pressed but still pliable.
4. Add Oil/Butter: Pour in the neutral oil (or melted butter) and mix thoroughly until everything is evenly distributed. The mixture should look cohesive and slightly glossy.
5. Optional Flavor Boosters: If using herbs, spices, or cheese, fold them in gently now.
6. Preheat Your Waffle Iron: Turn on your waffle iron and preheat it to the highest setting recommended for browning. This usually takes 5-10 minutes. A properly hot iron is essential for achieving that perfect crispy exterior.
7. Prepare the Waffle Iron: Lightly grease the grids of the waffle iron with a small amount of oil or melted butter using a paper towel or pastry brush. This prevents sticking and aids in browning. Wipe away any excess grease to avoid smoking.
8. Form the Hash Browns: Using a spoon or small scoop, portion out a generous amount of the sourdough mixture (about 1/4 to 1/3 cup, depending on your waffle iron size). Place it directly onto the center of the preheated, greased waffle iron grid.
9. Press and Cook: Close the waffle iron firmly. Do not open it to peek! Cooking time varies depending on your waffle iron’s heat and the amount of mixture. Generally, it takes 5-8 minutes. Look for the edges to become deeply golden brown and crispy, and the center to feel set. If your waffle iron has a light that indicates when it’s done, use that as a guide. If not, rely on visual cues and a gentle press with a fork – it should feel firm.
10. Release and Serve: Once cooked, carefully open the waffle iron. Use a fork or spatula to gently lift the hash brown out. It should release easily if the iron was properly greased. Place it on a plate. Repeat with the remaining mixture, greasing the iron lightly between batches if needed.
11. Enjoy Immediately: These hash browns are best enjoyed hot and fresh out of the waffle iron, with their crispy exterior and fluffy interior at their peak. Serve them alongside your favorite breakfast items – perhaps a fried egg, avocado slices, or a dollop of sour cream or Greek yogurt.
Variations to Explore: Spice It Up!
- Cheesy Delight: Stir in 2-3 tablespoons of grated cheddar, Monterey Jack, or Parmesan cheese into the batter before cooking. The cheese melts beautifully into the hash browns, adding a savory punch.
- Herbed Perfection: Add 1-2 teaspoons of dried herbs like chives, parsley, dill, or oregano to the batter. Fresh herbs can be used but add them after mixing to prevent wilting.
- Spicy Kick: Mix in 1/4 teaspoon of smoked paprika, a pinch of cayenne pepper, or a dash of hot sauce into the batter for a little heat.
- Onion & Garlic: Add 1-2 tablespoons of finely minced onion or shallot, or 1/2 teaspoon of garlic powder to the batter for extra savory depth.
- Sweet Potato Twist: Substitute 1/2 cup of cooked, mashed sweet potato for an equal amount of sourdough discard. This adds natural sweetness and vibrant color. You might need a touch more flour to compensate for the moisture.
- Bacon Alternative (For Flavor, Not Pork): While we can’t use actual bacon, a sprinkle of smoked paprika or a dash of liquid smoke in the batter can mimic that smoky bacon flavor without the meat.
Storage and Reheating: Keeping the Crisp Alive
- Cooling: Allow any leftover hash browns to cool completely on a wire rack. This prevents condensation and sogginess.
- Storage: Place cooled hash browns in an airtight container or resealable bag. They can be stored in the refrigerator for up to 3 days.
- Reheating: To restore their crispiness, the best method is to use a toaster oven or a regular oven. Preheat to 375°F (190°C). Place the hash browns on a baking sheet and heat for 5-10 minutes, flipping them halfway through, until they are hot and crispy again. Avoid the microwave, as it will make them soggy. If you have a toaster, you can try toasting them briefly, but the oven method is more reliable for full crispiness.
Common Mistakes to Avoid: Mastering the Method
1. Too Wet Discard: If your discard is too runny, your hash browns will be dense and won’t hold together. Add a little more flour (1-2 tablespoons at a time) until the mixture thickens to a batter-like consistency.
2. Overmixing: Overmixing develops gluten, leading to tough hash browns. Mix just until the ingredients are combined.
3. Underheating the Waffle Iron: A lukewarm iron won’t crisp the outside properly. Ensure it’s hot enough before adding the batter.
4. Opening the Iron Too Soon: Resist the urge to peek! Opening the iron releases heat and steam, leading to uneven cooking and less crispiness.
5. Overcrowding the Iron: Press only one portion of batter per waffle grid. Overcrowding prevents proper heat circulation and browning.
6. Not Greasing the Iron: Skipping this step guarantees sticking and poor browning. A light greasing is essential.
7. Using Too Much Oil: While oil is crucial for crispiness, using too much can make the hash browns greasy. Start with 1-2 tablespoons and adjust if needed.
8. Skipping the Cooling Rack: Placing hot hash browns directly on a plate traps steam, making them soggy. Always cool them on a wire rack first.
Frequently Asked Questions: Your Sourdough Hash Brown Queries Answered
- Q: Can I use sourdough starter instead of discard? A: Yes! If your starter is thick and active, you can use it directly. If it’s very thin, you might need to add a little flour to thicken it to the right consistency. Discard is simply the excess from feeding your starter, so it’s perfect.
- Q: What if my hash browns are too dense? A: This often happens if the discard is too wet or if you overmixed. Add a bit more flour next time and mix gently. Ensure your waffle iron is hot enough.
- Q: Can I make these ahead of time? A: You can prepare the batter ahead and store it in the fridge for up to 24 hours. Cook them fresh when you’re ready to eat for the best texture. Leftover cooked hash browns can be stored and reheated as described.
- Q: Do I need to add eggs? A: No, eggs are not necessary. The sourdough discard and flour mixture binds together well on its own, creating a delicious, egg-free hash brown.
- Q: Can I use a regular skillet instead of a waffle iron? A: Absolutely! Press the mixture firmly into a hot, greased skillet or griddle. Cook over medium heat for 3-5 minutes per side, pressing down occasionally with a spatula, until golden brown and crispy. Flip carefully. It might take a bit longer than the waffle iron method.
- Q: How do I prevent them from sticking to the waffle iron? A: Ensure your waffle iron is properly preheated and lightly greased with oil or melted butter before adding the batter. Wipe away any excess grease to avoid smoking. Using a non-stick waffle iron helps too.
- Q: Can I freeze cooked hash browns? A: Yes! Place cooled, cooked hash browns in a single layer on a baking sheet and freeze until solid (about 1 hour). Then transfer them to an airtight freezer bag or container. They can be frozen for up to 1 month. Reheat directly from frozen in a toaster oven or oven until hot and crispy.
Conclusion: Embrace the Discard, Celebrate the Crisp
Creating Crispy Sourdough Discard Hash Browns in your waffle iron is more than just a recipe; it’s a delicious act of culinary resourcefulness. It transforms what might be considered kitchen waste into a breakfast treasure bursting with flavor and satisfying texture. The simplicity of the ingredients, the ease of the waffle iron method, and the incredible results make this a standout recipe for any home cook, especially those looking to reduce waste and enjoy something truly special. The tangy depth of the sourdough, perfectly balanced by the crispy exterior and fluffy interior, creates a unique and addictive experience. Whether you enjoy them plain, topped with your favorite breakfast fixings, or experiment with fun variations, these hash browns are sure to become a beloved staple in your kitchen. So, don’t let that sourdough discard go to waste – give these crispy, golden gems a try and discover the magic for yourself. Happy cooking!
")


