Contents
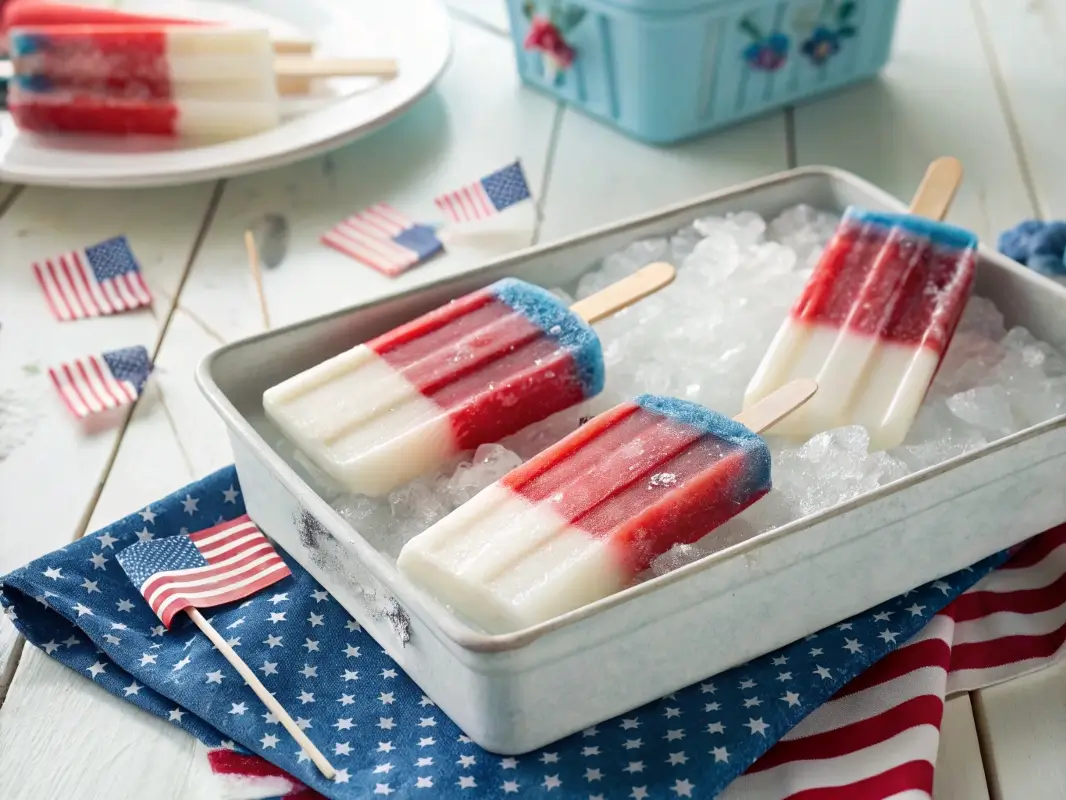
Celebrate the 4th of July in the most refreshing way possible with these vibrant Independence Day Ice Pops. These red, white, and blue frozen treats are perfect for barbecues, pool parties, parades, or any summer gathering. Made with fresh fruit and wholesome ingredients, these ice pops are not only festive but also healthy and kid-friendly.
Whether you’re entertaining guests or just want a fun project for the family, these patriotic ice pops are the ideal make-ahead dessert to keep everyone cool and smiling.
Why You’ll Love These Independence Day Ice Pops
These pops aren’t just pretty—they’re packed with real fruit and natural sweetness. Skip the artificial colors and flavors, and use strawberries, coconut milk, and blueberries to get those iconic red, white, and blue stripes. They’re dairy-free, refined sugar-free, and easy to make in batches.
Great for:
-
Patriotic parties and cookouts
-
Healthy treats for kids
-
Easy make-ahead dessert
-
Vegan and allergy-friendly diets
Ingredients You’ll Need
You only need a few simple ingredients to make these festive frozen treats.
Red Layer (Strawberry):
-
1 1/2 cups fresh or frozen strawberries, hulled
-
1–2 tbsp honey or maple syrup (optional, depending on sweetness)
-
1 tbsp lemon juice
White Layer (Coconut):
-
1 cup canned full-fat coconut milk (shake well)
-
2 tbsp honey or maple syrup
-
1/2 tsp pure vanilla extract
Blue Layer (Blueberry):
-
1 1/2 cups fresh or frozen blueberries
-
1–2 tbsp honey or maple syrup (optional)
-
1 tbsp lemon juice
Equipment:
-
Ice pop molds (yields about 8–10 pops depending on size)
-
Popsicle sticks
-
Blender or food processor
How to Make Independence Day Ice Pops
Creating these layered pops is simple, but patience is key. Each layer must freeze before the next is added for that perfect red, white, and blue effect.
Step 1: Make the Red Layer
In a blender, combine the strawberries, sweetener (if using), and lemon juice. Blend until smooth. Pour about one-third of each ice pop mold with the strawberry mixture. Tap gently to remove air bubbles.
Place the molds in the freezer for at least 1 hour, or until firm enough to hold the next layer.
Step 2: Add the White Layer
While the red layer is freezing, mix the coconut milk, honey or syrup, and vanilla extract in a small bowl or blender. Once the red layer is set, pour the coconut mixture on top until the molds are about two-thirds full. Insert the popsicle sticks into the center. Freeze again for 1–1.5 hours.
Step 3: Finish with the Blue Layer
Blend the blueberries, sweetener, and lemon juice until smooth. Carefully pour the blueberry mixture into the final third of each mold. Return to the freezer and let the pops freeze for at least 4–6 hours, or overnight for best results.
Step 4: Unmold and Serve
To release the pops, run the molds under warm water for a few seconds. Gently wiggle the sticks to pull the pops free. Serve immediately and watch them disappear fast!
Tips for Perfect Ice Pops
Use Fresh or Frozen Fruit
Both work well! Frozen fruit makes a thicker puree, while fresh fruit gives a lighter consistency. Taste and adjust the sweetness to your preference.
Avoid Mixing Layers
Make sure each layer is fully frozen before adding the next to prevent colors from bleeding. If you’re short on time, place molds in the coldest part of your freezer to speed up the process.
Customize the Flavors
Want to mix it up? Try raspberries for the red layer or blackberries for the blue. You can even add chia seeds or yogurt for a creamy texture.
Fun Ideas for Serving
Party Ready
Serve the pops in a decorative bucket filled with ice at your Fourth of July BBQ for a show-stopping dessert centerpiece.
Kid-Friendly Tray
Line a tray with patriotic napkins and hand them out during fireworks or parade watching.
Healthy Dessert Bar
Create a DIY frozen treats station with toppings like shredded coconut, dark chocolate drizzle, or granola for extra fun.
Storage and Make-Ahead Tips
Store the finished pops in the molds or remove them and wrap individually in parchment paper or plastic wrap. Place in a freezer-safe container and freeze for up to two weeks. They’re perfect to make ahead for large gatherings.
Health Benefits of Homemade Ice Pops
-
Low in sugar: You control the sweetness
-
Made with real fruit: No dyes or syrups
-
Dairy-free and vegan: Ideal for all diets
-
Kid-approved: Naturally sweet and refreshing
FAQs About Independence Day Ice Pops
Can I make these pops without added sugar?
Yes! If your fruit is ripe and sweet, you can skip the honey or syrup entirely. Taste each layer before freezing.
What if I don’t have a popsicle mold?
You can use small paper cups and insert wooden sticks once the second layer is semi-frozen. Peel the paper cups off once fully frozen.
How long do they take to freeze completely?
Plan for about 6–8 hours total. Each layer should freeze for at least 1–1.5 hours before adding the next.
Can I use yogurt instead of coconut milk?
Absolutely. Greek yogurt or plant-based yogurt can be a great substitution, but it may give a tangier flavor.
What if my layers mix slightly?
Don’t worry! Slight mixing creates a pretty tie-dye effect and still looks festive and fun.
Final Thoughts
These Independence Day Ice Pops are more than just a treat—they’re a celebration in every bite. With their bold colors, refreshing fruit flavors, and simple ingredients, they’re a patriotic dessert everyone will love. Easy to customize and perfect for summer, they’re a cool way to show your red, white, and blue spirit.
Make them ahead, get creative with ingredients, and don’t forget to take pictures—these pops are as Instagram-worthy as they are delicious!
")


