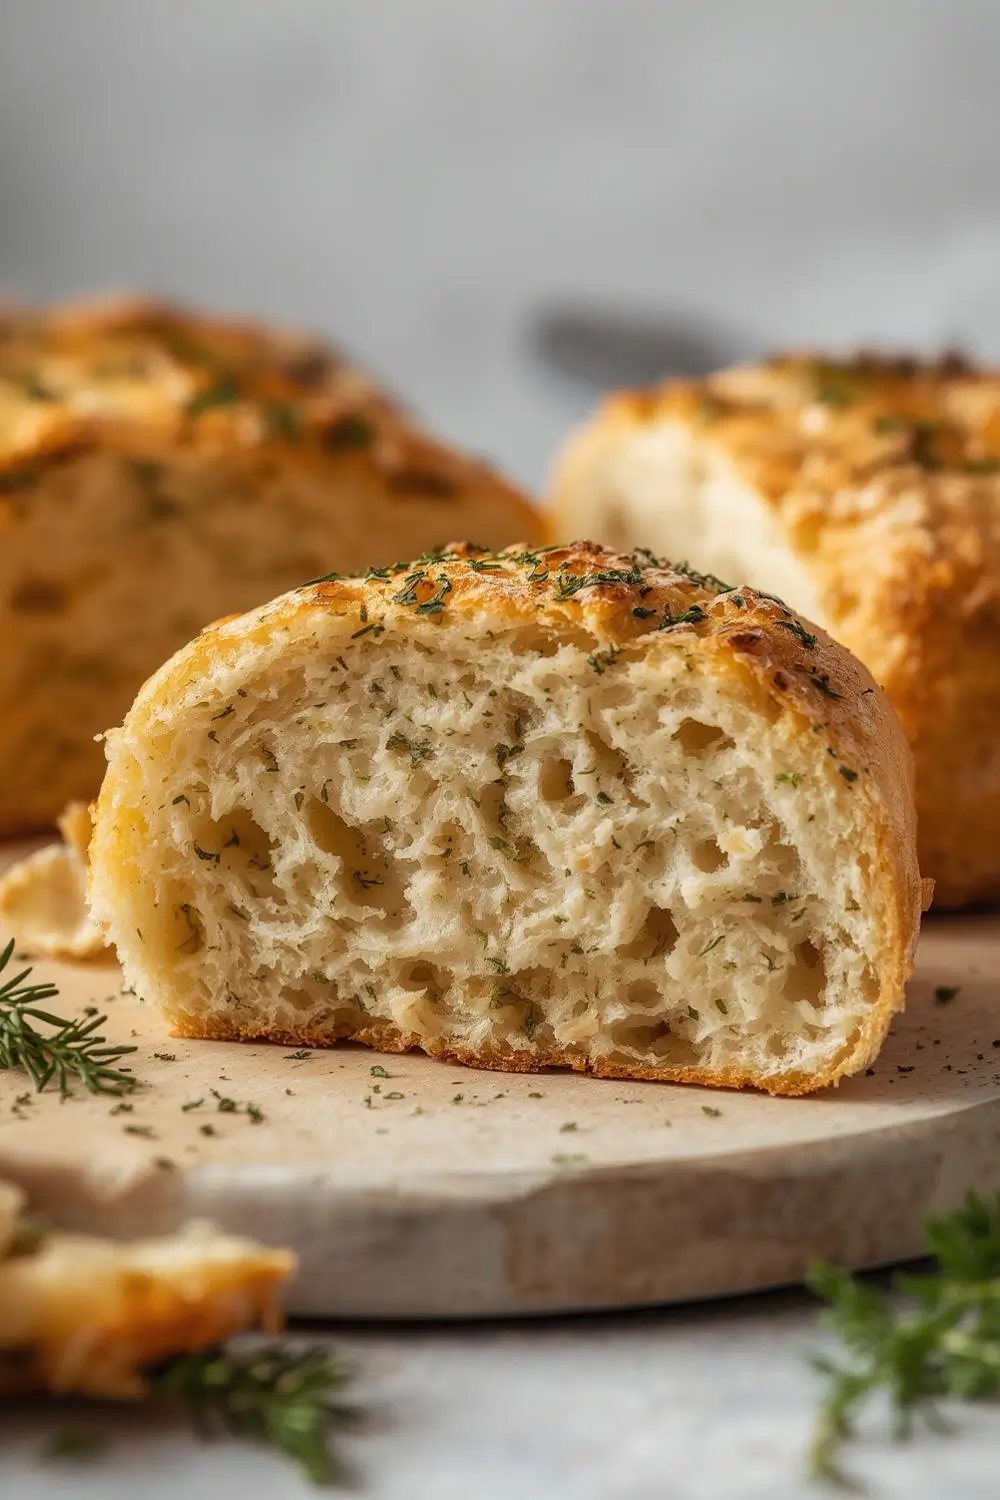
Imagine biting into a slice of bread where the crust shatters with satisfying crunch, giving way to an impossibly soft, airy interior. Now, imagine that bread bursting with the pungent, savory warmth of garlic and the bright, fresh punch of herbs. This isn’t just any focaccia; it’s a celebration of your sourdough discard, turning what might otherwise be waste into pure, delicious magic. This Easy Sourdough Discard Garlic Herb Focaccia Bread is your gateway to bakery-quality results right in your home kitchen, perfect for soaking up olive oil, pairing with soups, or simply enjoying as a standalone masterpiece. Forget complicated techniques or rare ingredients – this recipe harnesses the power of your leftover starter for a flavor profile that will have everyone asking for the secret.
Why Sourdough Discard is Your Secret Weapon
Sourdough discard often gets overlooked, destined for the trash or a simple discard loaf. But why waste it? This vibrant, active starter remnant is packed with flavor compounds and natural leavening power. When incorporated into focaccia dough, it imparts a complex, tangy depth that commercial yeast simply can’t replicate. The result? A bread with a more nuanced flavor, a beautifully irregular crumb structure, and a crust that develops incredible color and crispness thanks to the acids present. Using your discard is not only sustainable but elevates the entire baking experience.
The Heart of the Flavor: Garlic & Herbs
The magic truly happens with the aromatic trio: garlic, rosemary, and thyme. Fresh garlic provides a sharp, pungent kick that mellows beautifully during baking, creating pockets of savory delight. Rosemary adds an earthy, piney note that complements the sourdough’s tang perfectly. Thyme contributes a subtle, floral sweetness that ties everything together. While dried herbs are an option, fresh herbs are strongly recommended for their vibrant, aromatic impact. A generous sprinkle of flaky sea salt on top isn’t just decoration; it’s a crucial element that enhances every single bite.
A Beginner’s Journey to Bakery Bliss
Fear not if you’re new to sourdough or focaccia! This recipe is meticulously designed for success. The dough is incredibly forgiving, relying on the natural fermentation of the discard rather than complex kneading. The process involves a simple autolyse (resting the flour and water), a gentle mix, a long, slow rise, and a final, dramatic dimpling before baking. The key is patience – allowing the dough to develop flavor and structure naturally. The steps are straightforward, and the tips provided will guide you through common pitfalls, ensuring your first (or hundredth!) attempt is a triumph.
Your Pantry to Plate: Ingredients Explained
- Sourdough Discard: The star! Use discard that’s been fed recently (within 24-48 hours) for maximum activity and flavor. It should be thick and active, not thin and watery. (Approx. 1 cup / 240ml)
- All-Purpose Flour: Provides the perfect structure and chew. Bread flour can be substituted for a slightly chewier crumb, but AP flour is ideal for this recipe’s balance.
- Water: Room temperature water is best. It hydrates the flour evenly and helps the discard integrate smoothly.
- Salt: Fine sea salt or table salt. It’s crucial for flavor development and controlling fermentation.
- Olive Oil: Extra virgin olive oil is essential. It adds richness, tenderness, and helps create that beautiful golden crust. Use it generously in the dough and for drizzling.
- Fresh Garlic: Minced or finely grated. Fresh is non-negotiable for maximum aroma.
- Fresh Rosemary & Thyme: Finely chopped. Dried herbs are a last resort; they lack the fresh punch.
- Flaky Sea Salt: For sprinkling on top before baking. Maldon or similar works beautifully.
Step-by-Step: From Bowl to Oven
1. The Autolyse (Resting): In a large bowl, whisk together the flour and water until a shaggy dough forms. Cover and let it rest for 30-60 minutes. This allows the flour to fully hydrate and the gluten to begin developing gently.
2. Incorporating the Discard & Flavor: After the autolyse, add the sourdough discard, olive oil, minced garlic, chopped rosemary, chopped thyme, and salt to the flour mixture. Using your hands or a sturdy spatula, mix until a shaggy dough comes together. It will be sticky – that’s normal!
3. The Gentle Mix: Turn the dough out onto a lightly floured surface. Using a bench scraper or your hands, perform a series of gentle folds. Lift the dough from the sides and fold it over itself, rotating the bowl a quarter turn each time. Do this 4-6 times, just until the ingredients are fully incorporated and the dough forms a cohesive ball. Avoid aggressive kneading.
4. The First Rise (Bulk Fermentation): Place the dough ball in a lightly oiled bowl, turning it once to coat. Cover tightly with plastic wrap or a damp towel. Let it rise at room temperature (around 70-75°F / 21-24°C is ideal) for 2-4 hours, or until it has roughly doubled in size and looks puffy. It won’t be as dramatic as a standard sourdough rise due to the discard’s activity level.
5. Shaping & Dimpling: Gently turn the risen dough out onto a lightly floured surface. Using a bench scraper, carefully lift and fold the edges of the dough towards the center, creating a neat package. Place the dough seam-side down into a lightly oiled 9×13 inch (23×33 cm) baking pan. Using your fingertips, gently press the dough out to fill the pan, leaving a slight lip around the edges. This is where the magic happens: using your fingertips, press deep dimples all over the surface of the dough. This creates pockets for the olive oil and herbs to pool, ensuring maximum flavor and a beautiful texture. Drizzle generously with olive oil and sprinkle with flaky sea salt.
6. The Second Rise (Proofing): Cover the pan loosely with plastic wrap or a damp towel. Let the dough proof at room temperature for another 30-60 minutes. It should puff up noticeably and feel soft and springy when gently pressed. It won’t double again like a standard loaf.
7. The Final Touch & Bake: Preheat your oven to 425°F (220°C) with a rack in the center. Just before baking, drizzle a little more olive oil over the top and sprinkle with extra flaky sea salt if desired. Place the pan in the oven. Bake for 20-25 minutes. The focaccia is done when the crust is deep golden brown and sounds hollow when tapped on the bottom. If the top browns too quickly, tent it loosely with foil for the last 10 minutes.
8. Cooling & Serving: Remove the focaccia from the oven and let it cool in the pan for at least 15-20 minutes. This crucial step allows the crumb to set and makes slicing much cleaner. Once cooled, slice and serve warm or at room temperature. The flavors are best enjoyed fresh, but leftovers keep well.
Variations & Substitutions: Making it Your Own
- Herb Fusion: Swap rosemary and thyme for a mix of oregano, basil, or a pinch of dried sage. Experiment with your favorite combinations!
- Garlic Intensity: For a more pronounced garlic hit, add an extra clove minced into the dough or sprinkle extra minced garlic on top before baking.
- Cheese Lover’s Twist: Stir in 1/2 cup (50g) of grated Parmesan or Pecorino Romano into the dough for a savory, umami boost.
- Sweet & Savory: Add 1-2 tablespoons of honey or maple syrup to the dough for a subtle sweetness that complements the herbs beautifully.
- Whole Wheat Upgrade: Substitute up to 50% of the all-purpose flour with whole wheat flour for a nuttier flavor and denser crumb.
- No Fresh Herbs?: Use 1-2 teaspoons of high-quality dried herbs (rosemary, thyme, oregano) mixed into the dough. Reduce the amount slightly as dried herbs are more potent.
- Gluten-Free Option: Unfortunately, traditional sourdough discard focaccia relies on gluten for structure. A dedicated gluten-free sourdough discard recipe would be needed for a similar concept.
Storage & Reheating: Keeping the Magic Alive
- Room Temperature: Stored in an airtight container or wrapped tightly in plastic wrap, leftover focaccia will stay fresh at room temperature for up to 2 days. The crust may soften slightly, but the flavor remains excellent.
- Refrigeration: For longer storage (up to 4 days), wrap tightly and refrigerate. The crust will become noticeably softer. To restore crispness, reheat gently.
- Freezing: Slice cooled focaccia and wrap slices tightly in plastic wrap, then foil. Freeze for up to 1 month. Thaw at room temperature or reheat from frozen in a low oven (300°F / 150°C) for 10-15 minutes, or until warmed through and the crust is crisp again.
- Reheating Perfection: For the best texture, reheat slices in a preheated oven (350°F / 175°C) for 5-10 minutes, or use a toaster oven. Avoid the microwave, as it makes the crust soggy.
Common Mistakes & How to Avoid Them
1. Using Too Much Discard: Ensure your discard is the right consistency (thick and active). Too much liquid can make the dough overly wet and difficult to handle.
2. Over-Kneading: This develops too much gluten, leading to a tough, chewy texture instead of the desired soft, airy crumb. Gentle folds are key.
3. Rushing the Rise: Allowing the dough sufficient time to ferment develops flavor and structure. Don’t skip the bulk fermentation and proofing stages.
4. Skipping the Dimples: This step is crucial! It allows the olive oil and herbs to penetrate the dough, creating the signature flavor pockets and ensuring a moist interior.
5. Not Preheating the Oven: A hot oven is essential for that dramatic crust formation. Preheat thoroughly.
6. Cutting Too Soon: Resist the urge to slice immediately! Letting the focaccia cool completely prevents a gummy texture and allows the crumb to set properly.
7. Using Low-Quality Olive Oil: The oil is a major flavor component. Use a good quality extra virgin olive oil you’d enjoy drizzling on bread.
Your Burning Questions Answered
- Q: Can I use discard that’s been in the fridge for a week? A: While possible, discard that’s been refrigerated for a week may be less active and have a stronger sour flavor. It can still work, but the rise might be slower. Use it if it smells pleasant and active. For best results, use discard fed within 24-48 hours.
- Q: My dough is too sticky to handle. What can I do? A: This is common! Lightly flour your hands and the surface as needed during shaping. The dough should be tacky but not stick excessively to your fingers. Avoid adding too much extra flour, as it can dry out the crumb.
- Q: Why isn’t my focaccia rising much? A: Ensure your discard is active (it should smell pleasantly sour and bubbly). Check your room temperature – it should be warm enough (70-75°F / 21-24°C). Avoid drafts. If your discard is very old or inactive, it won’t rise well.
- Q: Can I make this ahead of time? A: Absolutely! Bake it a day ahead. Store it wrapped at room temperature as described. Reheat slices gently before serving. The flavors often meld beautifully overnight.
- Q: What’s the best way to store leftovers? A: Wrap tightly in plastic wrap or an airtight container at room temperature for up to 2 days. For longer storage, refrigerate or freeze as outlined. Reheat gently to restore crispness.
- Q: Can I use a bread machine? A: While possible, the manual process described allows for better control over the texture and flavor development, especially the crucial dimpling step. It’s highly recommended for best results.
The Final Slice: A Celebration of Simplicity
This Easy Sourdough Discard Garlic Herb Focaccia Bread is more than just a recipe; it’s a testament to the magic hidden within your sourdough starter. It transforms the ordinary into the extraordinary, turning leftover discard into a centerpiece of flavor and texture. The process is surprisingly simple, relying on the natural power of fermentation and the vibrant punch of fresh herbs and garlic. The result is a bread that’s deeply satisfying, incredibly versatile, and perfect for sharing. Whether you’re a sourdough novice or a seasoned baker, this focaccia offers a rewarding and delicious experience. So, don’t discard that starter discard any longer! Embrace the process, enjoy the aromas, and savor the golden, herb-infused crust of your very own homemade creation. Happy baking!
")


