Bakery Style Giant Cinnamon Rolls:The Ultimate Homemade Breakfast Showstopper
There’s something undeniably magical about pulling a warm, fragrant cinnamon roll from the oven. The promise of gooey cinnamon sugar filling, a pillowy soft, slightly sweet dough, and that irresistible, smooth cream cheese or vanilla glaze drizzled on top. But what if you could take that classic treat and elevate it to something truly spectacular? Something that commands attention at your breakfast table, becomes the centerpiece of a brunch spread, and leaves everyone asking for the recipe? Welcome to the world of Bakery Style Giant Cinnamon Rolls. These aren’t just rolls; they’re a celebration of cinnamon, sugar, and pure, unadulterated comfort baked to perfection. Forget the tiny, bite-sized versions you find in cafes; these are the giants, thick, fluffy, and packed with rich cinnamon sugar swirls, designed to be shared and savored.
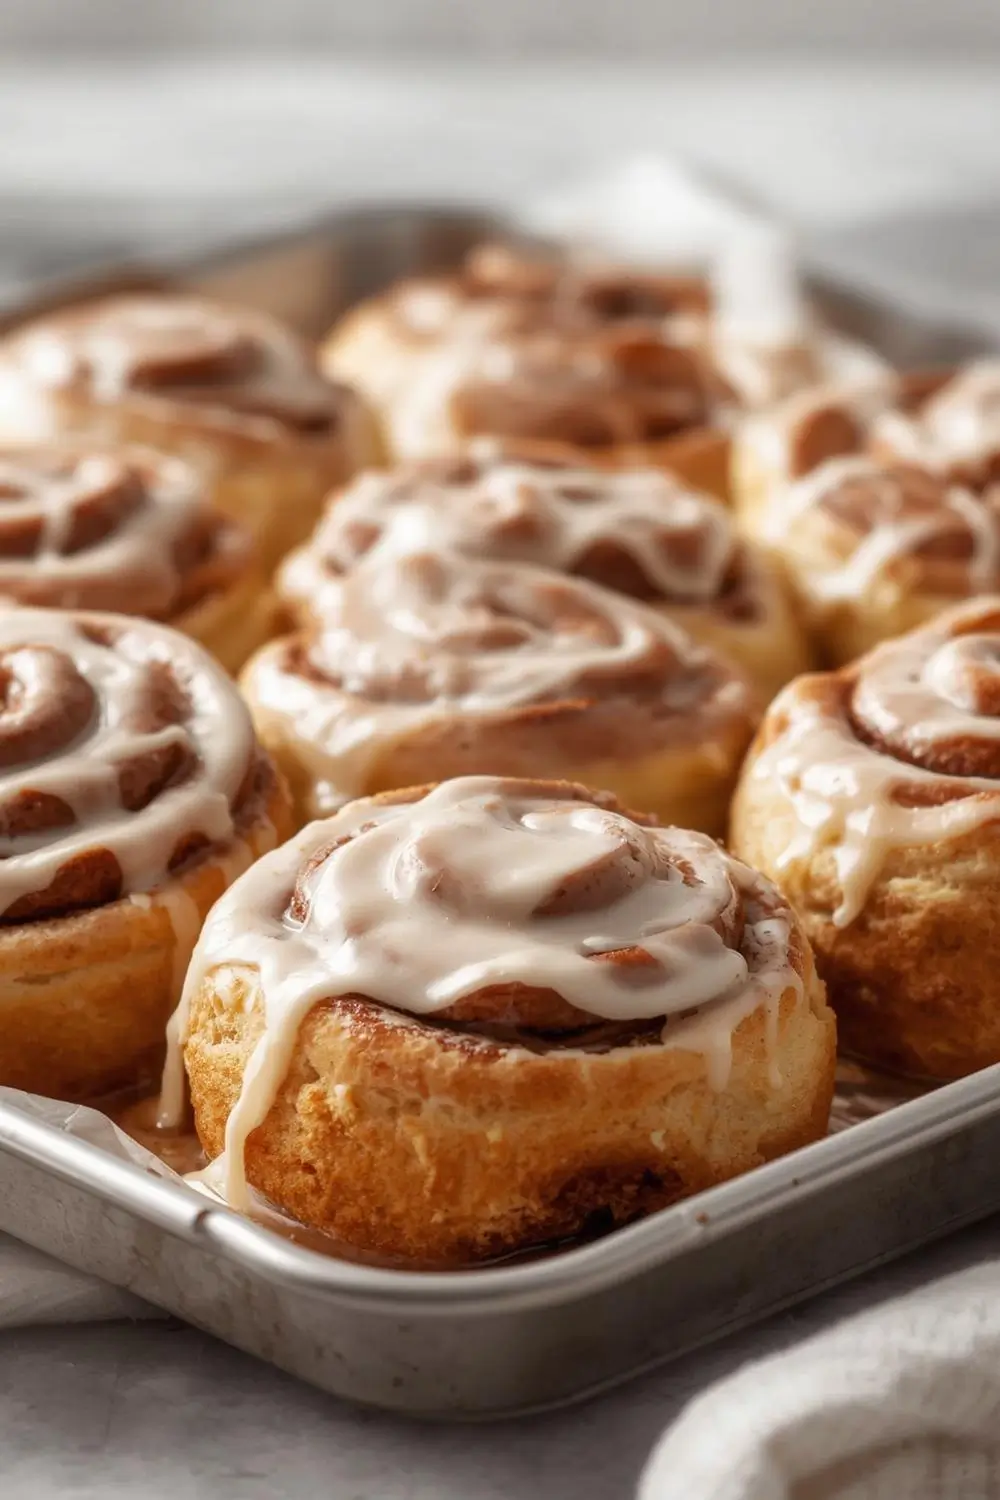
Imagine the scene: a large, golden-brown roll, almost the size of a dinner plate, its surface glistening with a smooth, tangy icing. Each slice reveals layers upon layers of tender dough, generously filled with a warm, aromatic cinnamon-sugar mixture that melts into the soft crumb. It’s the kind of breakfast or brunch centerpiece that sparks conversation and brings people together. Perfect for special gatherings, lazy Sundays, or simply treating yourself to something extraordinary. The best part? You can create this bakery magic right in your own kitchen. No fancy equipment needed, just a bit of patience and the right technique. Let’s dive into crafting these showstopping rolls that will become your new breakfast obsession.
The Foundation: Understanding Your Dough
The magic of a great cinnamon roll starts long before the cinnamon sugar hits the counter. It begins with the dough – the very foundation of these giants. This isn’t just any dough; it’s a rich, slightly sweet, and incredibly soft yeast dough designed to rise high and hold its shape while remaining tender. We’re talking about a dough that’s a step above the basic roll dough, incorporating a touch more fat (butter) and sugar for that signature bakery richness and tenderness. The key players here are simple: flour, milk, yeast, sugar, eggs, butter, and a pinch of salt. But it’s how you handle them and the attention to detail in the process that transforms them into something special.
Gathering Your Ingredients: Precision is Key
Before you start mixing, ensure you have everything measured and ready. This isn’t the time for guesswork, especially with yeast. Here’s what you’ll need for the dough:
- All-Purpose Flour (or Bread Flour): 4 1/2 to 5 cups (560-625g). Bread flour gives a slightly chewier texture, while all-purpose works perfectly fine. Measure by spooning flour into your measuring cup and leveling it off – don’t scoop directly from the bag.
- Whole Milk: 1 cup (240ml). Warm it slightly (about 110°F / 43°C) to activate the yeast effectively. Cold milk won’t activate the yeast properly.
- Instant Yeast: 2 1/4 teaspoons (7g). This is crucial for the rise. Don’t use active dry yeast unless you specifically adjust the instructions (it needs proofing).
- Granulated Sugar: 1/2 cup (100g). This feeds the yeast and adds sweetness.
- Large Eggs: 2, at room temperature. They add richness, structure, and help the dough rise.
- Unsalted Butter: 1/2 cup (113g), melted and slightly cooled. This is the secret to the tender, rich texture.
- Salt: 1 teaspoon (6g). Balances the sweetness and enhances flavor.
The Filling: A Cinnamon-Sugar Symphony
The filling is where the magic happens. It needs to be generous, flavorful, and spreadable without being too wet. Here’s the classic combination:
- Brown Sugar: 1 cup (200g), packed. Brown sugar adds a deeper, caramel-like sweetness and moisture compared to white sugar.
- Granulated Sugar: 1/4 cup (50g). Balances the brown sugar and adds a touch of brightness.
- Ground Cinnamon: 2 tablespoons (12g). The star of the show! Use high-quality cinnamon for the best flavor.
- Salt: 1/4 teaspoon (1.5g). Enhances the cinnamon flavor.
- Unsalted Butter: 1/4 cup (57g), softened. This helps bind the filling and makes it spreadable.
The Icing: The Perfect Finish
No giant cinnamon roll is complete without a smooth, tangy, or sweet glaze. This is your chance to personalize it:
- Cream Cheese: 4 ounces (115g), softened. The classic choice for a tangy, rich finish.
- Unsalted Butter: 2 tablespoons (28g), softened. Adds richness and smoothness.
- Powdered Sugar: 1 1/2 to 2 cups (180-240g), sifted. Adjust for desired sweetness and thickness.
- Vanilla Extract: 1 teaspoon (5ml). Enhances the flavor.
- Salt: A pinch (1/8 teaspoon / 0.5g). Balances the sweetness.
The Process: From Bowl to Oven
Now, let’s walk through the steps to transform these ingredients into your magnificent rolls. This process requires patience, especially the rising times, but the results are absolutely worth it.
Step 1: Activating the Yeast (The First Rise Begins)
- In a small saucepan, warm the milk over medium heat until it reaches about 110°F (43°C). It should feel warm, not hot, to the touch. Remove from heat.
- Pour the warm milk into the bowl of your stand mixer fitted with the dough hook attachment (or use a large bowl if mixing by hand). Sprinkle the instant yeast evenly over the milk.
- Add the 1/2 cup granulated sugar and let it sit undisturbed for about 5-10 minutes. You should see the mixture become foamy on top – this is the yeast activating. If it doesn’t foam, your yeast might be expired or the milk was too hot/cold. Start over with fresh yeast and warmer/cooler milk.
Step 2: Building the Dough Base
- Once the yeast is foamy, add the melted butter (cooled slightly), room temperature eggs, and salt to the milk mixture. Mix on low speed for about 30 seconds until just combined.
- Gradually add 4 1/2 cups of the flour, 1 cup at a time, mixing on low speed until a shaggy dough forms and most of the flour is incorporated. The dough will be sticky.
Step 3: Kneading for Perfection
- If using a stand mixer, switch to medium-low speed and knead the dough for about 8-10 minutes. If mixing by hand, turn the dough out onto a lightly floured surface and knead vigorously for 8-10 minutes. The dough is ready when it becomes smooth, elastic, and slightly tacky but not sticky. It should pass the “windowpane test” – stretch a small piece thin enough to see light through without tearing.
- Lightly grease a large bowl with oil or non-stick spray. Place the dough ball in the bowl, turning it once to coat it lightly with oil. Cover the bowl tightly with plastic wrap or a damp kitchen towel.
Step 4: The First Rise (Letting the Dough Breathe)
- Place the covered bowl in a warm, draft-free spot. Allow the dough to rise until doubled in size, which typically takes 1 to 1.5 hours. You can check by gently pressing two fingers into the dough; if the indentation remains, it’s ready. Don’t rush this step; proper rising is crucial for flavor and texture.
Step 5: Preparing the Filling and Pan
- While the dough rises, make the filling. In a medium bowl, whisk together the brown sugar, granulated sugar, cinnamon, and salt. Add the softened butter and rub it in with your fingers until the mixture resembles coarse crumbs. Set aside.
- Generously grease a 9-inch or 10-inch springform pan or a deep 9×13-inch baking dish with butter or non-stick spray. This pan is key for achieving those thick, bakery-style rolls.
Step 6: Rolling Out the Dough (The Cinnamon Sugar Layer)
- Once the dough has doubled, gently punch it down to release the air. Turn it out onto a lightly floured surface.
- Roll the dough into a large rectangle, roughly 18×24 inches (45×60 cm). Aim for a thickness of about 1/4 inch (6mm). Use a ruler or measuring tape if you want precision, but don’t stress too much – it doesn’t have to be perfect.
- Spread the softened butter evenly over the entire surface of the dough, leaving a 1/2-inch border around the edges. This butter helps the filling adhere and adds richness.
- Sprinkle the cinnamon-sugar filling mixture evenly over the buttered dough, also leaving a 1/2-inch border. Press the filling gently into the butter so it sticks well.
Step 7: Rolling Up the Dough (Creating the Swirls)
- Starting from the long edge closest to you, carefully roll the dough up tightly into a log. Try to keep it as tight as possible without tearing the dough. Pinch the seam firmly to seal it.
- Using a sharp knife or dental floss (for cleaner cuts), cut the log into 6 equal pieces. Each piece should be about 3-4 inches thick. This will give you thick, substantial rolls.
Step 8: Arranging the Rolls in the Pan
- Place the cut rolls, cut-side up, into the prepared springform or baking dish. Arrange them snugly together, touching each other. They will expand significantly during the second rise and baking, so don’t overcrowd them. You should be able to fit all 6 comfortably in the pan.
- Cover the pan loosely with plastic wrap or a damp kitchen towel. Let the rolls rise again in a warm place until they are noticeably puffy and have doubled in size, which usually takes about 30-45 minutes. They should look very full and soft.
Step 9: Baking to Golden Perfection
- Preheat your oven to 350°F (175°C) while the rolls are rising.
- Once the rolls have risen, place the pan in the preheated oven. Bake for 25-35 minutes, or until the rolls are deep golden brown on top and sound hollow when tapped on the bottom. The internal temperature should reach around 190-200°F (88-93°C) if you have an instant-read thermometer. Keep an eye on them towards the end to prevent over-browning; you can tent them loosely with foil if needed.
Step 10: The Glorious Icing
- While the rolls are baking, make the icing. In a medium bowl, beat the softened cream cheese and softened butter together with an electric mixer until smooth and creamy.
- Gradually add the sifted powdered sugar, beating well after each addition until fully incorporated and smooth. Beat in the vanilla extract and a pinch of salt.
- Once the rolls are baked and have cooled in the pan for about 10 minutes, carefully remove the springform ring (if using) or transfer the rolls to a wire rack. Spread the icing generously over the warm rolls. The heat from the rolls will help the icing melt slightly and seep into the crevices, creating that perfect, gooey finish.
Variations and Substitutions: Making it Your Own
- Different Fillings: Swap the cinnamon-sugar filling for a chocolate-hazelnut spread (like Nutella), a brown sugar and pecan filling, or even a simple cinnamon-sugar with a drizzle of caramel sauce on top after baking.
- Different Icings: Use a vanilla glaze (powdered sugar, milk, vanilla) instead of cream cheese. For a citrus twist, add lemon or orange zest to the icing. A maple glaze is also delicious.
- Whole Wheat Twist: Substitute up to 1 cup of the all-purpose flour with whole wheat flour for a heartier, nuttier flavor (though the texture will be slightly denser).
- Vegan Option: Use plant-based milk (soy or oat work well), vegan butter, and a flax egg (1 tbsp ground flaxseed + 3 tbsp water, mixed and rested 5 mins) in place of the eggs. Use a vegan cream cheese alternative for the icing.
- Smaller Batch: This recipe makes 6 large rolls. For smaller rolls, divide the dough into 12 pieces and adjust baking time to 20-25 minutes.
Storage and Reheating: Keeping the Magic Alive
- Cooling: Allow the rolls to cool completely in the pan on a wire rack before covering. This prevents the bottom from getting soggy.
- Room Temperature: Store leftover rolls, covered loosely with plastic wrap or in an airtight container, at room temperature for up to 2 days. Reheat gently in the microwave for 15-20 seconds or in a warm oven (300°F / 150°C) for 5-10 minutes.
- Refrigeration: For longer storage (up to 5 days), wrap individual rolls tightly in plastic wrap and place them in a zip-top bag. Reheat as above.
- Freezing: Wrap cooled rolls tightly in plastic wrap, then place in a freezer bag or airtight container. Freeze for up to 3 months. Thaw overnight in the refrigerator, then reheat gently.
Common Mistakes to Avoid: Ensuring Success
- Overheating the Milk: Milk that’s too hot (above 110°F / 43°C) will kill the yeast, preventing the dough from rising. Test the temperature with your finger or a thermometer.
- Under-Kneading: Under-kneaded dough will be dense and tough. Knead until smooth and elastic, passing the windowpane test.
- Rushing the Rise: Skipping or shortening the rise times results in dense, flavorless rolls. Be patient; the dough needs time to develop flavor and structure.
- Overfilling: Too much filling can leak out during baking, creating a mess. Spread it evenly and leave a border.
- Cutting the Dough Too Thick: Rolls that are too thick may not cook evenly in the center. Aim for 3-4 inches thick.
- Icing Too Early: Applying icing before the rolls are completely cool can make it runny. Wait until they are warm but not hot.
- Using Expired Yeast: Old yeast won’t activate, leading to no rise. Check the expiration date and proof it if unsure.
Frequently Asked Questions (FAQs)
- Q: Can I make these rolls ahead of time?
A: Absolutely! You can prepare the dough through the first rise, shape the rolls, and let them rise in the pan overnight in the refrigerator. In the morning, let them come to room temperature for about 30 minutes, then bake as directed. The second rise in the fridge takes longer (up to 2 hours), but it develops great flavor.
- Q: Why are my rolls dense?
A: This is often due to under-kneading, not letting the dough rise long enough, or using expired yeast. Ensure you knead thoroughly and give the dough ample time to rise.
- Q: How do I know when the rolls are done baking?
A: They should be deep golden brown on top and sound hollow when tapped on the bottom. An internal temperature of 190-200°F (88-93°C) is a good indicator.
- Q: Can I use active dry yeast instead of instant yeast?
A: Yes, but you need to proof it first. Dissolve the active dry yeast in the warm milk (110°F / 43°C) with the sugar and let it sit for 5-10 minutes until foamy before adding the other ingredients. Use 2 1/4 teaspoons (7g) as directed.
- Q: How do I prevent the filling from leaking out?
A: Ensure the filling is spread evenly and not too thick. Leave a 1/2-inch border around the edges. When rolling, seal the seam firmly. Don’t overfill.
- Q: Can I make these rolls without a stand mixer?
A: Yes! You can knead the dough by hand on a lightly floured surface for 8-10 minutes until smooth and elastic. It requires a bit more effort but is perfectly achievable.
- Q: What’s the best way to reheat leftover rolls?
A: The best methods are a quick 15-20 second blast in the microwave or a gentle warm-up in a 300°F (150°C) oven for 5-10 minutes. This restores their warmth and softness without drying them out.
- Q: Can I freeze the baked rolls?
A: Yes! Wrap them tightly in plastic wrap and place in a freezer bag or airtight container. Freeze for up to 3 months. Thaw overnight in the fridge and reheat gently before serving.
- Q: Why is my icing runny?
A: This usually happens if you add too much liquid. Start with 1-2 tablespoons of milk or cream and add more gradually until you reach the desired consistency. Sifting the powdered sugar helps prevent lumps.
- Q: Can I use a different type of milk?
A: Whole milk is ideal for richness, but you can use 2% or even almond milk. Avoid skim milk as it can make the dough drier. Ensure it’s warmed to the correct temperature.
The Grand Finale: A Slice of Bakery Bliss
There you have it – the blueprint for creating Bakery Style Giant Cinnamon Rolls that rival any professional bakery. These aren’t just a breakfast treat; they’re a labor of love, a celebration of simple ingredients transformed through patience and technique into something truly extraordinary. The thick, pillowy layers, the intoxicating aroma of cinnamon and sugar, the melt-in-your-mouth texture, and the luxurious icing – it’s a sensory experience that starts your day with pure joy. Whether you’re serving them for a special brunch, surprising your family on a lazy Sunday, or simply indulging in a moment of pure comfort, these giant rolls are guaranteed to impress. So roll up your sleeves, gather your ingredients, and get ready to bake up a storm. Your taste buds (and your breakfast table) will thank you. Enjoy every single, glorious bite!
")