Contents
- 1 Why Choose Water Bath Canning for Pickled Green Beans?
- 2 Essential Ingredients and Equipment
- 3 Step-By-Step Guide to Canning Pickled Green Beans
- 4 Tips for Successful Canning Pickles
- 5 How to Use Your Canned Pickled Green Beans
- 6 Frequently Asked Questions (FAQs)
- 7 Nutritional Information (Approximate per serving)
- 8 Variations to Try
- 9 Conclusion
Canning pickles is a time-honored tradition for preserving the best of summer’s bounty, and pickled green beans—often called “dilly beans”—are a delightful variation on classic cucumber pickles. With their satisfying crunch and tangy, garlicky flavor, these pickled green beans bring zest to any meal, and with water bath canning, you can enjoy them year-round.
This article breaks down the water bath canning process in clear, easy steps, perfect for beginners looking to embark on their preserving journey. No special skills or equipment beyond basic home canning tools are required. Let’s dive into making crisp, flavorful canned pickled green beans that will brighten your pantry and your table.
Why Choose Water Bath Canning for Pickled Green Beans?
Food Safety and Preservation
Water bath canning uses high heat to kill bacteria, yeasts, and molds, sealing jars airtight to prevent spoilage. Pickled green beans are acidic enough to be safely canned using this method.
Long-Term Storage
Properly canned pickles can last up to a year stored in a cool, dark pantry, allowing you to enjoy summer flavors through winter.
Enhanced Flavor Development
The canning process allows pickles to marinate and develop deep, robust flavors over time.
Cost-Effective and Sustainable
Canning lets you save money by preserving garden harvests and minimizing food waste.
Essential Ingredients and Equipment
Ingredients
| Ingredient | Quantity | Notes |
|---|---|---|
| Fresh green beans | 3 pounds | Trimmed and washed |
| Garlic cloves | 8 cloves | Peeled and slightly crushed |
| Fresh dill sprigs | 8 sprigs | Or dill seed |
| White vinegar (5%) | 6 cups | For proper acidity |
| Water | 6 cups | Filtered or distilled preferred |
| Pickling salt | 6 tablespoons | Non-iodized, to prevent cloudiness |
| Mustard seeds | 2 tablespoons | Optional |
| Black peppercorns | 2 teaspoons | Optional |
| Red pepper flakes | 1 teaspoon | Optional for a spicy kick |
Equipment
-
Quart-size mason jars (6–7 jars) with new lids and rings
-
Large water bath canner or a tall stockpot with a rack
-
Jar lifter and funnel
-
Clean towels and a magnetic lid lifter (optional)
-
Measuring cups and spoons
-
Large pot for brine and green beans blanching
Step-By-Step Guide to Canning Pickled Green Beans
Step 1: Prepare Your Green Beans
Trim and wash green beans thoroughly. For uniform packing, snap off ends but keep beans whole for the best crunch and appearance.
Step 2: Sterilize Jars and Lids
Wash jars, lids, and rings in hot soapy water. Place jars in the canner filled with water and bring to a simmer to sterilize. Keep jars hot until ready to fill.
Step 3: Blanch Green Beans
Bring a large pot of water to a boil. Blanch green beans for 3 minutes, then transfer immediately to an ice bath to stop cooking. Drain well.
Step 4: Prepare the Pickling Brine
In a large saucepan, combine vinegar, water, and pickling salt. Bring to a boil, stirring until salt dissolves.
Step 5: Pack Jars
Place 1–2 dill sprigs, garlic cloves, mustard seeds, peppercorns, and red pepper flakes (if using) into each hot jar. Pack green beans vertically, leaving about 1/2 inch headspace.
Step 6: Add the Brine
Pour the boiling hot brine over the green beans, covering them completely but maintaining 1/2 inch headspace. Remove air bubbles by running a non-metallic spatula down the inside of the jar gently.
Step 7: Wipe Jar Rims and Apply Lids
Wipe rims with a clean, damp cloth to ensure a good seal. Place sterilized lids on jars and screw on rings fingertip-tight.
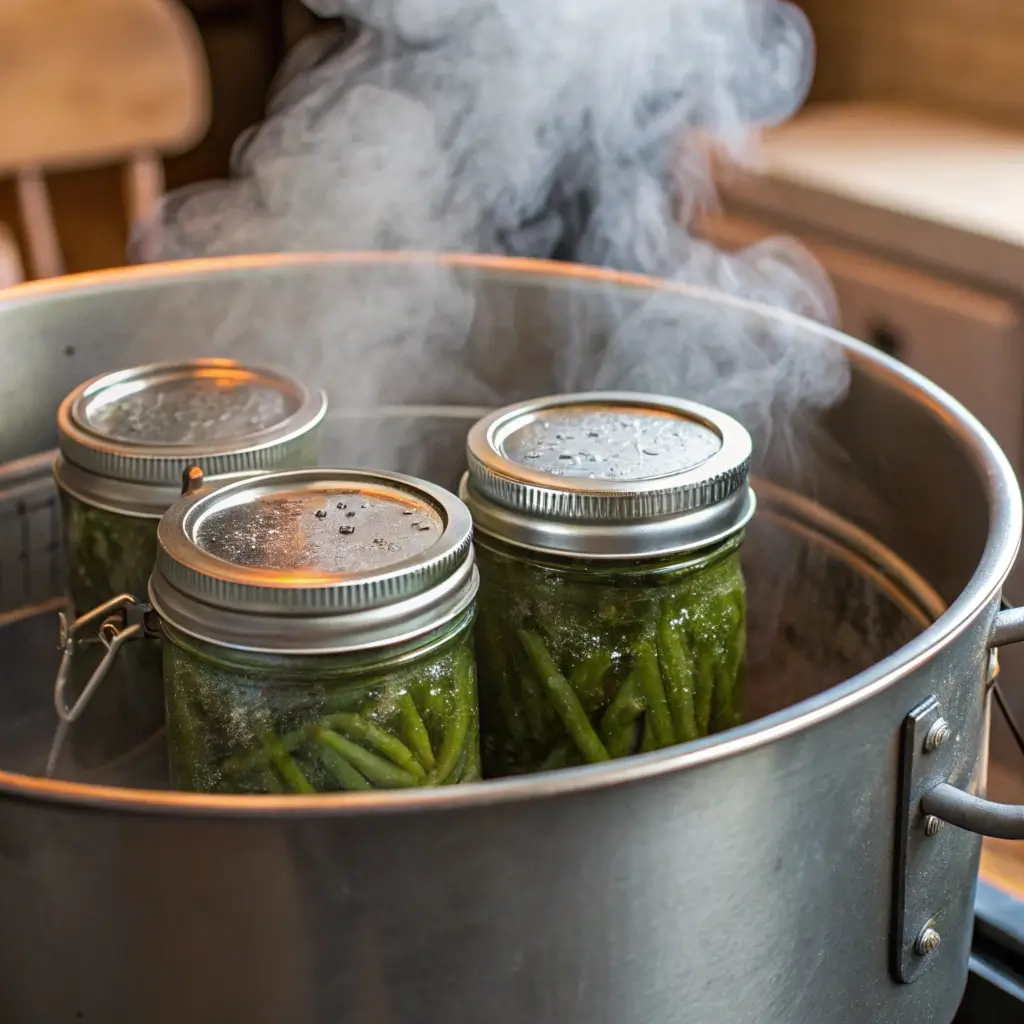
Step 8: Process Jars in Water Bath
Lower jars into the boiling water bath canner using a jar lifter. Ensure jars are covered by at least 1 inch of water. Process for 10 minutes (adjust time for altitude if necessary).
Step 9: Cool and Store
Carefully remove jars and place on a clean towel. Let cool undisturbed for 12–24 hours. Check seals (lids should not flex when pressed). Store sealed jars in a cool, dark place.
Tips for Successful Canning Pickles
-
Use fresh, firm beans: Avoid limp or blemished beans to ensure crunch.
-
Maintain jar cleanliness: Residue on rims can prevent sealing.
-
Don’t over-tighten lids: Rings should be snug but not overly tight to allow air to escape during processing.
-
Adjust for altitude: Processing times may need to increase in higher elevations.
-
Label jars: Include date and type for easy pantry management.
How to Use Your Canned Pickled Green Beans
-
Snack straight from the jar: Crunchy and flavorful as-is.
-
Cocktail garnish: Elevate your Bloody Mary with dilly beans.
-
Salad topper: Chop and toss in mixed greens or pasta salads.
-
Side dish: Serve alongside grilled or roasted meals.
Frequently Asked Questions (FAQs)
Q1: Can I use bottled vinegar instead of homemade?
A: Yes, use 5% acidity white vinegar to ensure safe preservation.
Q2: How long can canned pickled green beans last?
A: When stored properly, sealed jars can last up to 1 year.
Q3: What if a jar doesn’t seal?
A: Refrigerate and consume unsealed jars within 2 weeks.
Q4: Can I reuse jars and lids?
A: Jars can be reused if undamaged; lids must be new to ensure proper sealing.
Q5: Are pickled green beans keto or low-carb?
A: Yes! They are low in carbs and fit well in low-carb or keto diets.
Nutritional Information (Approximate per serving)
-
Calories: 10
-
Carbohydrates: 2g
-
Protein: 1g
-
Fat: 0g
-
Sodium: High (due to salt in brine)
Variations to Try
-
Spicy pickled beans: Increase red pepper flakes or add sliced jalapeños.
-
Garlic-heavy: Add extra garlic cloves for an intense flavor.
-
Herb blend: Experiment with fresh thyme, rosemary, or bay leaves for different aromas.
Conclusion
Canning pickled green beans is a rewarding way to preserve the freshest summer vegetables with bold, garlicky flavors and satisfying crunch. This easy, step-by-step water bath canning recipe makes it accessible for beginners, ensuring safe, delicious results.
Enjoy your homemade canned pickles as snacks, garnishes, or a pantry staple that captures the essence of summer all year long.
")