The Ultimate Guide to ChewySourdough Discard Chocolate Chip Cookies: Zero Waste, Maximum Delight
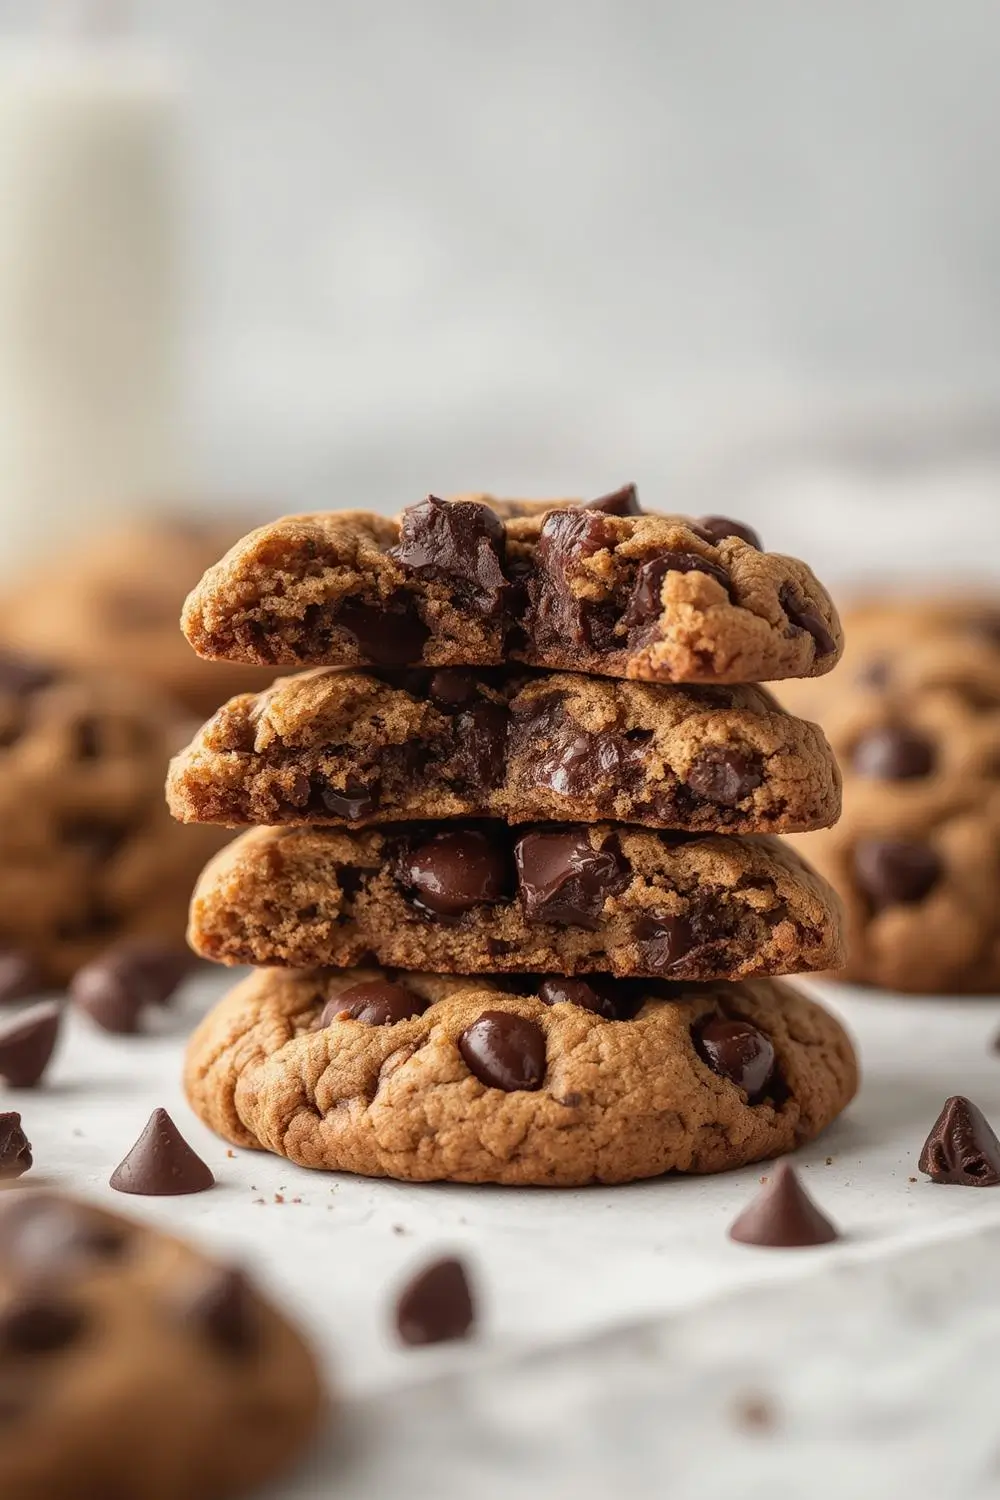
Imagine biting into a cookie so perfectly chewy, it practically melts in your mouth, bursting with pockets of molten chocolate. Now, imagine knowing that the very base of this decadent treat – the sourdough discard – would otherwise be headed straight for the trash. That’s the magic of these Chewy Sourdough Discard Chocolate Chip Cookies. They’re not just a delicious snack; they’re a delicious act of culinary kindness, transforming what some see as waste into something utterly irresistible. Perfect for the sourdough baker looking to minimize waste and maximize flavor, these cookies are a guaranteed crowd-pleaser that will have everyone asking for the recipe.
Why Sourdough Discard is a Cookie Game-Changer
Sourdough discard isn’t just a byproduct; it’s a flavor powerhouse. Its tangy, slightly sour notes add a unique depth that plain flour simply can’t match. When combined with the rich, buttery base of these cookies, it creates a complex flavor profile that’s utterly captivating. Plus, using discard is a fantastic way to reduce food waste, making these cookies not just tasty, but also environmentally friendly. They’re incredibly easy to make, requiring no special equipment beyond a mixing bowl and a baking sheet. Whether you’re a seasoned sourdough baker or just starting out, these cookies are a must-try.
The Perfect Chewy Texture: Your Secret Weapon
Achieving that signature chew is all about technique and understanding your ingredients. The sourdough discard contributes to the chewiness by adding moisture and structure. The key is not overmixing the dough once the flour is added – this develops gluten too much, leading to tough cookies. Chilling the dough is absolutely crucial. This step allows the flavors to meld beautifully and gives the dough time to firm up, preventing excessive spreading in the oven and resulting in thicker, chewier cookies. Don’t skip this step! Using high-quality chocolate chips (or chunks) ensures those pockets of melted chocolate are pure bliss. A sprinkle of flaky sea salt on top before baking? Pure magic.
Your Ingredient List: What You’ll Need
- Sourdough Discard: The star of the show! Use about 1 cup (240ml) of your active discard, at room temperature. This is roughly what you’d get from feeding your starter 1-2 days before baking. If your discard is very thick, you might need to add a splash of water to reach the right consistency.
- Unsalted Butter: 1 cup (2 sticks / 226g), softened to room temperature. This provides the rich, buttery base. Make sure it’s soft enough to cream easily but not melted.
- Granulated Sugar: 1 cup (200g). This adds sweetness and helps with browning.
- Brown Sugar: 1 cup (200g), packed. Brown sugar is key for moisture and chewiness, adding a lovely caramel note.
- Large Eggs: 2, at room temperature. They bind the ingredients and add structure and richness.
- Vanilla Extract: 2 teaspoons. Pure vanilla extract is essential for depth of flavor.
- All-Purpose Flour: 3 cups (375g), spooned and leveled. This is the structure-giver. Spooning and leveling prevents packing, which would add too much flour.
- Baking Soda: 1 teaspoon. This is your primary leavener, helping the cookies rise and spread slightly.
- Salt: 1 teaspoon. Enhances all the other flavors beautifully.
- Chocolate Chips: 2 cups (340g). Use your favorite – semi-sweet, dark, milk, or a mix. Chunks work wonderfully too.
- Flaky Sea Salt (Optional): For sprinkling on top before baking. Adds a lovely contrast.
Step-by-Step: Crafting Your Chewy Delights
1. Prep & Chill: Start by gathering all your ingredients. Ensure your sourdough discard and eggs are at room temperature. Preheat your oven to 350°F (175°C). Line your baking sheets with parchment paper or silicone mats. In a medium bowl, whisk together the flour, baking soda, and salt. Set this aside. In a large bowl, using a hand mixer or stand mixer fitted with the paddle attachment, cream the softened butter, granulated sugar, and brown sugar together on medium speed until the mixture is light, fluffy, and pale in color (about 3-5 minutes). Scrape down the sides of the bowl as needed. Add the eggs one at a time, mixing well after each addition. Beat in the vanilla extract until fully incorporated. Reduce the mixer speed to low and gradually add the flour mixture, mixing just until combined. Be careful not to overmix! Fold in the chocolate chips gently with a spatula.
2. The Crucial Chill: This is where the magic happens. Cover the bowl tightly with plastic wrap or transfer the dough to an airtight container. Refrigerate for at least 1 hour, or up to 3 days. Do not skip this step! The chilled dough will yield thicker, chewier cookies with better flavor development.
3. Portion & Bake: When ready to bake, scoop the dough using a cookie scoop (about 1.5 tablespoons per cookie) or a spoon, rolling into balls. Place them on your prepared baking sheets, spacing them about 2 inches apart (they will spread). If you like, press a few extra chocolate chips or a pinch of flaky salt onto the tops of each dough ball. Bake for 10-12 minutes, rotating the baking sheets halfway through baking. The cookies are done when the edges are set and golden brown, but the centers still look slightly soft and underbaked. They will continue to cook on the hot baking sheet.
4. Cool & Devour: Let the cookies cool on the baking sheets for at least 10 minutes before transferring them to a wire rack to cool completely. This resting time allows them to set properly and achieve that perfect chewy texture. Resist the temptation to eat them straight from the oven (though we know it’s hard!) – they’re even better warm and chewy.
Variations & Substitutions: Make It Yours
- Different Chocolate: Swap out some or all of the chocolate chips for chopped dark chocolate, white chocolate, or even a mix of different types. Add 1/2 cup of chopped nuts (walnuts, pecans, or almonds) for extra crunch and flavor.
- Spiced Up: Add 1 teaspoon of ground cinnamon, 1/2 teaspoon of ground ginger, or 1/2 teaspoon of espresso powder to the dry ingredients for a warm, spiced twist.
- Nut-Free: Simply omit any nuts if using them in a variation.
- Gluten-Free: Use a 1:1 gluten-free all-purpose flour blend. Note that the texture might be slightly different, and you may need to chill the dough a bit longer.
- Vegan Option: Replace the butter with a solid vegan butter (like Earth Balance), the eggs with 2 flax eggs (1 tbsp ground flaxseed + 3 tbsp water, mixed and rested 5 mins), and ensure your chocolate chips are vegan. The texture will still be wonderfully chewy.
- Larger Cookies: For giant cookies, use a 1/4 cup scoop and bake for 14-16 minutes.
Storage & Reheating: Keeping the Magic Alive
- Room Temperature: Store cooled cookies in an airtight container at room temperature for up to 5 days. They stay incredibly fresh and chewy this way.
- Freezing Dough: You can scoop the dough balls and freeze them on a baking sheet until solid. Transfer to a freezer bag or container. Bake straight from frozen, adding 1-2 minutes to the baking time. This is perfect for having fresh cookies anytime!
- Freezing Baked Cookies: Cool baked cookies completely, then place them in a single layer in a freezer-safe container or bag. Freeze for up to 3 months. Thaw at room temperature or reheat gently in a 300°F (150°C) oven for 5-7 minutes to restore chewiness.
- Reheating: For the best texture, reheat leftover cookies gently in a 300°F (150°C) oven for 3-5 minutes, or microwave a single cookie for 10-15 seconds (watch carefully!). This revives the chew without making them hard.
Common Mistakes to Avoid: Mastering the Chew
1. Skipping the Chill: This is the #1 reason cookies spread too much and become thin and crispy. Always chill!
2. Overmixing the Dough: Once the flour is added, mix just until combined. Overmixing develops gluten, leading to tough cookies.
3. Using Cold Butter: Butter needs to be soft enough to cream properly. If it’s too cold, it won’t incorporate air, and the cookies won’t rise as well. If it’s melted, the cookies will spread too much.
4. Overbaking: Cookies continue to cook on the hot sheet after removal. Take them out when the edges are set but the centers still look slightly soft. They’ll finish perfectly.
5. Using Too Much Flour: Scooping flour directly from the bag packs it down, adding too much. Spoon it into the measuring cup and level it off.
6. Not Using Room Temperature Eggs: Cold eggs can cause the butter to seize slightly, leading to a less smooth batter and potentially denser cookies.
Your Sourdough Discard Chocolate Chip Cookie FAQs
- Q: What if my sourdough discard is very thick or very thin? A: If it’s very thick, add a tablespoon or two of water or milk to reach a pourable consistency. If it’s very thin, you might need a bit more discard or a splash of flour to thicken it slightly. Aim for a consistency similar to pancake batter.
- Q: Can I use sourdough starter instead of discard? A: Yes! If you have active starter, you can use it in place of discard. You might need to adjust the liquid slightly, as starter can be wetter. Start with the discard amount and add a little water if needed.
- Q: Why are my cookies spreading too much? A: This is usually due to warm dough, warm baking sheets, or oversoftened butter. Ensure dough is well-chilled, use cool baking sheets, and check your butter isn’t melted. Also, ensure your baking soda isn’t expired.
- Q: Can I make these cookies without baking soda? A: Baking soda is crucial for leavening and texture. You can try baking powder (about 1.5 tsp), but the texture and rise will be different. The sourdough discard provides some lift, but baking soda is still key.
- Q: How do I know when they’re done? A: Look for golden brown edges and a set top. The center should still look slightly soft and underdone – they’ll firm up as they cool. Overbaking leads to crisp cookies.
- Q: Can I freeze the baked cookies? A: Absolutely! Cool them completely, then store in an airtight container or freezer bag for up to 3 months. Thaw at room temperature or reheat gently.
- Q: Do these cookies taste sour? A: The sourdough discard adds a subtle tang, but it’s balanced beautifully by the sweetness of the brown sugar and chocolate. It’s a complex, pleasant flavor, not overpowering sourness.
The Final Bite: Your Reward for Creativity
There’s a profound satisfaction in transforming something destined for the bin into a batch of cookies that disappear in minutes. These Chewy Sourdough Discard Chocolate Chip Cookies are more than just a recipe; they’re a celebration of resourcefulness and flavor. The tangy depth from the discard, the perfect chew, and the gooey chocolate pockets create a cookie experience that’s truly special. They’re incredibly forgiving, adaptable, and guaranteed to impress. So, dig into your sourdough starter, rescue that discard, and get ready to bake up a batch of cookies that are as kind to your conscience as they are delicious to your taste buds. Share them with loved ones, savor the moment, and enjoy the sweet, chewy rewards of your zero-waste baking adventure. Happy baking!
")