Creamy Broccoli ChickenPasta Bake: A Comforting Family Favorite
There’s something undeniably magical about a dish that effortlessly combines tender chicken, hearty pasta, vibrant broccoli, and a luscious, cheesy sauce. This Creamy Broccoli Chicken Pasta Bake is precisely that kind of dish – a warm hug in a baking dish, perfect for busy weeknights or gathering around the table with loved ones. It’s the kind of recipe that disappears from the serving platter almost as quickly as it hits the table, leaving everyone asking for seconds and begging for the recipe. Let’s dive into creating this ultimate comfort food masterpiece together.
Why This Recipe Wins
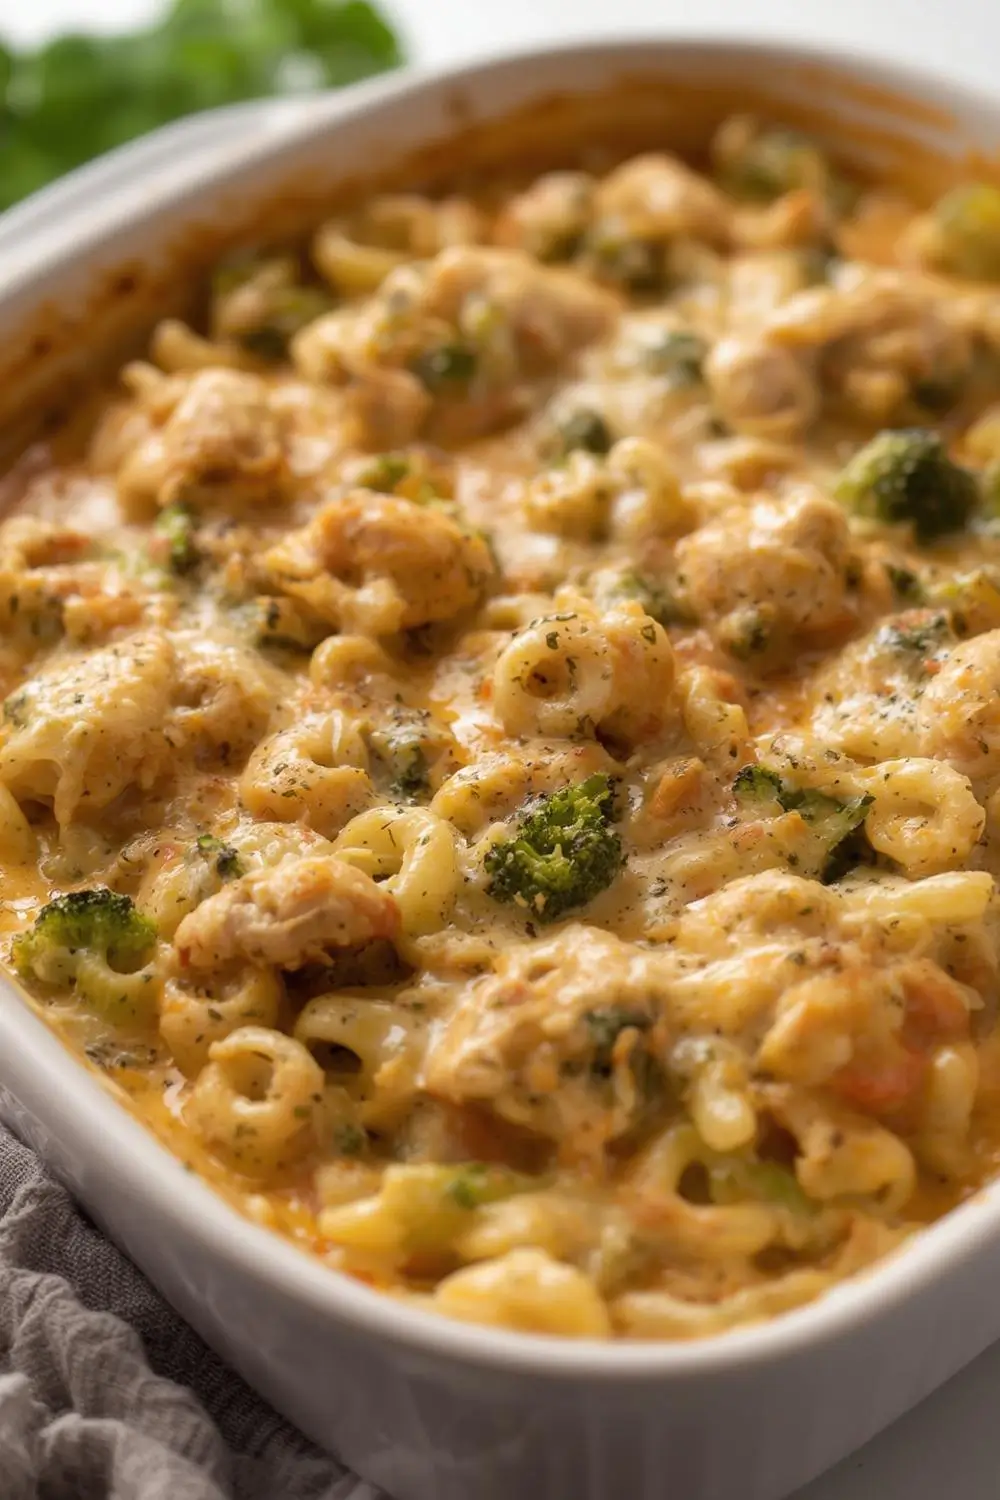
Imagine tender, bite-sized pieces of chicken breast cooked until golden and juicy, nestled among perfectly al dente pasta and crisp-tender broccoli florets. All of that is bathed in a rich, velvety sauce made from scratch – a blend of creamy cheese, savory broth, and just the right touch of mustard for depth. The crowning glory? A generous, golden-brown, cheesy topping that forms a delightful, slightly crispy crust. Every forkful offers a symphony of textures and flavors: the comforting creaminess, the satisfying chew of pasta, the fresh bite of broccoli, and the savory richness of chicken. It’s a complete, satisfying meal in one dish, packed with protein and vegetables, yet incredibly easy to make. Best of all, it’s endlessly adaptable, making it a fantastic base for your own culinary creativity.
Gathering Your Ingredients: The Building Blocks of Comfort
Before we start cooking, let’s gather everything you’ll need. This recipe relies on simple, wholesome ingredients you likely already have on hand, or can easily find at your local grocery store. I’ve included detailed explanations for each component to help you understand their role and make informed choices.
- The Star Protein: Chicken Breast
* 2 boneless, skinless chicken breasts (about 1.5 lbs total): Chicken breast is lean, versatile, and cooks quickly. Cutting it into 1-inch cubes ensures even cooking and easy eating. You can use thighs for richer flavor if preferred, but stick to boneless, skinless for this recipe. Pat the chicken dry before cooking for better browning.
- The Pasta Foundation: Elbow Macaroni or Cavatappi
* 12 oz (about 3 cups) elbow macaroni or cavatappi: These short, curved pasta shapes are classic for baked pasta dishes. They hold the sauce beautifully. Cavatappi (corkscrew pasta) is slightly more fun and holds sauce even better. Use gluten-free pasta if needed.
- The Green Vegetable: Fresh Broccoli Florets
* 4 cups fresh broccoli florets (about 1 large head): Fresh broccoli adds essential vitamins, fiber, and a lovely green color. It retains its texture beautifully when baked. Frozen broccoli can be used, but reduce the cooking time slightly and ensure it’s thawed and well-drained to prevent a soggy bake.
- The Creamy Sauce Base: Butter, Flour, Milk, Chicken Broth
* 3 tablespoons unsalted butter: Provides the fat base for the roux and adds richness.
* 3 tablespoons all-purpose flour: This is the thickening agent for the sauce. Whisk it in thoroughly to avoid lumps.
* 2 cups whole milk (or 1.5 cups milk + 0.5 cup heavy cream): Whole milk creates a luxuriously creamy sauce. You can use 2% or skim, but the sauce will be less rich. Heavy cream adds extra decadence.
* 1 cup low-sodium chicken broth: Adds savory depth and helps thin the sauce slightly. Use homemade or a good quality store-bought brand.
- The Cheesy Goodness: Sharp Cheddar, Parmesan, Dijon Mustard
* 2 cups shredded sharp cheddar cheese (about 8 oz): The star of the cheesy topping. Sharp cheddar provides a bold, tangy flavor that cuts through the richness.
* 1/2 cup grated Parmesan cheese (plus extra for topping): Parmesan adds a salty, umami depth and helps the sauce cling to the pasta.
* 1 tablespoon Dijon mustard: This is key! It adds a subtle tang and helps emulsify the sauce, making it incredibly smooth and helping it cling to the pasta and chicken. Don’t skip it!
- Seasoning the Dish: Salt, Black Pepper, Garlic Powder, Onion Powder
* 1 teaspoon salt (plus more to taste): Essential for balancing flavors.
* 1/2 teaspoon freshly ground black pepper: Adds warmth and depth.
* 1/2 teaspoon garlic powder: Provides savory garlic flavor without the need for fresh garlic (though you can add minced garlic if you prefer).
* 1/2 teaspoon onion powder: Adds a subtle sweetness and depth, complementing the cheese beautifully.
- The Golden Topping: More Cheese & Breadcrumbs (Optional)
* 1 cup shredded sharp cheddar cheese (for topping): Extra cheese for that irresistible golden crust.
* 1/2 cup panko breadcrumbs (optional): Adds a delightful extra crunch on top. You can substitute with crushed crackers or even more grated cheese.
Step-by-Step Instructions: Crafting Your Creamy Creation
Now that your ingredients are prepped and ready, let’s bring them all together. This process is straightforward and designed to be approachable for cooks of all levels. Follow these steps carefully, and you’ll be rewarded with a stunning, delicious pasta bake.
1. Preheat & Prep:
* Step 1: Preheat your oven to 375°F (190°C). This ensures the oven is nice and hot when your dish goes in.
* Step 2: Lightly grease a 9×13 inch baking dish with butter or non-stick cooking spray. This prevents sticking and makes cleanup easier.
Step 3: Cook the pasta according to package directions until al dente* (firm to the bite). Drain it thoroughly in a colander and set it aside. Don’t rinse the pasta, as the starch helps the sauce cling.
* Step 4: While the pasta cooks, pat the chicken dry with paper towels. This is crucial for browning. Season the chicken cubes generously with salt, black pepper, garlic powder, and onion powder on all sides.
2. Sauté the Chicken:
* Step 5: Heat 1 tablespoon of butter in a large skillet or Dutch oven over medium-high heat until melted and foaming. Add the seasoned chicken pieces in a single layer (don’t overcrowd the pan – work in batches if needed). Cook for 5-7 minutes, turning occasionally, until the chicken is golden brown on all sides and cooked through (internal temperature reaches 165°F / 74°C). Remove the chicken to a clean plate and set aside. Leave the delicious browned bits (fond) in the pan – they add incredible flavor!
3. Create the Creamy Sauce:
* Step 6: Reduce the heat to medium-low. Add the remaining 2 tablespoons of butter to the skillet. Let it melt completely.
* Step 7: Sprinkle the flour evenly over the melted butter. Whisk constantly for about 1 minute. This cooks the raw flour taste and creates a smooth base for the sauce. Don’t skip this step!
* Step 8: Gradually pour in the milk, whisking constantly to prevent lumps from forming. Add the chicken broth slowly, whisking continuously.
* Step 9: Increase the heat to medium. Continue whisking constantly as the mixture comes to a gentle simmer. It will start to thicken noticeably. This should take about 3-5 minutes. The sauce is ready when it coats the back of a spoon and leaves a clear path when you run your finger through it.
* Step 10: Reduce the heat to low. Add the shredded sharp cheddar cheese, grated Parmesan cheese, and Dijon mustard to the sauce. Whisk vigorously until the cheese is completely melted and the sauce is smooth and glossy. Taste and season with salt and pepper if needed (remember the chicken is already seasoned). The sauce should be rich and creamy.
4. Combine Everything:
* Step 11: Return the cooked chicken to the skillet with the sauce. Add the drained pasta and the fresh broccoli florets. Gently fold everything together until the pasta, chicken, and broccoli are evenly coated in the luscious cheese sauce. Be careful not to break the pasta too much.
5. Assemble and Top:
* Step 12: Transfer the entire mixture to your prepared 9×13 inch baking dish. Spread it out into an even layer.
* Step 13: Sprinkle the remaining 1 cup of shredded sharp cheddar cheese evenly over the top. If using, sprinkle the panko breadcrumbs evenly over the cheese.
* Step 14: Place the dish in the preheated oven. Bake for 25-30 minutes, or until the top is golden brown and bubbly, and the sauce is visibly bubbling around the edges. The cheese should be melted and slightly crispy in spots.
6. Rest and Serve:
* Step 15: Remove the pasta bake from the oven. Let it rest for at least 10 minutes before serving. This crucial resting time allows the sauce to set slightly, making it much easier to scoop and preventing it from being overly runny. It also lets the flavors meld beautifully. Serve hot, straight from the dish, with a sprinkle of extra Parmesan if desired. Enjoy the fruits of your labor!
Variations and Substitutions: Making It Your Own
One of the joys of this recipe is its flexibility. Here are some ideas to tailor it to your taste or what you have on hand:
- Protein Swap: Use diced cooked ham, turkey, or even crumbled cooked Italian sausage instead of chicken. For a vegetarian version, omit the chicken and add extra broccoli, diced zucchini, or mushrooms.
- Cheese Blend: Experiment with different cheeses! Try a mix of cheddar and Monterey Jack, or add a touch of smoked Gouda for a deeper flavor. Avoid cheeses that melt poorly like Swiss or provolone.
- Pasta Options: Cavatappi is great, but you can use rotini, penne, or even small shells. For a gluten-free version, use GF elbow macaroni or cavatappi.
- Vegetable Boost: Add diced bell peppers, sliced mushrooms, or chopped spinach along with the broccoli. Stir them in with the pasta and sauce.
- Creaminess Level: For an extra-rich sauce, add 1/4 cup of sour cream or Greek yogurt when whisking in the cheese. For a lighter version, use 2% milk and skip the heavy cream.
- Spice It Up: Add a pinch of red pepper flakes to the sauce for a subtle kick, or stir in some cooked, crumbled bacon (if allowed) for a smoky flavor.
- Make-Ahead Magic: Prepare the entire dish up to the point of adding the topping (Step 12). Cover it tightly with plastic wrap and refrigerate for up to 24 hours. When ready to bake, let it sit at room temperature for 20-30 minutes, then bake as directed, adding 5-10 minutes to the baking time if needed.
Storage and Reheating: Keeping the Comfort Alive
This pasta bake is fantastic for meal prep! Here’s how to store and reheat it:
- Cooling & Storing: Let the baked pasta cool completely in the baking dish on a wire rack. Once cool, cover the dish tightly with plastic wrap or aluminum foil, or transfer portions to airtight containers. Refrigerate for up to 3-4 days.
- Reheating:
* Oven (Best for Crisp Top): Preheat oven to 350°F (175°C). Cover the dish loosely with foil (to prevent the top from burning) and bake for 20-25 minutes, or until heated through and bubbly. Remove the foil for the last 5 minutes to crisp the top.
* Stovetop (For Individual Portions): Place a portion in a saucepan over medium-low heat. Add a splash of milk or broth to prevent sticking and help loosen the sauce. Stir gently until heated through (5-10 minutes).
* Microwave (Quickest): Place a portion in a microwave-safe bowl. Cover loosely with a microwave-safe lid or microwave-safe plastic wrap, leaving a small vent. Microwave on medium power (50%) in 1-minute intervals, stirring in between, until heated through (2-4 minutes total). Be careful, as it can get very hot.
Common Mistakes to Avoid: Ensuring Perfect Results
Even experienced cooks can run into minor hiccups. Here’s how to avoid them:
Overcooking the Pasta: Cooking pasta al dente* is key. It will continue to cook slightly in the oven. If it’s too soft before baking, it will turn mushy.
- Lumpy Sauce: Whisking constantly, especially when adding the milk and broth, is non-negotiable. Don’t rush this step. If lumps form, whisk vigorously or use a whisk attachment on a hand mixer to smooth it out.
- Sauce Too Thin: If your sauce isn’t thickening enough, whisk in a little more flour (1-2 teaspoons) mixed with a splash of cold milk, then return to medium heat and whisk constantly until thickened. Avoid boiling vigorously once the flour is added.
- Sauce Too Thick: If the sauce is too thick before adding the pasta, simply whisk in a splash more milk or broth until it reaches the desired consistency.
- Chicken Not Cooked Through: Ensure chicken pieces are cut small enough and cooked until they reach 165°F (74°C). Don’t skip resting the chicken before adding it to the sauce.
- Soggy Top: Don’t overbake! The top should be golden brown and bubbly, not burnt. Covering with foil during the last part of baking can prevent over-browning if needed.
- Missing the Mustard: Don’t skip the Dijon mustard! It’s essential for a smooth, flavorful sauce that clings beautifully. Its absence will leave the sauce flat.
Frequently Asked Questions: Your Top Queries Answered
- Q: Can I use frozen broccoli? Yes, but thaw it completely and squeeze out as much excess water as possible before adding it to the sauce. Otherwise, your bake will be watery.
- Q: What if my sauce is too thick? Whisk in a little more milk or broth, a tablespoon at a time, until it reaches the desired consistency.
- Q: Can I make this ahead of time? Absolutely! Assemble the dish (without the topping) up to 24 hours in advance. Refrigerate, then add the topping and bake as directed, adding 5-10 minutes to the baking time if needed.
- Q: How do I know when the chicken is cooked? Use a meat thermometer! Chicken is safe to eat at 165°F (74°C). If you don’t have one, cut into the thickest piece; it should be opaque and juices should run clear.
- Q: Can I freeze this pasta bake? Yes! Assemble the dish (without the topping) and freeze it in the baking dish or an airtight container. Wrap tightly with plastic wrap and foil. To reheat, thaw overnight in the fridge, then bake covered with foil at 350°F (175°C) for 30-40 minutes, or until heated through. Add the topping and bake for another 10-15 minutes.
- Q: Why is my sauce runny? This usually happens if the sauce wasn’t cooked long enough after adding the flour and milk, or if too much liquid was added too quickly. Ensure you whisk constantly and cook the roux for the full minute before adding liquids. If it’s already baked, you can try adding a cornstarch slurry (1 tsp cornstarch mixed with 1 tbsp cold water) to the sauce and reheating it gently.
- Q: Can I use a different type of cheese? Yes! Sharp cheddar is classic, but you can use a blend like sharp cheddar and Monterey Jack, or even a Mexican blend. Avoid cheeses that don’t melt well like Swiss or feta.
- Q: Is this dish spicy? Not inherently. It has a subtle tang from the mustard and cheese. If you want heat, add a pinch of red pepper flakes to the sauce or serve with hot sauce on the side.
A Final Word: The Joy of Sharing Comfort
Creating this Creamy Broccoli Chicken Pasta Bake is more than just following a recipe; it’s about crafting a moment of warmth and connection. It’s a dish that speaks of home, of care, and of simple, satisfying goodness. Whether you’re feeding a hungry family after a long day, hosting a casual dinner with friends, or simply treating yourself to a bowl of pure comfort, this bake delivers. The aroma that fills your kitchen as it bakes, the golden crust that forms, the first creamy, cheesy bite – these are the little pleasures that make cooking so rewarding. I hope you find as much joy in making and sharing this recipe as I do. Happy baking, and enjoy every comforting mouthful!
")