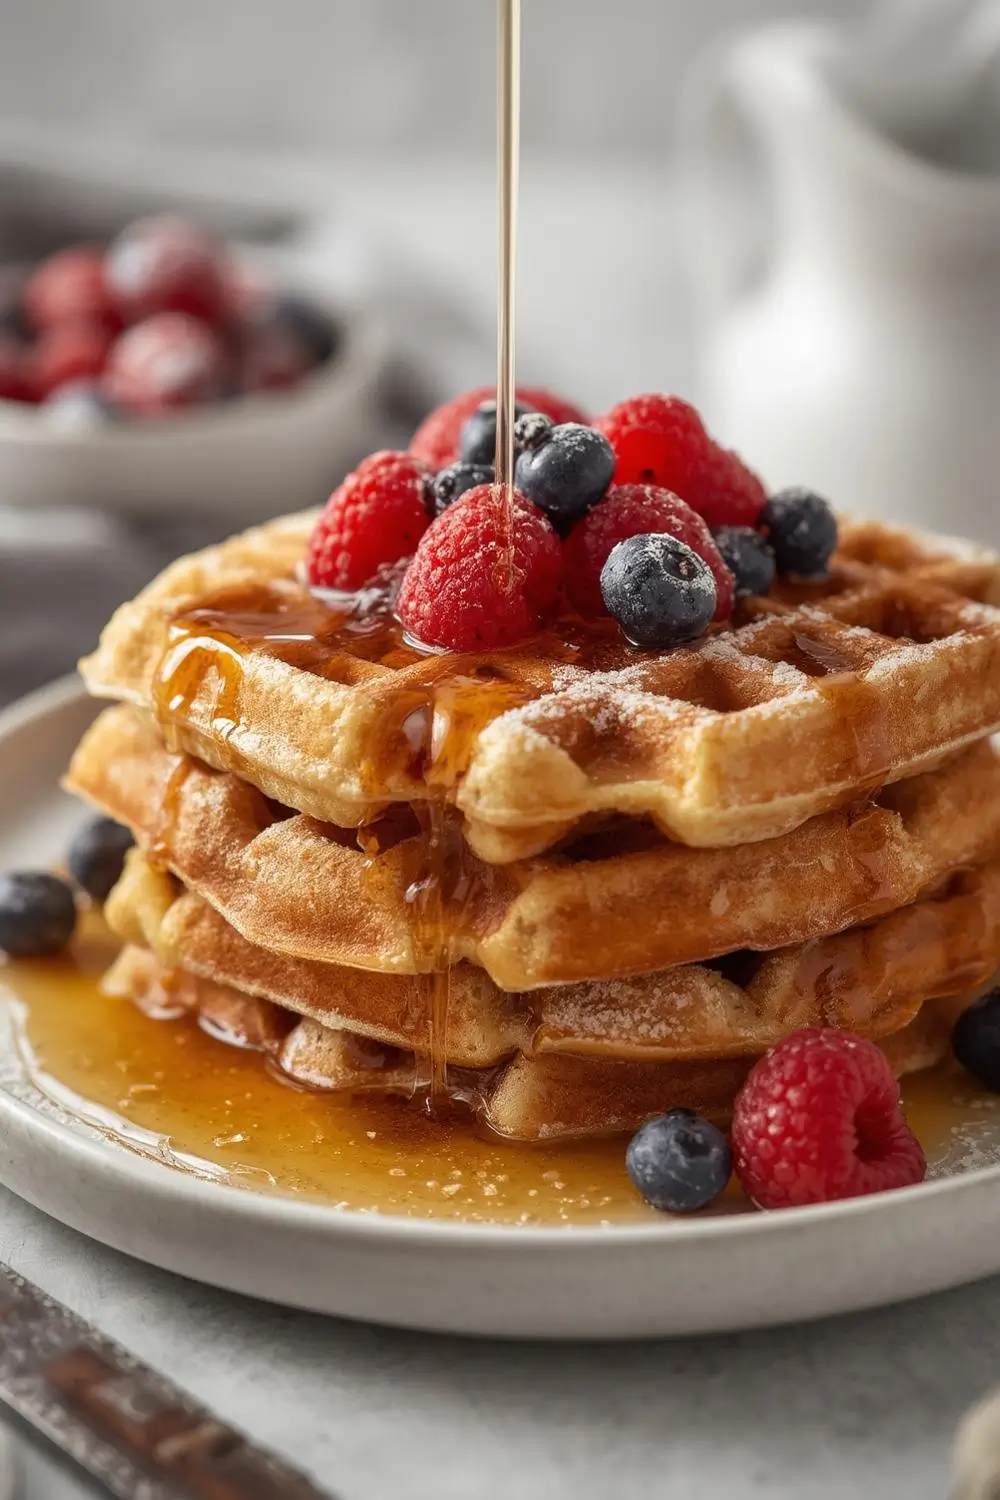
Decadent Sourdough Discard Sweet Vanilla Breakfast Waffles: A Weekend Brunch Dream
There’s something truly magical about transforming what might otherwise feel like kitchen clutter into the star of a weekend brunch. If you’re a sourdough baker, you know the familiar pang of guilt when your discard bucket overflows. Instead of letting those tangy, bubbly remnants go to waste, why not harness their unique flavor and texture to create something utterly delightful? These Decadent Sourdough Discard Sweet Vanilla Breakfast Waffles are the answer. They capture the essence of sourdough – that wonderful tanginess balanced perfectly with pure vanilla sweetness – resulting in waffles that are light, crispy on the outside, and tender and fluffy within. They’re the ultimate way to start your day, whether piled high with maple syrup, fresh berries, or a dollop of whipped cream. Let’s dive into creating this breakfast masterpiece together.
The Joy of Sourdough Discard Waffles
Using sourdough discard isn’t just frugal; it’s a celebration of the sourdough process itself. That discarded starter, often seen as a byproduct, holds incredible potential. Its natural acidity tenderizes the batter, creating waffles with a wonderfully complex flavor profile that’s far more interesting than plain buttermilk or plain flour versions. The vanilla adds a classic, comforting sweetness that pairs beautifully with the sourdough’s inherent depth. The result? Waffles that are simultaneously familiar and excitingly new.
Gathering Your Ingredients: The Foundation of Flavor
Before you begin, ensure all your ingredients are at room temperature. This is crucial for proper gluten development and even rising. Here’s what you’ll need:
- 1 1/2 cups (180g) All-Purpose Flour: The backbone of the waffle. You can substitute up to 1/2 cup (60g) with whole wheat flour for a nuttier flavor and denser texture, but all-purpose yields the classic light and crispy result.
- 1 1/2 cups (360ml) Sourdough Discard: This is the star! Use discard that’s been fed recently (within 24-48 hours) and has a lively, bubbly consistency. The tanginess is key. If your discard is very thick, you might need to add a splash more liquid.
- 1/2 cup (120ml) Whole Milk: Adds richness and helps create a tender crumb. You can use buttermilk for extra tang, or even a dairy-free alternative like oat or almond milk if needed.
- 2 Large Eggs, Room Temperature: Provide structure and richness. Room temperature eggs incorporate better.
- 1/3 cup (67g) Granulated Sugar: Sweetness balances the sourdough tang. Adjust slightly if you prefer it sweeter or less sweet.
- 1/4 cup (60ml) Neutral Oil (like Vegetable or Canola) OR Melted Butter: Adds moisture and helps achieve that beautiful golden color and crisp exterior. Butter adds extra flavor.
- 1 1/2 teaspoons Pure Vanilla Extract: The essential aromatic note that defines these waffles. Use high-quality extract for the best flavor.
- 1 1/2 teaspoons Baking Powder: Provides the lift for those fluffy interiors. Ensure it’s fresh!
- 1/2 teaspoon Baking Soda: Works with the acidity of the sourdough to create additional lift and tenderness.
- 1/2 teaspoon Salt: Enhances all the other flavors beautifully. Don’t skip it!
- Optional Add-ins: 1/2 cup (60g) Chocolate Chips, Chopped Nuts (like pecans or walnuts), or Fresh Berries (tossed in flour to prevent sinking) can be stirred in for extra texture and flavor.
The Art of Mixing: Creating the Perfect Batter
The beauty of these waffles lies in their simplicity, but technique matters. Here’s how to bring it all together:
1. Combine Dry Ingredients: In a large bowl, whisk together the flour, baking powder, baking soda, and salt. This ensures even distribution and prevents clumping.
2. Combine Wet Ingredients: In a separate medium bowl, whisk together the sourdough discard, milk, eggs, sugar, oil (or melted butter), and vanilla extract until smooth. If using melted butter, ensure it’s cooled slightly to avoid cooking the eggs.
3. Merge Wet and Dry: Pour the wet ingredients into the bowl with the dry ingredients. Using a spatula or wooden spoon, gently fold the mixture just until the dry ingredients are mostly moistened. It’s perfectly fine if there are a few small lumps – overmixing develops gluten, leading to tough waffles. A few lumps are your friend!
4. Rest the Batter: Let the batter rest for 5-10 minutes. This allows the flour to fully hydrate and the baking powder/baking soda to begin activating, resulting in lighter waffles. The sourdough discard will also relax, making the batter easier to work with.
Cooking to Perfection: Mastering the Waffle Iron
Now comes the fun part! Your waffle iron is your canvas.
1. Preheat Thoroughly: This is non-negotiable. Preheat your waffle iron according to the manufacturer’s instructions, usually until the green light goes off or it indicates it’s ready. A hot iron ensures even cooking and that crucial crispy exterior.
2. Light Grease (Optional): While most modern waffle irons are non-stick, a light brushing of oil or melted butter on the grids can help with release and browning, especially if you’re adding wet add-ins.
3. Pour the Batter: Pour approximately 1/2 to 3/4 cup of batter onto the center of the preheated waffle iron. The amount depends on the size of your iron. Avoid overfilling – batter will expand.
4. Close and Cook: Close the lid firmly. The cooking time varies significantly based on your iron’s heat and the batter’s thickness. Typically, it ranges from 3 to 7 minutes. Look for visual cues: the steam should subside, the waffle should look set and golden brown, and the edges should pull slightly away from the sides. If your iron has a light, it might turn off or change color.
5. Check for Doneness: Carefully open the lid (use the handle!) and check the waffle. It should be deep golden brown, crispy on the outside, and spring back slightly when touched. If it’s pale or doughy inside, close it back and cook for another minute or two. If it’s browning too quickly on the outside but still raw inside, your iron might be too hot – reduce the heat slightly next time.
6. Transfer and Keep Warm: Use a fork or spatula to gently lift the waffle out. Place it on a wire rack set over a baking sheet in a warm oven (around 200°F/95°C) while you cook the remaining batches. This prevents them from getting soggy from steam.
Serving Suggestions: The Perfect Finish
The beauty of these waffles is their versatility. Here are some winning combinations:
- Classic: Generous drizzle of pure maple syrup and a scattering of fresh berries (strawberries, blueberries, raspberries).
- Creamy & Fruity: A scoop of vanilla ice cream or a dollop of whipped cream topped with sliced bananas and a sprinkle of cinnamon.
- Nutty & Sweet: A generous spread of peanut butter or almond butter, drizzled with honey or maple syrup, and topped with chopped nuts.
- Chocolate Lover’s: A thick layer of Nutella or chocolate hazelnut spread, topped with chocolate chips or shavings.
- Simple & Elegant: A light dusting of powdered sugar and a squeeze of fresh lemon juice.
Variations and Substitutions: Making it Your Own
- Sourdough Strength: If your discard is very sour, you might want to reduce the sugar slightly. If it’s mild, a touch more sugar can balance it.
- Milk Alternatives: Use buttermilk, oat milk, almond milk, or soy milk. Adjust slightly if using a thinner milk.
- Oil vs. Butter: Butter adds incredible flavor but can brown faster. Oil is more neutral and reliable. Use melted butter if you prefer its taste.
- Add-ins: Get creative! Try shredded coconut, dried fruit (soaked in warm water first), or a teaspoon of cinnamon or nutmeg added to the dry ingredients.
- Gluten-Free: Substitute a 1:1 gluten-free flour blend for the all-purpose flour. Note that results may vary slightly in texture and rise.
- Vegan: Use a flax egg (1 tbsp ground flaxseed + 3 tbsp water, let sit 5 mins) instead of regular eggs. Use a plant-based milk and oil instead of butter/milk. Ensure your baking powder is vegan.
Storage and Reheating: Enjoy the Leftovers
These waffles are fantastic made ahead!
- Cooling: Let the cooked waffles cool completely on the wire rack.
- Freezing: Stack cooled waffles between sheets of parchment paper. Place the stack in a large freezer bag or airtight container. Freeze for up to 1 month.
- Reheating (Oven Method – Best for Crispiness): Preheat oven to 200°F (95°C). Place frozen or thawed waffles on a wire rack set over a baking sheet. Bake for 8-10 minutes until heated through and crisp. This method prevents sogginess.
- Reheating (Toaster Method): Place frozen waffles directly into a toaster. Toast until heated through and crispy (usually 2-4 minutes, depending on your toaster). Works well for individual waffles.
- Reheating (Microwave Method – Least Ideal): Place a waffle on a microwave-safe plate. Microwave on high for 20-30 seconds. The texture will be softer and less crispy, but it’s a quick option.
Common Mistakes to Avoid: Ensuring Waffle Success
- Overmixing the Batter: This is the #1 culprit for tough waffles. Mix just* until combined. Lumps are okay!
- Using Cold Ingredients: Room temperature eggs and milk incorporate much better and create a smoother batter.
- Overfilling the Iron: Batter will expand significantly. Too much batter leads to overflow and uneven cooking.
- Prematurely Opening the Iron: Resist the urge to peek! Opening the lid too early releases heat and steam, resulting in soggy waffles.
- Using Stale Baking Powder/Baking Soda: These lose their potency over time. Test yours by adding 1/2 tsp to 1/4 cup hot water – it should fizz vigorously. If not, replace them.
- Not Preheating the Iron: A cold iron leads to pale, dense, and soggy waffles. Patience pays off!
Frequently Asked Questions: Your Sourdough Waffle Queries Answered
1. Q: What if my sourdough discard is very thick or dry?
A: Add a splash (1-2 tablespoons) of milk or water to the wet ingredients to reach the desired batter consistency. It should pour easily but not be runny.
2. Q: Can I use sourdough starter instead of discard?
A: Yes, but discard is typically thinner and more active. If using starter, you might need to add a little more liquid (milk/water) to achieve the right batter thickness. Discard is ideal.
3. Q: Why are my waffles dense and not fluffy?
A: Common causes are overmixing the batter, using old baking powder/baking soda, or an iron that isn’t hot enough. Ensure you mix minimally, use fresh leavening, and preheat thoroughly.
4. Q: Can I make these waffles without a waffle iron?
A: While a waffle iron is traditional, you can make them in a skillet. Pour about 1/2 cup batter onto a lightly greased, preheated skillet over medium heat. Cook until golden brown on one side, then carefully flip and cook the other side until set and golden. They won’t be as crispy as iron-cooked waffles but will still be delicious.
5. Q: How long do leftover waffles last in the fridge?
A: Stored in an airtight container in the refrigerator, they will keep for 2-3 days. Reheat thoroughly before eating.
6. Q: Can I freeze the batter instead of the cooked waffles?
A: Yes! Pour the batter into a greased muffin tin or a freezer-safe container. Freeze solid. When ready to cook, thaw slightly if frozen solid, then pour into a preheated waffle iron and cook as usual, adding a minute or two to the cooking time. This is great for batch cooking.
The Final Verdict: A Brunch Essential
There you have it – the recipe for truly Decadent Sourdough Discard Sweet Vanilla Breakfast Waffles. They transform humble sourdough discard into a breakfast sensation, offering a perfect balance of tangy sourdough depth and comforting vanilla sweetness. The light, crispy exterior gives way to a tender, fluffy interior that’s simply irresistible. Whether you’re treating yourself on a lazy weekend morning or need a reliable, crowd-pleasing brunch option, these waffles deliver. They embody the joy of baking with what you have, creating something extraordinary from the ordinary. So, embrace your sourdough discard, preheat that waffle iron, and get ready to savor the delicious results. Enjoy every golden, crispy, fluffy bite!
")