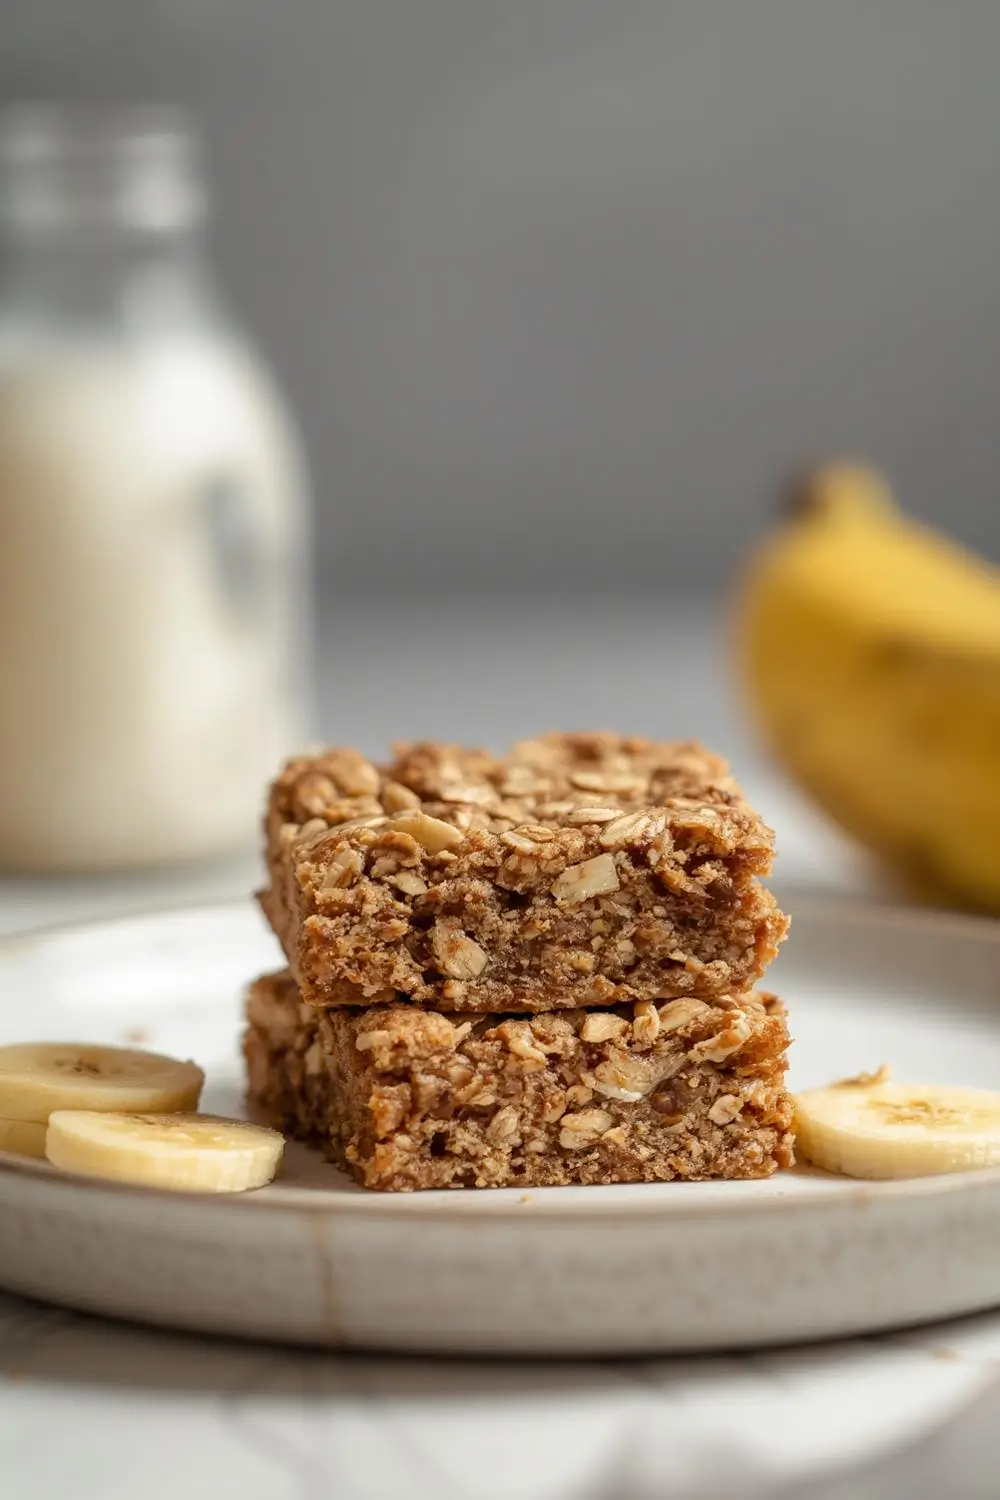
The Ultimate Guide toEasy Banana Oatmeal Breakfast Bars: Your New Morning Hero
Picture this: you stumble into the kitchen, bleary-eyed, craving something warm, comforting, and genuinely nourishing to kickstart your day. Something that doesn’t require a PhD in culinary arts or a trip to the grocery store. Enter the humble banana oatmeal breakfast bar. These soft-baked wonders are the answer to your chaotic mornings. Packed with the natural sweetness of ripe bananas, the hearty goodness of oats, and a touch of wholesome sweetness, they offer a perfect balance of fiber, complex carbs, and a gentle energy boost. Forget the sugary cereal or the rushed pastry; these bars are your new best friend, designed for effortless meal prep and satisfying those breakfast cravings without the guilt.
Why These Bars Are a Game-Changer
Let’s be honest, mornings can be a whirlwind. Finding time to sit down for a proper breakfast often feels impossible. These bars solve that problem beautifully. They’re incredibly simple to make, requiring minimal active time and basic pantry staples. The beauty lies in their versatility and adaptability. Whether you’re a seasoned baker or a kitchen newbie, these bars welcome you with open arms. They’re naturally sweetened, making them a healthier alternative to many store-bought options, and they freeze brilliantly, meaning you can batch them up on a lazy Sunday and have grab-and-go breakfasts ready for weeks. Plus, they’re incredibly forgiving – a little too much banana? No problem. A dash of extra oats? Perfectly fine. They adapt to your needs, ensuring you always have a delicious, satisfying breakfast option at the ready.
The Heart of the Bar: Ingredients Explained
The magic of these bars comes from a few key players, each contributing something special:
- Ripe Bananas (2 large): The star of the show! Ripe bananas (spotted, soft, sweet) are essential. They provide natural sweetness, moisture, and binding properties. Underripe bananas will make the bars dry and less flavorful. Mashed thoroughly is key.
- Old-Fashioned Rolled Oats (2 cups): These are the backbone. They provide fiber, texture, and a comforting, hearty base. Avoid quick oats as they can make the bars too dense and gummy. A quick pulse in a food processor can help if you prefer a slightly finer texture, but whole oats are ideal.
- All-Purpose Flour (1 cup): This adds structure and helps bind everything together. You can use whole wheat flour for a nuttier flavor and extra fiber, or gluten-free flour blend if needed. Avoid almond flour or coconut flour here as they behave differently.
- Baking Powder (1 tsp): This is your rising agent, ensuring the bars have a pleasant, slightly fluffy texture rather than being flat and dense.
- Salt (1/2 tsp): A crucial pinch! Salt enhances all the other flavors, making the sweetness pop and balancing the oats beautifully.
- Cinnamon (1 tsp): Adds warmth and depth, complementing the banana perfectly. Feel free to add a pinch of nutmeg or allspice if you like.
- Pure Maple Syrup or Honey (1/4 cup): This adds a touch of liquid sweetness and helps bind the mixture. Adjust to taste if you prefer them sweeter or less sweet.
- Unsalted Butter, Melted (1/2 cup): Provides richness, moisture, and helps everything bind together. You can use coconut oil for a dairy-free option, or a neutral oil like avocado oil.
- Vanilla Extract (1 tsp): A splash of pure vanilla elevates the flavor profile, adding complexity.
- Optional Add-ins: This is where you can get creative! Fold in 1/2 cup of chopped nuts (walnuts, pecans), seeds (chia, flax, pumpkin), or chocolate chips (dairy-free if needed) for extra texture and flavor. A handful of dried fruit like raisins or cranberries also works wonderfully.
Step-by-Step: Crafting Your Breakfast Bars
Making these bars is straightforward, but attention to detail ensures the best results:
1. Preheat & Prep: Start by preheating your oven to 350°F (175°C). Lightly grease a 9×9 inch baking pan or line it with parchment paper, leaving an overhang for easy removal. This step is crucial for clean-up and perfect bars.
2. Mash the Bananas: In a large bowl, thoroughly mash the ripe bananas with a fork until smooth. There should be no large chunks left. This releases their natural sugars and moisture.
3. Combine Dry Ingredients: In a separate medium bowl, whisk together the rolled oats, all-purpose flour, baking powder, salt, and cinnamon. This ensures even distribution of leavening and spices.
4. Mix Wet Ingredients: To the mashed bananas, add the melted butter (or oil), maple syrup or honey, and vanilla extract. Whisk until well combined and smooth.
5. Bring it Together: Pour the wet banana mixture into the bowl with the dry ingredients. Stir gently with a spatula or wooden spoon until just combined. The mixture will look thick and slightly crumbly. Don’t overmix! A few streaks of flour are fine.
6. Fold in Add-ins: If using nuts, seeds, or chocolate chips, gently fold them into the batter now.
7. Transfer to Pan: Spread the thick batter evenly into your prepared baking pan. Use damp fingers or the back of a spoon to press it down firmly and evenly into the corners. This ensures even baking and clean slices later.
8. Bake: Place the pan in the preheated oven and bake for 25-35 minutes. The bars are done when the top is golden brown, the edges look set, and a toothpick inserted into the center comes out clean or with just a few moist crumbs (not wet batter). Ovens vary, so start checking at 25 minutes.
9. Cool Completely: This is non-negotiable! Remove the pan from the oven and place it on a wire rack. Let the bars cool completely in the pan – at least 1-2 hours. Cutting them warm will make them crumbly and messy. Patience pays off here for perfect slices.
10. Slice & Store: Once completely cool, lift the bars out of the pan using the parchment paper overhang. Place them on a cutting board and slice into squares or rectangles. Store them in an airtight container at room temperature for up to 3 days, or freeze them for up to 3 months.
Variations to Keep Things Interesting
The beauty of this recipe is its adaptability:
- Nutty Delight: Add 1/2 cup chopped walnuts or pecans for a satisfying crunch and healthy fats.
- Seed Power: Boost fiber and omega-3s with 1/2 cup chia seeds, flax seeds (ground), or pumpkin seeds.
- Chocolate Lover’s Dream: Fold in 1/2 cup dairy-free chocolate chips or chunks for a decadent twist.
- Fruit Fanatic: Add 1/2 cup dried cranberries, blueberries, or chopped apricots for bursts of fruity sweetness.
- Spiced Up: Increase the cinnamon to 1.5 tsp and add 1/2 tsp ground ginger or cardamom for a different flavor profile.
- Gluten-Free Option: Use a 1:1 gluten-free all-purpose flour blend instead of regular flour. Ensure your oats are certified gluten-free if needed.
- Vegan Option: Use melted coconut oil instead of butter and a flax egg (1 tbsp ground flax + 3 tbsp water, let sit 5 mins) instead of an egg if the recipe calls for it (though this recipe doesn’t typically use eggs).
Storage & Reheating: Keeping Them Perfect
- Room Temperature: Stored in an airtight container, they stay fresh for 3-4 days. The oats retain their texture well.
- Refrigeration: If your kitchen is warm, or you prefer a slightly chewier texture, store them in the fridge for up to 5 days. Bring them to room temperature before eating.
- Freezing: For long-term storage, wrap individual bars tightly in plastic wrap or place them in a freezer-safe bag. They freeze beautifully for up to 3 months. Thaw at room temperature or microwave for 15-20 seconds for a quick warm-up.
- Reheating: For the best texture, reheat frozen bars in the microwave for 15-20 seconds or wrap a room-temperature bar in foil and warm it in a 300°F (150°C) oven for 5-7 minutes. Avoid the toaster – they can become too hard.
Common Mistakes to Avoid
- Underripe Bananas: This is the biggest culprit for dry bars. Ensure your bananas are very ripe and soft.
Overmixing: Overmixing develops gluten in the flour, leading to tough, chewy bars instead of soft and tender. Mix just* until combined.
- Cutting Too Soon: Cutting warm bars is a recipe for crumbles. Wait for complete cooling.
- Overbaking: While they need time to set, overbaking makes them dry. Start checking at 25 minutes.
- Skipping the Press: Not pressing the batter firmly into the pan results in uneven baking and crumbly bars. Use damp hands or a spatula to pack it down.
Your Burning Questions Answered
- Can I use quick oats instead of rolled oats? It’s not recommended. Quick oats absorb more liquid and can make the bars dense and gummy. If you must, use slightly less (about 1 3/4 cups) and expect a different texture.
- Can I make these without flour? It’s challenging to get the right structure without some form of flour (all-purpose or GF blend). You could try a flourless oat bar using more oats and binding agents like eggs or flax eggs, but the texture will be different.
- How do I prevent the bars from sticking to the pan? Greasing the pan well or lining it with parchment paper is essential. If they stick slightly, run a knife around the edges and let them cool completely before lifting.
- Can I add peanut butter? Yes! Stir in 2-3 tablespoons of creamy peanut butter into the wet ingredients before adding the dry ingredients. It adds richness and flavor.
- Are these suitable for kids? Absolutely! They’re naturally sweet, soft, and packed with fiber. Perfect for lunchboxes or after-school snacks.
- Can I make a larger batch? Definitely! Double the recipe and use a 9×13 inch pan. Adjust baking time slightly (check at 35-40 minutes).
- What if my bars are too sweet? Simply reduce the maple syrup or honey by 1-2 tablespoons next time. The bananas provide natural sweetness, so you might not need as much added sweetener.
The Final Bite: Why These Bars Belong in Your Routine
These Easy Banana Oatmeal Breakfast Bars are more than just a recipe; they’re a practical solution for nourishing yourself well, even on your busiest days. They embody the simplicity and comfort of homemade food, crafted from wholesome ingredients you likely have on hand. The soft, moist texture, the warm embrace of cinnamon, and the subtle sweetness of ripe bananas create a breakfast experience that’s both satisfying and energizing. By making them yourself, you control the ingredients, avoiding unnecessary additives and excess sugar found in many store-bought options. They freeze beautifully, turning a single baking session into a month’s worth of ready-to-eat breakfasts. Whether you enjoy them warm from the oven, chilled from the fridge, or thawed from the freezer, each bite is a reminder that starting your day right doesn’t have to be complicated. So, gather your ripe bananas, grab your oats, and let’s bake up a batch of breakfast happiness. Your future self (and your taste buds) will thank you.
")