Welcome to the wonderful world of baking! If you’ve ever looked at a picture of a perfectly golden, gooey cinnamon roll and thought, “I could never make that,” I’m here to tell you a secret: you absolutely can. Making cinnamon roll dough from scratch is easier than you might think, especially when you start with a simple, beginner-friendly recipe. Forget complicated techniques or fancy equipment – this guide breaks down the process into manageable steps, focusing on creating a soft, elastic dough that forms the perfect base for those irresistible cinnamon rolls. Whether you’re a complete novice or just need a confidence boost, this recipe is designed to set you up for success. Let’s dive in and transform basic ingredients into something truly special.
The Magic of a Good Dough Base
Before we get our hands sticky, let’s talk about why the dough matters. The foundation of any great cinnamon roll is its dough. It needs to be soft enough to roll out smoothly, elastic enough to hold its shape without tearing, and possess just the right amount of chew and tenderness when baked. This recipe achieves that balance using everyday ingredients and straightforward methods. You won’t need any special tools beyond a large bowl, a clean surface for kneading, and a warm spot for rising. The key is patience and gentle handling – rushing this process can lead to tough rolls, but taking your time ensures light, fluffy results. Ready to get started? Let’s gather our ingredients.
Gathering Your Ingredients: What You’ll Need
Here’s everything you’ll need to create this beginner-friendly cinnamon roll dough. Don’t worry if you don’t have every single item listed; we’ll cover substitutions later!
- All-Purpose Flour (or Bread Flour): This is the backbone of your dough. All-purpose flour works perfectly well for beginners. If you have bread flour, which has slightly more protein (gluten), it will yield an even chewier texture. For this recipe, we’ll use all-purpose.
- Warm Water: Not just any water – it needs to be warm, ideally between 105°F and 110°F (40°C to 43°C). This temperature is crucial. Too hot will kill the yeast; too cold won’t activate it. You can test it with your finger – it should feel comfortably warm, like bath water, not hot.
- Active Dry Yeast: This is the leavening agent that makes your dough rise. Make sure it’s fresh! Check the expiration date. If you’re unsure, you can do a quick “proof” test: mix the yeast with the warm water and a pinch of sugar. If it gets foamy after 5-10 minutes, it’s active and ready to go.
- Granulated Sugar: This does more than just sweeten. It feeds the yeast, helping it activate and produce gas for rising. It also contributes to the dough’s tenderness.
- Salt: Essential for flavor and controlling yeast activity. Don’t skip it!
- Large Egg: Adds richness, structure, and helps bind the dough together. Room temperature is best.
- Unsalted Butter: Softened to room temperature. This adds incredible flavor, tenderness, and richness. Don’t try to melt it – it needs to be soft enough to mix in easily but not melted.
- Milk (or Plant-Based Alternative): We’ll use whole milk for the richest flavor and tenderness, but any milk or a good plant-based alternative (like oat or soy milk) works. Warm it slightly to the same temperature as the water.
- Vanilla Extract: A splash adds a lovely depth of flavor that complements the cinnamon beautifully.
Why These Ingredients Work Together
Each ingredient plays a specific role. The flour provides structure through gluten formation. The yeast consumes the sugar and flour, producing carbon dioxide gas that makes the dough rise. Salt regulates the yeast and enhances flavor. The egg and butter add richness, moisture, and tenderness. The milk contributes to the dough’s softness and flavor. Using warm liquids activates the yeast effectively. This combination creates a dough that’s pliable, rises well, and bakes into tender, flavorful rolls.
Step-by-Step Instructions: From Bowl to Beautiful Dough
Now, let’s get our hands dirty! Follow these steps carefully. Don’t worry if it seems messy at first – kneading is therapeutic and gets easier with practice.
1. Activating the Yeast (The First Step):
* In a small bowl or measuring cup, combine the warm water (105-110°F), a pinch of the granulated sugar, and the active dry yeast. Stir gently to dissolve.
* Let this mixture sit undisturbed for 5-10 minutes. You’ll know it’s working when it becomes foamy on top – this means your yeast is alive and active! If it doesn’t foam, your yeast might be old or the water was too hot/cold. Start over with fresh yeast and warmer/cooler water.
2. Mixing the Dry Ingredients:
* In your large mixing bowl (or the bowl of a stand mixer fitted with a dough hook), whisk together the all-purpose flour and salt. Give it a good stir to distribute the salt evenly.
3. Combining Wet Ingredients:
* In a separate medium bowl, whisk together the warm milk, softened butter (cut into small pieces), the remaining granulated sugar, the egg, and the vanilla extract until smooth.
4. Bringing it Together:
* Pour the activated yeast mixture and the wet ingredient mixture into the bowl with the dry ingredients.
* Using a sturdy spatula or your hands, mix everything together until a shaggy, sticky dough forms. It will look messy, but that’s okay! If using a stand mixer, start on low speed and gradually increase to medium until the dough comes together and pulls away from the sides of the bowl. If mixing by hand, turn the dough out onto a lightly floured surface and begin kneading.
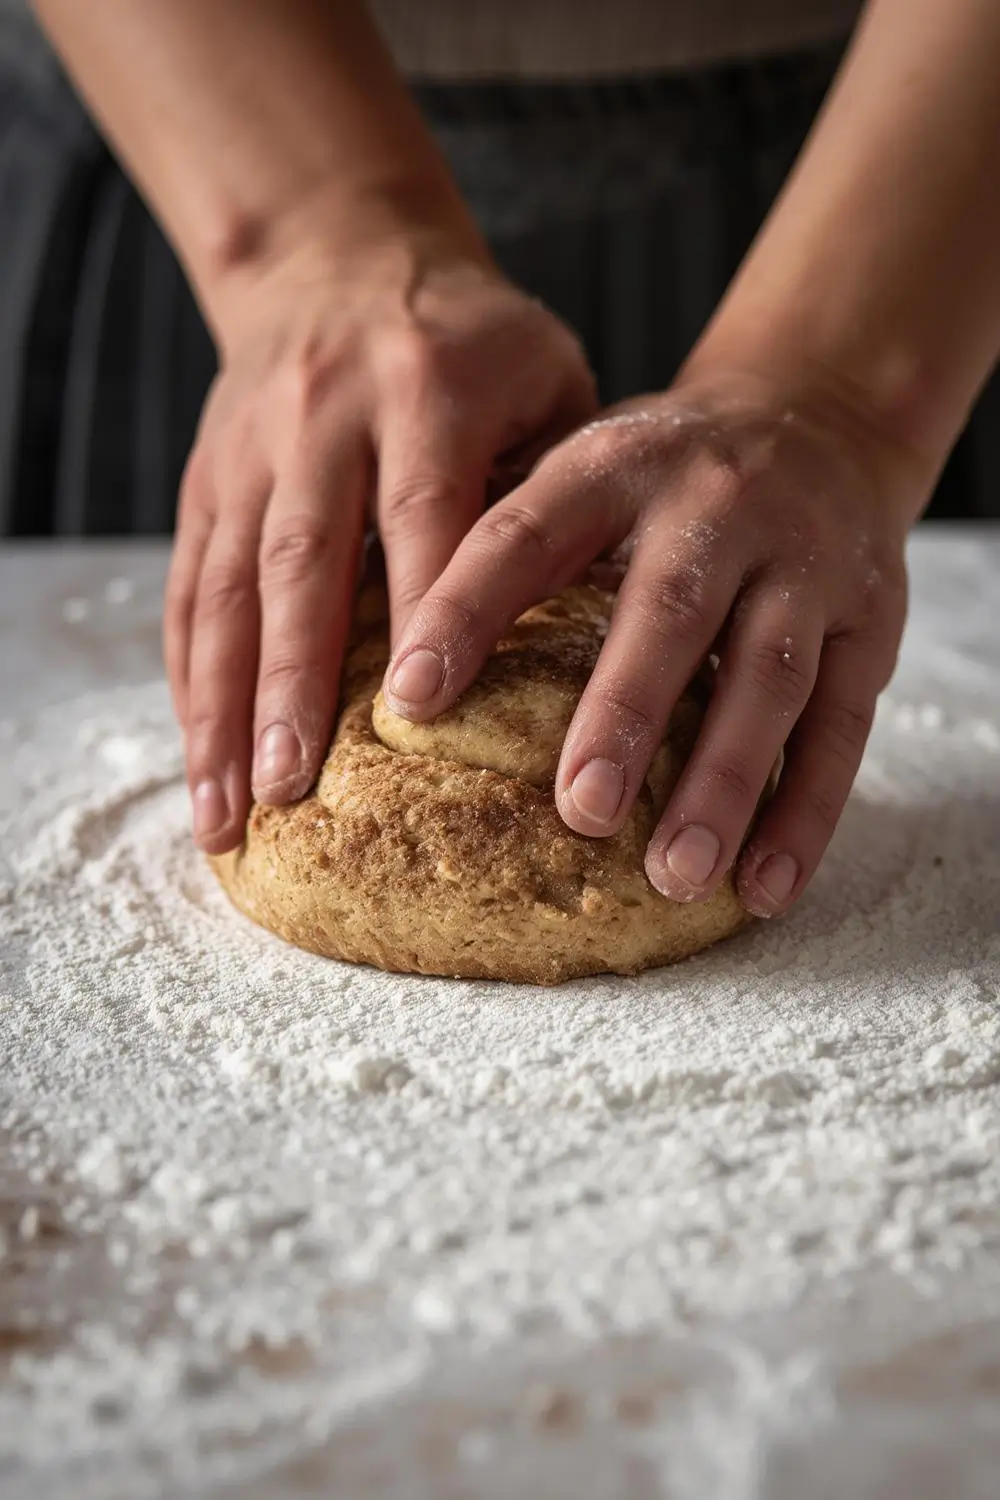
5. Kneading the Dough (The Key to Elasticity):
* Kneading develops the gluten in the flour, giving your dough its structure and elasticity. This is where you transform the shaggy mass into a smooth, supple ball.
* By Hand: Lightly flour your clean work surface. Turn the dough out onto it. Using the heel of your hand, push the dough away from you, then fold it back over itself. Give it a quarter turn and repeat. Do this for about 8-10 minutes. The dough should become smooth, elastic, and slightly tacky but not sticky. It should pass the “windowpane test” – stretch a small piece thin enough to see light through it without tearing.
* Stand Mixer: Knead on medium speed for about 5-7 minutes until the dough is smooth and elastic, pulling away from the sides of the bowl.
* Tip: If the dough is too sticky, add a tablespoon of flour at a time. If it’s too dry, add a teaspoon of warm water at a time. Don’t add too much flour, though – you want a soft, slightly tacky dough.
6. First Rise (Proofing):
* Lightly grease a clean, large bowl with a little oil or non-stick spray. Place the kneaded dough ball into the bowl, turning it once to coat it lightly with oil.
* Cover the bowl tightly with plastic wrap or a damp kitchen towel. Place it in a warm, draft-free spot. A turned-off oven with the light on, a sunny windowsill, or near a warm appliance (like a fridge) works well. Let the dough rise until it has doubled in size. This usually takes 1 to 1.5 hours, but it can vary depending on the warmth of your spot and the yeast activity. Don’t rush it!
7. Punching Down and Shaping:
* Once the dough has doubled, gently punch it down in the center with your fist. This releases the large air bubbles and redistributes the yeast.
* Turn the dough out onto a lightly floured surface. Gently press it into a rough rectangle, about 1-inch thick. Use a rolling pin to roll it out evenly into a large rectangle, roughly 12 inches by 18 inches. Aim for an even thickness.
8. Preparing for Cinnamon Rolls:
* Spread the softened butter evenly over the entire rolled-out dough rectangle, leaving a small border (about 1/2 inch) around the edges.
* In a small bowl, mix together the remaining granulated sugar and your chosen cinnamon (and any other spices like nutmeg or cardamom you might enjoy). Sprinkle this sugar-cinnamon mixture evenly over the buttered dough, again leaving the border clean.
9. Rolling and Cutting:
* Starting from the long edge closest to you, carefully roll the dough up tightly into a log. Try to keep it as tight as possible without squeezing out the filling.
* Using a sharp knife or dental floss (dental floss works great for clean cuts!), gently saw through the log to create 12 equal-sized rolls. A piece of unflavored dental floss wrapped around the log and pulled tight is perfect for this.
* Place the rolls, cut-side up, in a lightly greased 9-inch or 10-inch round or square baking pan. They should fit snugly with a little space between them.
10. Second Rise (Proofing Again):
* Cover the pan loosely with plastic wrap or a damp towel. Let the rolls rise again in a warm place until they are noticeably puffy and have nearly doubled in size, about 30-45 minutes. They should look much fuller than before.
11. Baking to Golden Perfection:
* Preheat your oven to 375°F (190°C) while the rolls are proofing.
* Once the rolls have risen, uncover them and bake in the preheated oven for 18-25 minutes, or until the tops are a beautiful golden brown and the rolls are cooked through. The internal temperature should be around 190°F (88°C) if you have a thermometer. They should sound hollow when tapped on the bottom.
12. Cooling and Enjoying:
* Remove the pan from the oven and let the rolls cool in the pan for at least 10-15 minutes. This allows them to set and makes them easier to handle. Then, carefully transfer them to a wire rack to cool completely before frosting (if desired). Warm rolls are heavenly, but they’re also delicious at room temperature. Enjoy the fruits of your labor!
Variations and Substitutions: Making it Your Own
This basic dough is incredibly versatile! Here are some ideas to customize it:
- Add-Ins: Fold in 1/2 to 1 cup of chopped nuts (walnuts, pecans, almonds) or dried fruit (raisins, cranberries, chopped apricots) into the dough after the first rise and before rolling.
- Spice It Up: Add 1-2 teaspoons of ground cinnamon, nutmeg, or cardamom to the sugar-cinnamon mixture. For a more complex flavor, add 1 teaspoon of orange zest or lemon zest to the filling.
- Flavored Butters: Instead of plain softened butter, mix in 1-2 tablespoons of your favorite jam, lemon curd, or even a spoonful of cinnamon-sugar into the softened butter before spreading.
- Different Sugars: Use brown sugar instead of granulated sugar for the filling for a deeper, caramel-like flavor. You can also mix brown sugar and granulated sugar.
- Flavored Milk: Substitute the milk with almond milk, oat milk, or even coconut milk for a different taste profile.
- Whole Wheat Twist: Substitute up to 50% of the all-purpose flour with whole wheat flour for a nuttier, more nutritious dough. The texture might be slightly denser, but it’s delicious.
Storage and Reheating Tips: Keeping Your Rolls Fresh
- Room Temperature: Store cooled, unfrosted rolls in an airtight container at room temperature for up to 2 days. Frost them just before serving.
- Refrigeration: For longer storage (up to 5 days), refrigerate the rolls in an airtight container. Let them come to room temperature before serving.
Freezing: You can freeze the unbaked rolls. After shaping and placing them in the pan, cover the pan tightly with plastic wrap and foil. Freeze for up to 1 month. When ready to bake, thaw the rolls in the refrigerator overnight. Remove from the fridge, let them come to room temperature (about 30-45 minutes), then bake as directed, adding 5-10 minutes to the baking time. You can also freeze baked* rolls. Cool completely, wrap individually in plastic wrap, then place in a freezer bag. Reheat in the microwave for 20-30 seconds or in a preheated 350°F (175°C) oven for 10-15 minutes until warmed through.
Common Mistakes to Avoid: Baking Wisdom
- Water Temperature: Using water that’s too hot kills the yeast. Too cold won’t activate it. Stick to the 105-110°F range.
- Over-Kneading: While kneading is important, over-kneading can make the dough tough. Knead just until smooth and elastic (8-10 minutes by hand, 5-7 minutes in a mixer).
- Rushing the Rise: Yeast needs time to work. Don’t skip the first rise or rush the second rise. Place the dough in a consistently warm spot.
- Overfilling: Don’t overload the rolls with too much filling. It can make them soggy and harder to roll. A thin, even layer is best.
- Cutting with a Dull Knife: A sharp knife or dental floss ensures clean cuts and prevents squishing the rolls.
- Overbaking: Watch the rolls closely towards the end of baking. They should be golden brown, not dark brown or burnt. They continue to cook slightly after being removed from the oven.
FAQs: Your Cinnamon Roll Dough Questions Answered
- Q: My dough is too sticky. What can I do? A: Add flour, a tablespoon at a time, while kneading. Don’t add too much at once. The dough should be soft and slightly tacky, not wet.
- Q: My dough didn’t rise. Why? A: Check your yeast – it might be expired. Ensure the water was the right temperature (not too hot). Make sure the rising spot was warm enough and draft-free. Give it more time if needed.
- Q: Can I use bread flour instead of all-purpose? A: Yes! Bread flour has more protein, which creates more gluten, resulting in a slightly chewier texture. It works perfectly well.
- Q: Can I make the dough ahead of time? A: Absolutely! You can make the dough, shape it into rolls, and let them rise in the pan overnight in the refrigerator. Bake them in the morning as usual.
- Q: How do I know when the rolls are done baking? A: They should be golden brown on top and sound hollow when tapped on the bottom. An internal temperature of 190°F (88°C) is a good indicator.
- Q: Can I freeze the baked rolls? A: Yes! Cool them completely, wrap individually in plastic wrap, then place in a freezer bag. Reheat in the microwave or a 350°F (175°C) oven until warmed through.
- Q: Why are my rolls dense? A: This often happens if the dough wasn’t kneaded enough to develop the gluten properly, if the yeast wasn’t active, or if the rolls were overbaked. Ensure proper kneading and rising times.
- Q: Can I use a stand mixer for kneading? A: Yes! Using the dough hook on medium speed for 5-7 minutes is perfectly fine and much easier on your hands.
- Q: What’s the best way to store frosted rolls? A: Store frosted rolls in an airtight container at room temperature for up to 1 day. Frost them just before serving for the best texture.
A Warm Conclusion: The Joy of Baking
Creating your own cinnamon roll dough is more than just following a recipe; it’s an act of love and a celebration of simple ingredients transformed into something extraordinary. The process – from the initial mixing and kneading to the patient waiting for the dough to rise, and finally, the rewarding moment of pulling warm, fragrant rolls from the oven – connects you to the heart of baking. It’s a skill that builds confidence and brings immense satisfaction. Remember, baking is not about perfection; it’s about the joy of creating, the delicious results, and the shared moments of enjoyment. So, gather your ingredients, embrace the process, and let the aroma of cinnamon and warm dough fill your kitchen. You’ve got this, and the best cinnamon rolls are waiting for you. Happy baking!
")