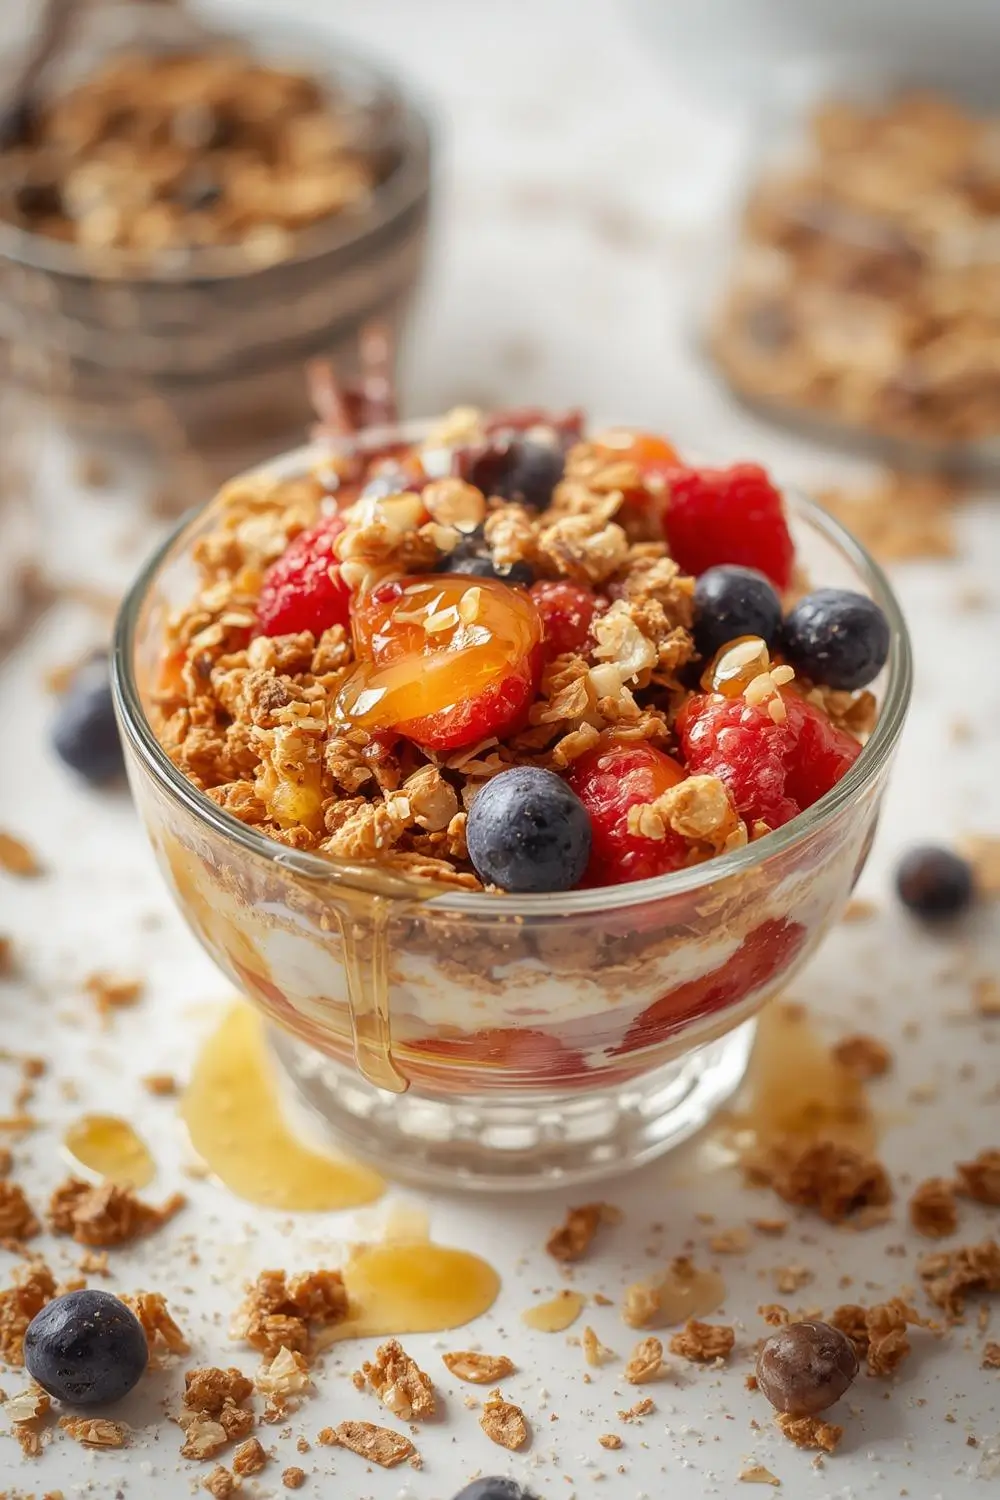
Make Your Own Healthy Homemade Granola in Minutes
There’s something magical about opening your pantry to find a jar of freshly made granola. That sweet aroma of toasted oats and nuts, the satisfying crunch, and the knowledge that you’ve created something truly nourishing – this is what snack-time dreams are made of. Forget expensive store-bought versions loaded with hidden sugars and questionable ingredients. With just a few simple steps, you can whip up custom granola blends perfect for sprinkling over yogurt, pairing with fruit, or nibbling straight from the jar.
What makes homemade granola truly special is its versatility. Unlike commercial varieties that often taste one-note, your DIY version can change with your mood – maybe coconut and mango for tropical vibes one week, cinnamon-apple for cozy autumn energy the next. And here’s the best part: you control every ingredient, ensuring your snack fits your dietary needs without sacrificing that crave-worthy crunch we all love.
Your Essential Granola Toolkit
The Foundation Ingredients
-
- Old-fashioned oats (3 cups) – The hearty base that gives granola its signature texture (certified gluten-free if needed)
-
- Raw nuts (1.5 cups) – Almonds and walnuts work beautifully for crunch and healthy fats
-
- Seeds (1/2 cup) – Pumpkin and sunflower seeds add nutrition and delightful pops of texture
The Binding Sweeteners
-
- Pure maple syrup (1/3 cup) – Adds caramel notes without refined sugars
-
- Coconut oil (1/4 cup melted) – Helps create crispy clusters and adds subtle flavor
The Flavor Boosters
-
- Cinnamon (1 tsp) – Warm spice that complements nearly any mix-in
-
- Vanilla extract (1 tsp) – Enhances all the other flavors
-
- Pinch of sea salt – Balances sweetness and makes flavors pop
Step-by-Step Granola Mastery
1. Mix Dry Components Thoroughly
Preheat your oven to 300°F (150°C). In a large mixing bowl, combine oats, roughly chopped nuts (leave some whole for texture), seeds, and spices. Stir until you see even distribution – no clumps of cinnamon! Tip: Want bigger clusters? Add 1 tablespoon of chia seeds soaked in 3 tablespoons water to help bind the mixture.
2. Create the Sweet Coating
Whisk together maple syrup, melted coconut oil, and vanilla in a separate bowl. Pour this liquid gold over your dry ingredients. Use a silicone spatula to fold everything together until every oat flake glistens. The mixture should hold together slightly when pressed.
3. Spread for Optimal Baking
Line a rimmed baking sheet with parchment paper. Spread your granola mixture in an even layer – no thicker than 1/2 inch anywhere. Press down gently with your spatula to encourage clusting. Bake for 20 minutes, then rotate the pan for even cooking.
4. The Golden Bake
Continue baking another 15-20 minutes until fragrant and golden. Watch closely in the last 5 minutes – granola burns easily! Remove when edges just start turning honey-brown. The granola will crisp up more as it cools. Resist stirring during baking for better clusters.
Creative Flavor Combinations to Try
Tropical Sunset Blend
-
- Add unsweetened coconut flakes during last 5 minutes of baking
-
- Mix in dried mango and pineapple after cooling
-
- Use macadamia nuts instead of walnuts
Chocolate Cherry Energy Booster
-
- Stir in cacao nibs with dried tart cherries after baking
-
- Add 1 tbsp unsweetened cocoa powder to dry ingredients
-
- Use dark chocolate chunks once completely cooled
Apple Pie Spice Delight
-
- Add 1 tsp apple pie spice to dry ingredients
-
- Mix in freeze-dried apple pieces post-baking
-
- Include chopped pecans for autumnal flair
Smart Storage Solutions
Keep your granola crunchy for weeks with these pro tips:
-
- Cool completely before storing (any steam = soggy granola)
-
- Airtight containers work best – glass jars with sealable lids
-
- No refrigeration needed – cool pantry spot is perfect
-
- Freeze for long-term – up to 3 months in freezer bags
5 Newbie Mistakes to Avoid
-
- Overcrowding the pan – leads to steaming instead of toasting
-
- Stirring too often – prevents beautiful clusters from forming
-
- Adding dried fruit before baking – results in burnt bitter pieces
-
- Using quick oats – they turn powdery rather than crisp
-
- Skipping the salt – makes flavors fall flat
Granola Q&A Corner
Can I make this oil-free?
Absolutely! Replace coconut oil with applesauce or mashed banana, though texture will be chewier rather than crisp.
What if I’m allergic to nuts?
Double up on seeds like pumpkin and sunflower. Toasted quinoa flakes also add wonderful crunch.
How do I get bigger clusters?
Press the mixture firmly into the pan before baking. Don’t stir during cooking. Let cool completely before breaking apart.
Can I use steel-cut oats?
Not recommended – they’re too dense. If you want extra chew, substitute up to 1/4 cup rolled oats with steel-cut, but soak them first.
Is granola really healthy?
When made at home with controlled sweeteners, it’s a great source of fiber and healthy fats. Portion control still matters!
How long does homemade granola last?
Stored properly, it stays fresh 2-3 weeks. You’ll probably eat it all long before then though!
The Joy of Homemade Goodness
Once you experience the simple pleasure of pulling a golden batch of homemade granola from your oven, you’ll never look at store-bought versions the same way. This recipe gives you complete control – want extra clusters? Press harder before baking. Prefer more subtle sweetness? Reduce syrup slightly. The kitchen becomes your personal granola laboratory where every experiment leads to delicious discoveries. Whip up a batch today and discover just how rewarding (and tasty) healthy snacking can be. Your future self will thank you when that satisfying crunch hits your taste buds tomorrow morning!
")