Crispy Garlic HerbSourdough Discard Breadsticks: Transform Waste into Wonder
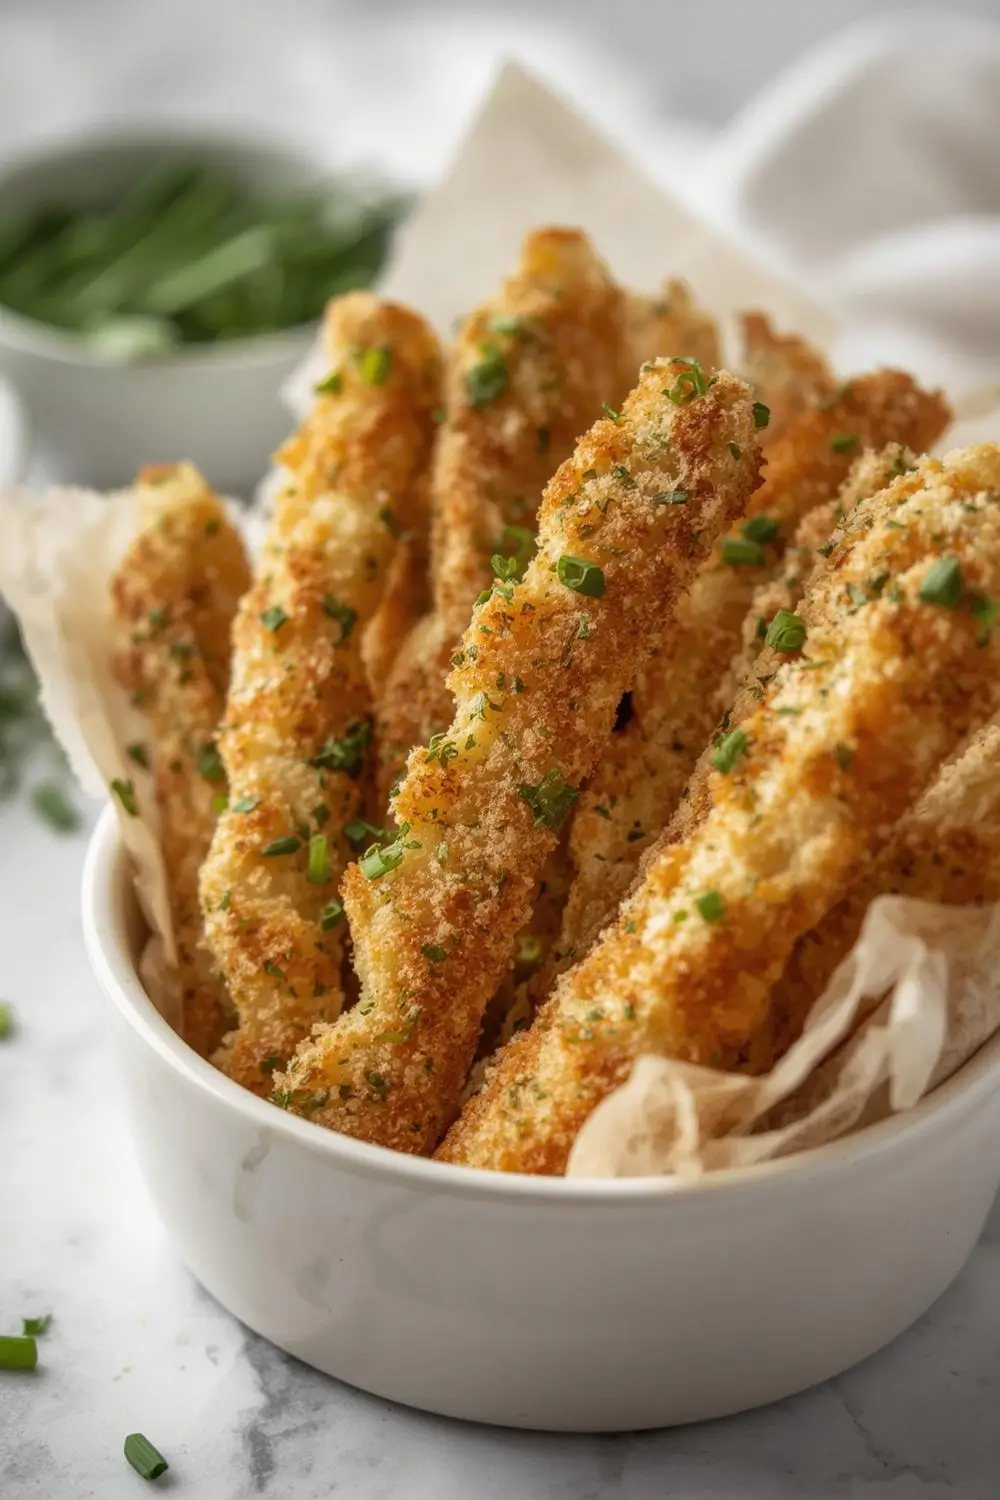
Imagine biting into a warm, golden-brown breadstick, its exterior crackling with satisfying crispness while the interior remains tender and pillowy soft. Now, imagine that breadstick bursting with the vibrant, savory punch of garlic and fresh herbs, all while being a clever way to use up that seemingly useless sourdough discard sitting in your fridge. Welcome to the magic of these Easy Homemade Sourdough Discard Garlic Herb Breadsticks. They’re not just a delicious snack; they’re a celebration of resourcefulness, transforming kitchen scraps into pure comfort food perfection.
If you bake sourdough bread, you know the familiar cycle: you feed your starter, it bubbles and rises, you bake a beautiful loaf, and then you’re left with a small pool of discard. It’s often discarded, but why waste such potential? This discard is packed with flavor and natural leavening power, perfect for creating something entirely new and delightful. These breadsticks harness that discarded sourdough to create a base that’s subtly tangy, deeply flavorful, and incredibly versatile. Paired with a generous sprinkle of garlic powder, dried herbs, and fresh chives or parsley, they become an irresistible savory treat.
The beauty of these breadsticks lies in their simplicity and speed. They require minimal active time, mostly waiting for the dough to rest and rise. The result is a batch of golden, crispy-on-the-outside, tender-on-the-inside breadsticks that are perfect for dipping into olive oil, spreading with soft cheese, or simply enjoying plain. They’re a fantastic way to showcase the unique character of your sourdough starter while providing a satisfying, homemade snack that feels special.
Why You’ll Love These Breadsticks:
- Zero Waste: Utilizes your sourdough discard effectively.
- Flavor Bomb: Garlic and herbs create an intensely savory profile.
- Perfect Texture: Crispy exterior, soft, chewy interior.
- Quick & Easy: Minimal active prep time.
- Versatile: Serve as an appetizer, snack, or side.
- Beginner Friendly: Requires no special equipment or advanced techniques.
Ready to turn your discard into delicious magic? Let’s dive into creating these irresistible garlic herb breadsticks.
Ingredients: The Foundation of Flavor
The beauty of this recipe is its simplicity. You likely have most of these ingredients on hand, especially if you bake sourdough regularly. Here’s what you’ll need:
- Sourdough Discard: The star of the show! Use about 1 cup (240ml) of discard. It should be relatively thick, not soupy. If your discard is very thin, you might need a touch more flour. The discard provides the tangy base and natural leavening.
- All-Purpose Flour: Provides structure. You’ll need about 1 1/2 to 1 3/4 cups (190-220g). The exact amount can vary slightly depending on your discard’s hydration and the humidity in your kitchen. Start with 1 1/2 cups and add more as needed.
- Water: Warm water helps activate the sourdough discard and hydrate the flour. Use about 1/2 cup (120ml). It should be lukewarm, not hot.
- Olive Oil: Adds richness and helps with tenderness. About 2 tablespoons (30ml).
- Garlic Powder: The essential savory punch. Use 1 1/2 to 2 teaspoons, depending on your garlic love.
- Dried Herbs: A classic blend like Italian seasoning (oregano, basil, thyme, rosemary) works wonderfully. Use 1 1/2 to 2 teaspoons.
- Salt: Essential for flavor. Use 1 teaspoon.
- Fresh Herbs (Optional but Recommended): Chives or parsley add a lovely fresh, green note. Chop about 2 tablespoons finely.
- Cornmeal or Semolina Flour (for dusting): Helps prevent sticking and adds a subtle texture.
Why These Ingredients Work Together:
- Sourdough Discard: Provides tang, flavor, and some leavening. It’s the unique character of your bread.
- Flour & Water: Form the dough structure. The discard adds moisture and flavor.
- Olive Oil: Tenderizes the crumb and adds richness.
- Garlic Powder & Dried Herbs: Deliver the signature savory, aromatic flavor.
- Salt: Balances and enhances all the other flavors.
- Fresh Herbs: Brighten the overall taste and add visual appeal.
Step-by-Step Instructions: From Bowl to Golden Perfection
Creating these breadsticks is straightforward. Follow these steps carefully for the best results:
1. Combine the Base: In a large mixing bowl, whisk together the sourdough discard, warm water, and olive oil until smooth. This is your wet base.
2. Add Dry Ingredients: Gradually add the all-purpose flour, garlic powder, dried herbs, and salt to the wet mixture. Stir with a wooden spoon or your hands until a shaggy dough forms. It will be sticky.
3. Knead Briefly: Turn the dough out onto a lightly floured surface. Knead it for just 1-2 minutes. The goal is to bring it together into a cohesive ball. Over-kneading isn’t necessary as the sourdough discard provides some elasticity. The dough should be smooth but still slightly tacky.
4. First Rise (Rest): Place the dough ball in a lightly oiled bowl, turning it once to coat. Cover the bowl tightly with plastic wrap or a damp kitchen towel. Let it rest at room temperature for 30-60 minutes. This allows the sourdough discard to begin working its magic, making the dough easier to handle and adding subtle flavor development.
5. Shape the Sticks: After the rest, gently deflate the dough. Turn it out onto a lightly floured surface. Divide it into 8-10 equal pieces. Roll each piece into a long, thin rope, about 8-10 inches long. You can make them thicker or thinner depending on your preference – thinner for more crispness, thicker for a chewier bite.
6. Second Rise (Optional but Recommended): Place the shaped sticks on a baking sheet lined with parchment paper or a silicone mat. Cover them loosely with plastic wrap or a towel. Let them rest for another 15-20 minutes. This second rise helps them puff up slightly before baking, contributing to a better texture.
7. Preheat & Prep: While the sticks rise, preheat your oven to 400°F (200°C). Lightly grease a baking sheet or line it with parchment paper. If you have cornmeal or semolina, sprinkle a little on the parchment.
8. Brush & Sprinkle: In a small bowl, mix 1 tablespoon of olive oil with 1 teaspoon of water. Brush this mixture lightly over the tops of the breadsticks. This helps them brown beautifully. Generously sprinkle the tops with garlic powder, dried herbs, and chopped fresh herbs (if using).
9. Bake to Golden Perfection: Place the baking sheet in the preheated oven. Bake for 18-25 minutes, rotating the pan halfway through, until the breadsticks are deep golden brown and sound hollow when tapped on the bottom. The exact time depends on their thickness and your oven.
10. Cool & Serve: Remove the breadsticks from the oven and transfer them to a wire rack to cool for a few minutes. They are best enjoyed warm, right out of the oven, when the exterior is at its crispiest. Let them cool slightly before serving to avoid burning your mouth!
Tips for Success:
- Don’t Overmix: Once the flour is incorporated, stop mixing. Overmixing develops too much gluten, leading to tough breadsticks.
- Flour Your Surface: Keep a light dusting of flour handy when shaping the dough to prevent sticking.
- Don’t Skip the Rises: The resting periods allow the dough to relax and the sourdough flavor to develop slightly. It makes shaping easier.
- Watch the Oven: Ovens vary. Start checking the breadsticks at 18 minutes. They should be golden brown and sound hollow.
- Brush Generously: The olive oil brush is crucial for browning and flavor. Don’t skip it.
- Use Fresh Herbs: If you have them, fresh chives or parsley add a wonderful brightness that dried herbs alone can’t match.
Variations and Substitutions: Make it Your Own
The beauty of this recipe is its adaptability. Here are some ideas to customize your garlic herb breadsticks:
- Herb Swap: Experiment with different herb blends! Try rosemary and thyme, basil and oregano, or even a touch of lemon zest with dill.
- Cheese Twist: Stir 1/4 cup of grated Parmesan or sharp cheddar into the dough before shaping for cheesy, flavorful bites.
- Spicy Kick: Add 1/4 teaspoon of red pepper flakes or a pinch of cayenne pepper to the garlic and herb mixture.
- Sesame Seed: Sprinkle sesame seeds over the brushed tops before baking for added crunch and nuttiness.
- Olive Oil Infusion: For extra garlic flavor, infuse your olive oil with a smashed garlic clove before brushing. Strain it before using.
- Whole Wheat Option: Substitute up to 1/2 cup of the all-purpose flour with whole wheat flour for a nuttier flavor and denser texture (may require slightly more water).
- Sweet Finish: Brush the tops with a little honey or maple syrup mixed with water before baking for a sweet-savory contrast.
Storage and Reheating: Keeping the Crunch
These breadsticks are best enjoyed fresh and warm. However, you can store them for later:
- Room Temperature: Place cooled breadsticks in an airtight container or resealable bag. They will stay fresh for 1-2 days. The exterior may soften slightly.
- Refrigeration: For longer storage (up to 4 days), refrigerate the breadsticks in an airtight container. They will soften more quickly.
- Freezing: For maximum freshness, freeze the unbaked* shaped sticks on a baking sheet until solid (flash-freeze), then transfer to a freezer bag or container. Freeze for up to 3 months. Bake from frozen, adding 5-7 minutes to the baking time, or thaw at room temperature for 30-60 minutes before baking as directed.
- Reheating: To restore crispness:
* Oven: Preheat oven to 350°F (175°C). Place breadsticks on a baking sheet and heat for 5-10 minutes until warmed through and crisp.
* Air Fryer: Preheat air fryer to 350°F (175°C). Heat breadsticks for 2-4 minutes until crisp.
* Toaster Oven: Similar to the oven method, use a toaster oven for a quick reheat.
Microwave: Not recommended* as it makes them soggy, but if necessary, heat for 10-15 seconds on high, then crisp in the oven or air fryer.
Common Mistakes to Avoid: Ensuring Perfect Results
- Using Too Much Flour: Adding too much flour during kneading makes the breadsticks dense and tough. Add flour sparingly only if the dough is extremely sticky and not coming together.
- Over-Kneading: Kneading beyond the initial 1-2 minutes develops excessive gluten, resulting in a tough texture.
- Skipping the First Rise: This rest period is crucial for the dough to relax and become easier to shape.
- Under-Baking: Breadsticks that are pale and doughy inside need more time. They should be deep golden brown.
- Not Brushing with Oil: Skipping the oil brush means less browning and less flavor.
- Using Cold Discard: If your discard is very cold from the fridge, let it come to room temperature slightly before using. Cold discard can make the dough harder to work with.
- Overcrowding the Pan: Give the breadsticks space to expand and brown evenly. Don’t cram too many on one sheet.
Frequently Asked Questions (FAQs)
- Q: Can I use sourdough starter instead of discard?
A: Yes! If you have active starter, you can use it, but you’ll likely need less flour. Start with 1 cup of starter and adjust the flour to 1 1/2 cups, adding a splash more water if needed. The flavor will be similar.
- Q: My dough is too sticky. What should I do?
A: Add flour a little at a time while kneading. Don’t add too much at once. The dough should be manageable but still slightly tacky.
- Q: Can I make these without an oven?
A: Unfortunately, no. Baking is essential for the crisp exterior and cooked interior.
- Q: How long do they last?
A: Best eaten fresh! Stored properly at room temperature, they last 1-2 days. Refrigeration extends it to 3-4 days. Freeze for longer storage.
- Q: Can I make them gluten-free?
A: This recipe uses traditional wheat flour. Gluten-free breadsticks require specific gluten-free flour blends and binding agents, which would alter the texture significantly. This recipe is not designed for gluten-free.
- Q: Can I use a bread machine?
A: Yes! Use the dough cycle for the first rise. Then shape and bake as directed. Adjust flour slightly if needed.
- Q: Why are my breadsticks not crisp?
A: They might be underbaked. Ensure they are deep golden brown and sound hollow when tapped. Also, ensure they have space to crisp properly in the oven. Overcrowding can prevent crisping.
Conclusion: Savor the Simplicity
Creating these Crispy Garlic Herb Sourdough Discard Breadsticks is more than just baking a snack; it’s a delightful journey into the heart of sourdough baking. It transforms what might seem like kitchen waste into a treasure trove of flavor and texture. The process is straightforward, requiring minimal active time but rewarding you with a batch of golden, savory bites that are perfect for any occasion. Whether you enjoy them dipped in olive oil, alongside a bowl of soup, or simply as a satisfying snack, these breadsticks embody the joy of using what you have to create something truly special. They’re a testament to the magic of sourdough and the simple pleasures of homemade food. So, gather your discard, embrace the aroma of garlic and herbs, and let’s get baking! Enjoy every crispy, flavorful bite.
")