The Ultimate Easy Make-AheadCinnamon Roll Tray Bake: Gooey, Glazed Perfection in Under an Hour!
Imagine waking up to the irresistible aroma of cinnamon and warm dough filling your kitchen. No need to spend hours kneading and waiting for rolls to rise – this Easy Make-Ahead Cinnamon Roll Tray Bake delivers all the gooey, cinnamon-spiced joy in a single, effortless tray. Perfect for busy mornings, lazy Sundays, or impressing guests at brunch, this recipe transforms simple ingredients into bakery-worthy treats ready in under an hour. Forget complicated steps and fussy techniques; this is cinnamon roll simplicity at its finest, designed for maximum flavor and minimum fuss.
Why This Tray Bake is a Game-Changer:
- Speed: Ready in under an hour from start to finish.
- Ease: No rolling pins, no intricate shaping. Just mix, pour, bake, and glaze.
- Make-Ahead Magic: Prepare the dough and assemble the tray the night before. Pop it in the oven in the morning for fresh, warm rolls.
- Crowd-Pleasing: One pan feeds a crowd beautifully.
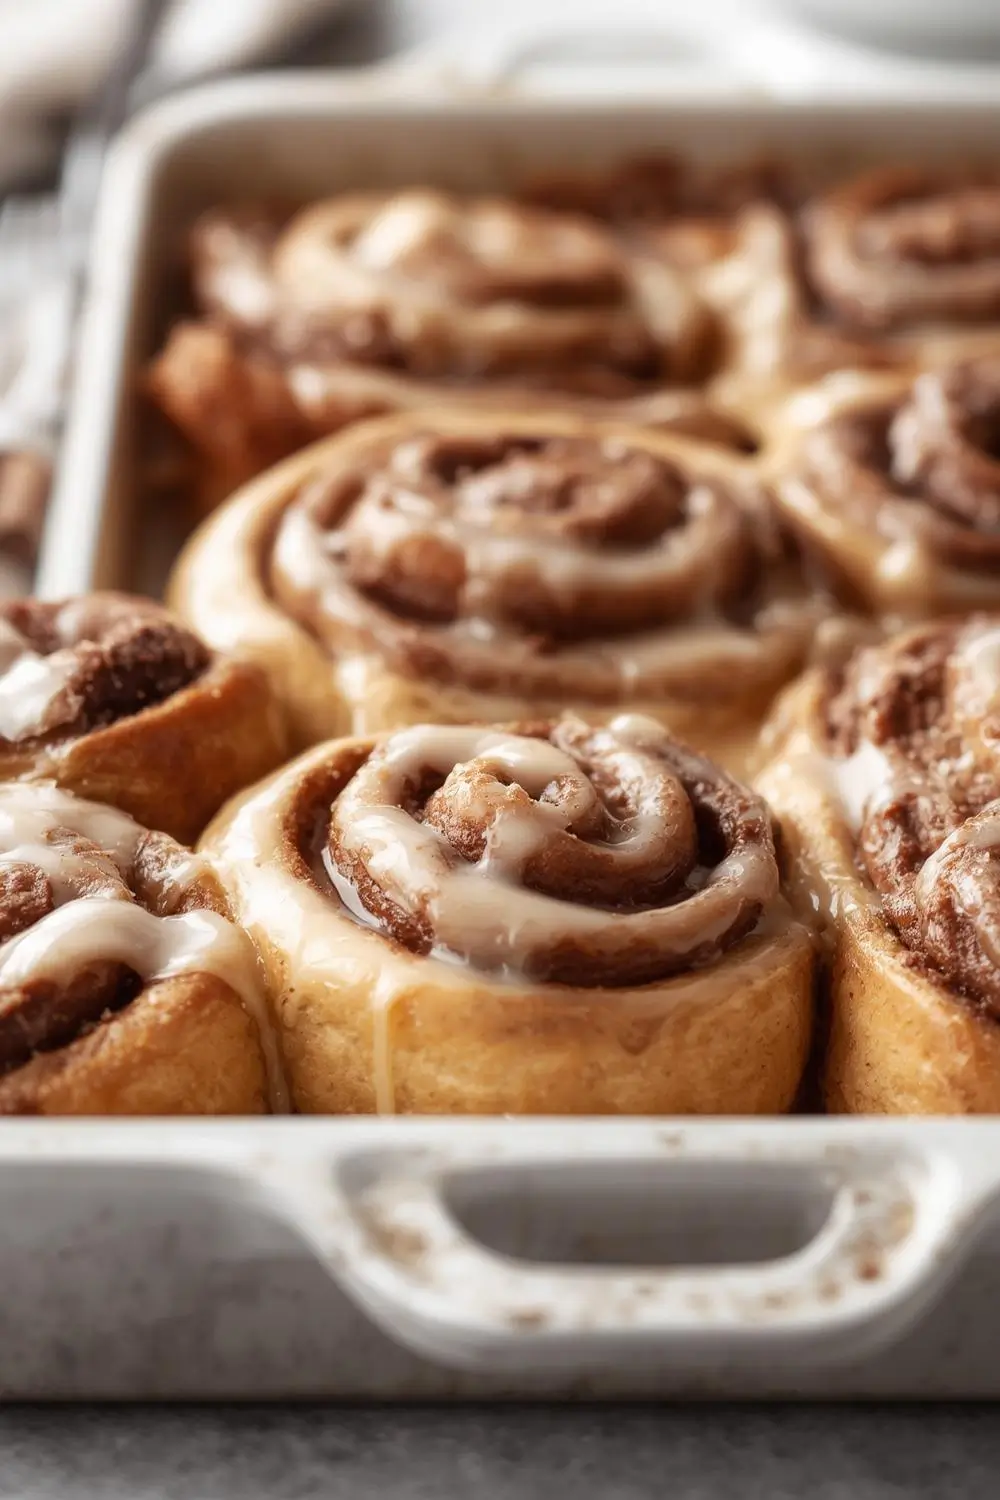
- Gooey Goodness: The secret lies in the generous cinnamon filling and the perfect bake time, ensuring every bite is melt-in-your-mouth delicious.
- Vanilla Glaze Perfection: A simple, sweet vanilla glaze elevates these rolls without overpowering the cinnamon.
Gather Your Ingredients: The Foundation of Flavor
Before you begin, ensure you have these essentials on hand. Don’t worry if you don’t have every single item listed; we’ll cover substitutions later!
- For the Dough:
* 2 ¼ teaspoons (1 standard packet) Active Dry Yeast (or Instant Yeast)
* 1 cup (240ml) Warm Milk (Whole milk is best, but any milk works)
* ¼ cup (50g) Granulated Sugar
* ¼ cup (57g) Unsalted Butter, melted and slightly cooled
* 1 large Egg, at room temperature
* 1 teaspoon Salt
* 4 cups (500g) All-Purpose Flour (plus extra for dusting)
- For the Cinnamon Filling:
* ½ cup (100g) Packed Brown Sugar
* 2 tablespoons Ground Cinnamon
* ¼ cup (57g) Unsalted Butter, softened (room temperature)
- For the Vanilla Glaze:
* 1 cup (120g) Powdered Sugar (Confectioners’ Sugar)
* 2 tablespoons Milk (or cream, or plant-based milk)
* ½ teaspoon Pure Vanilla Extract
* Pinch of Salt (optional, enhances sweetness)
Step-by-Step Instructions: From Bowl to Tray in Minutes
1. Activate the Yeast (The Magical Start): In a large mixing bowl, combine the warm milk, granulated sugar, and yeast. Stir gently and let it sit for 5-10 minutes. You’ll see it become frothy and foamy – this means your yeast is active and ready to work its magic! If it doesn’t foam, your yeast might be expired, and you’ll need fresh yeast.
2. Mix the Wet Ingredients: Add the melted butter, egg, and salt to the yeast mixture. Whisk everything together until well combined and smooth.
3. Incorporate the Flour: Gradually add the flour, about 1 cup at a time, stirring with a wooden spoon or sturdy spatula after each addition. The dough will start to come together and become quite sticky. Don’t worry; this is normal. Once the flour is mostly incorporated, turn the dough out onto a lightly floured surface.
4. Knead the Dough (Gentle Touch): Knead the dough for about 5-7 minutes. This develops the gluten just enough for a good rise without making it tough. Use the heel of your hand to push the dough away from you, fold it back over itself, and give it a quarter turn. Add small amounts of flour only if the dough is extremely sticky and sticking to your hands excessively. The goal is a smooth, elastic dough that springs back slightly when poked. It shouldn’t be stiff.
5. First Rise (The First Rest): Place the kneaded dough in a lightly oiled bowl, turning it once to coat. Cover the bowl tightly with plastic wrap or a damp kitchen towel. Let it rise in a warm, draft-free spot for 1 to 1.5 hours, or until it has doubled in size. This is where the yeast does its work, creating air pockets for lightness.
6. Prepare the Filling: While the dough rises, make your cinnamon filling. In a small bowl, combine the brown sugar and cinnamon. Add the softened butter and mix until it forms a thick paste. Set aside.
7. Shape the Tray Bake (No Rolling Required!): Once the dough has doubled, punch it down gently to release the air. Turn it out onto a lightly floured surface. Using a rolling pin, roll the dough into a large rectangle, roughly 12×18 inches (30×45 cm). Aim for an even thickness, about ¼ to ½ inch thick.
8. Spread the Filling & Roll Up: Spread the cinnamon butter paste evenly over the entire surface of the dough, leaving a small border around the edges. Starting from one of the longer sides, carefully roll the dough up tightly into a log. Pinch the seam closed firmly to seal.
9. Cut and Arrange: Using a sharp knife or dental floss, cut the log into 12 equal slices (about 1.5 inches thick each). Place the slices cut-side up in a lightly greased 9×13 inch (23×33 cm) baking dish or a large rimmed baking sheet. They should fit snugly, touching each other and the sides of the pan. This close proximity helps them bake into each other, creating that classic tray bake texture.
10. Second Rise (The Final Proof): Cover the baking dish loosely with plastic wrap or a damp towel. Let the rolls rise again for 30-45 minutes, or until they look puffy and have expanded significantly, almost doubling in size again. This second rise is crucial for maximum height and fluffiness.
11. Bake to Golden Perfection: Preheat your oven to 375°F (190°C) during the last 10 minutes of the second rise. Bake the rolls for 18-25 minutes, or until they are deeply golden brown on top and the edges look set. The internal temperature should reach around 190-200°F (88-93°C) if you have a thermometer. They should sound hollow when tapped on the bottom.
12. Make the Glaze: While the rolls are baking, whisk together the powdered sugar, milk, vanilla extract, and a pinch of salt (if using) in a small bowl. The glaze should be smooth and pourable but thick enough to coat the back of a spoon. If it’s too thick, add a tiny bit more milk. If it’s too thin, add a little more powdered sugar.
13. Glaze While Warm: As soon as the rolls come out of the oven, drizzle the warm glaze evenly over the top. The heat from the rolls will help the glaze melt slightly and seep into the crevices, creating that irresistible glossy finish. Let the rolls cool in the pan for at least 10-15 minutes before serving. This allows the glaze to set slightly and the rolls to firm up just enough to hold their shape.
Variations and Substitutions: Making it Your Own
- Flavor Boosters: Add 1 teaspoon of ground cinnamon to the dough along with the salt. Stir ½ cup of chopped pecans, walnuts, or chocolate chips into the cinnamon filling before spreading. For a citrus twist, add the zest of 1 lemon or orange to the filling.
- Dairy-Free: Use plant-based milk (soy, oat, almond) and a dairy-free butter substitute in both the dough and filling. Ensure your yeast is dairy-free if necessary. The glaze can be made with plant-based milk.
- Nut-Free: Omit the nuts entirely from the filling or use seeds like sunflower or pumpkin seeds for texture.
- Sweetener Swap: Replace granulated sugar in the dough with an equal amount of brown sugar for deeper flavor. Use honey or maple syrup in the glaze (reduce milk slightly to compensate for liquid).
- Gluten-Free: Use a high-quality gluten-free all-purpose flour blend (check for xanthan gum). You may need slightly more liquid (milk) and the dough might be stickier. Bake time may vary slightly.
- Larger Rolls: For fewer, larger rolls, cut the log into 8 slices instead of 12. Bake for a few minutes longer.
Storage and Reheating: Keeping the Magic Alive
- Room Temperature: Store leftover rolls in an airtight container at room temperature for up to 2 days. They are best enjoyed fresh, but the second day is still delicious.
- Refrigeration: For longer storage (up to 4 days), refrigerate the rolls in an airtight container. Let them come to room temperature before reheating.
Freezing: For maximum freshness, freeze the unbaked rolls. After cutting the slices and placing them in the greased pan, cover tightly with plastic wrap and foil. Freeze for up to 1 month. When ready to bake, remove from the freezer, let rise in the pan (this takes longer, about 1.5-2 hours), then bake as directed, adding 5-10 minutes to the baking time. You can also freeze baked* rolls. Cool completely, wrap tightly in plastic wrap and foil, and freeze for up to 1 month. Reheat at 350°F (175°C) for 10-15 minutes, or until warmed through. Glazing after reheating is optional but recommended for best texture.
Common Mistakes to Avoid: Ensuring Success Every Time
1. Water Temperature: Using water that’s too hot (above 110°F/43°C) can kill the yeast. Use warm milk (around 105-110°F/40-43°C) for the best rise.
2. Over-Kneading: Over-kneading develops too much gluten, resulting in tough rolls. Knead just until the dough is smooth and elastic (5-7 minutes).
3. Under-Rising: If the dough doesn’t rise sufficiently, the rolls won’t be light and fluffy. Ensure your rising spot is warm and draft-free. Don’t rush it!
4. Over-Baking: Baking too long makes the rolls dry and hard. Watch for the golden brown color and internal temperature (190-200°F/88-93°C). They should still feel slightly soft in the center when done.
5. Glaze Too Thin/Thick: Adjust the glaze consistency by adding more milk (thinner) or more powdered sugar (thicker) to your preference. The rolls are best glazed while still warm.
6. Skipping the Second Rise: This rise is crucial for the rolls to puff up beautifully. Don’t skip it!
7. Using Cold Ingredients: Room temperature egg and melted butter incorporate much better into the dough, leading to a smoother texture.
Frequently Asked Questions: Your Cinnamon Roll Queries Answered
1. Can I use instant yeast instead of active dry yeast?
* Yes! You can use instant yeast (also called rapid-rise or bread machine yeast) in place of active dry yeast. You don’t need to activate it in warm milk first. Just add it directly to the dry ingredients (flour, sugar, salt) along with the warm milk and other wet ingredients. The process is essentially the same.
2. My dough is too sticky. What can I do?
Add flour very* sparingly, a tablespoon at a time, while kneading. Don’t add too much at once. The dough should be soft and slightly tacky, not dry. If it’s excessively sticky, you might need a tiny bit more flour, but aim for a soft, pliable dough.
3. How do I know when the rolls are done baking?
* They should be a deep golden brown on top. A good indicator is the internal temperature – around 190-200°F (88-93°C) when measured with a thermometer. They should also sound hollow when tapped on the bottom. Avoid overbaking!
4. Can I make these rolls the night before?
* Absolutely! Prepare the dough, let it rise once, punch it down, shape it into the tray, and let it rise a second time. Cover the pan tightly and refrigerate overnight. The next morning, let the rolls come to room temperature for about 30 minutes, then bake as directed (adding 5-10 minutes to the baking time if they were cold).
5. How do I reheat leftover rolls?
* The best way is to reheat them in a 350°F (175°C) oven for 10-15 minutes, wrapped loosely in foil to prevent the glaze from burning. You can also reheat individual rolls in the microwave for 10-15 seconds, but this can make the texture slightly chewy. Avoid reheating glazed rolls in the microwave.
6. Can I freeze the unbaked rolls?
* Yes! After cutting the slices and placing them in the greased pan, cover tightly with plastic wrap and foil. Freeze for up to 1 month. When ready to bake, let the rolls thaw and rise in the pan (takes longer, about 1.5-2 hours), then bake as directed, adding 5-10 minutes to the baking time.
7. What can I use if I don’t have vanilla extract for the glaze?
* You can omit it, but the glaze will be less flavorful. Try almond extract (use sparingly, ¼ tsp), lemon extract, or even a pinch of ground cinnamon for a different twist. Maple syrup or honey can also be used, adjusting the milk accordingly.
8. Are these rolls suitable for people with dietary restrictions?
* This recipe is naturally dairy-free and egg-free if you use plant-based milk and a dairy-free butter substitute. It’s also naturally gluten-free if you use a gluten-free flour blend. Always check labels on yeast and other ingredients for hidden allergens or specific dietary needs.
9. Why are my rolls not as gooey as I hoped?
* Ensure you have a generous amount of filling (about ½ cup) and that you spread it evenly. Don’t skip the second rise, as this creates the light, airy texture that holds the gooey filling. Baking time is also crucial – they should be golden brown but not dry.
10. Can I add fruit to these rolls?
* Yes! Fold ½ cup of chopped apples, berries, or raisins into the cinnamon filling before spreading. Be careful not to overload it, as this can make the rolls soggy. Drain any excess juice from fresh fruit before adding.
The Final Touch: A Warm Welcome to Your Kitchen
There’s something deeply satisfying about pulling a warm, fragrant tray of cinnamon rolls from your oven. This Easy Make-Ahead Cinnamon Roll Tray Bake embodies that joy – transforming simple pantry staples into pure comfort with minimal effort. Whether you’re preparing for a bustling brunch, a cozy weekend breakfast, or simply craving a sweet treat, these rolls deliver on flavor, texture, and convenience. The gooey cinnamon filling, the tender crumb, and the sweet vanilla glaze create a symphony of taste that’s hard to resist. Best of all, the make-ahead magic means you can enjoy the aroma and taste of freshly baked cinnamon rolls without the early morning rush. So, gather your ingredients, preheat your oven, and get ready to create a breakfast (or brunch!) centerpiece that will have everyone asking for seconds. Enjoy the process and the delicious results!
")