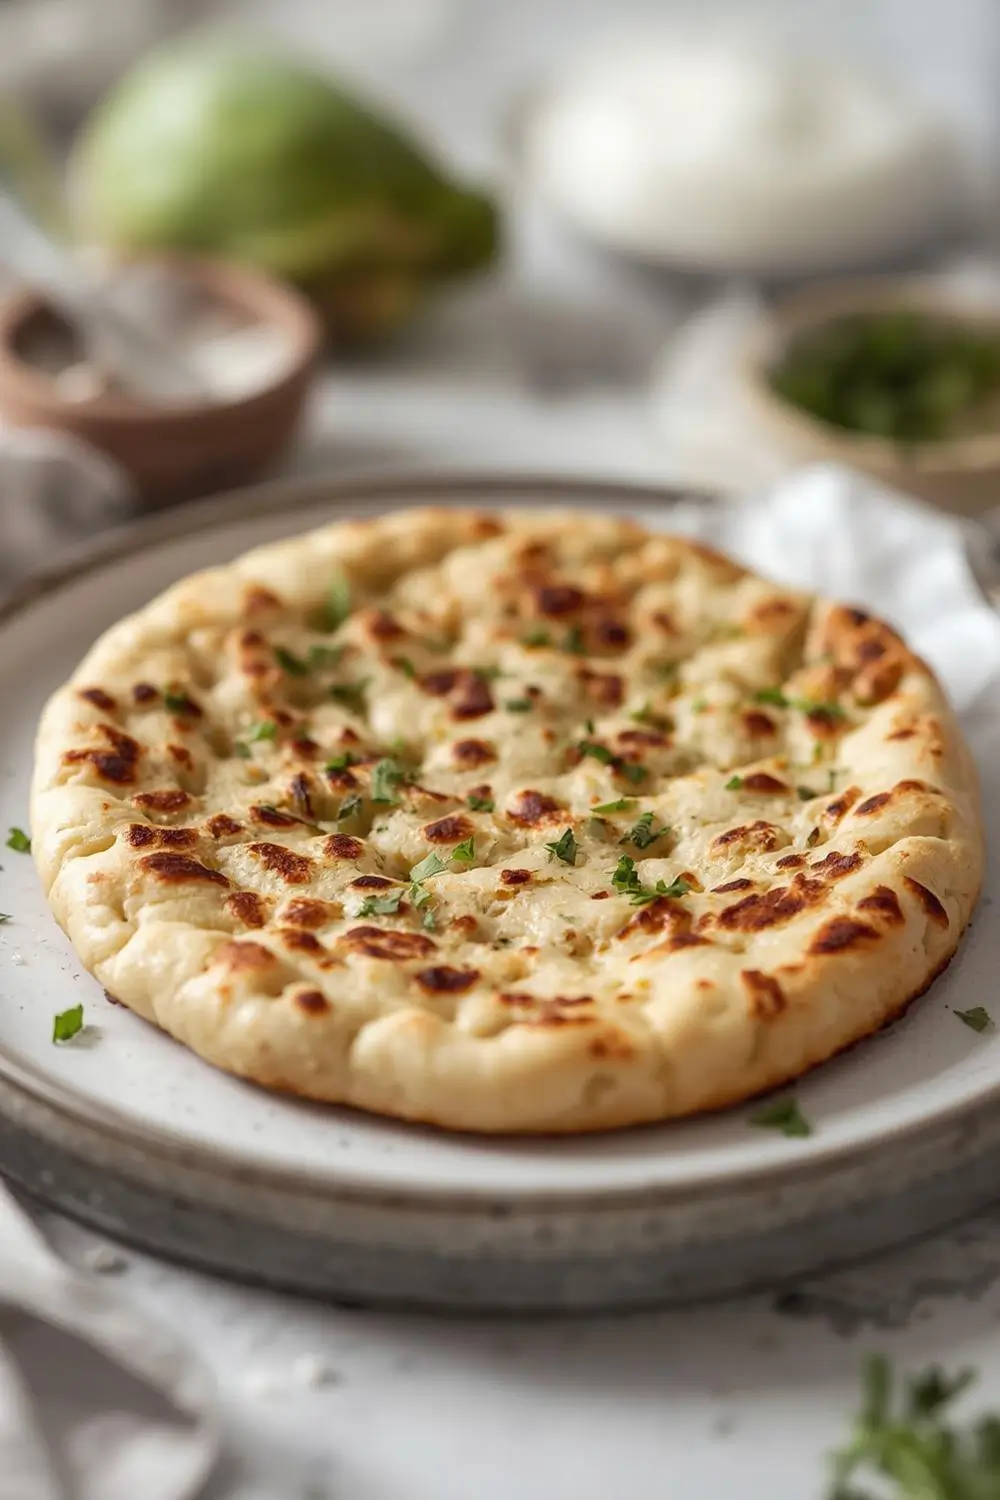
Have you ever stared at your sourdough starter, wondering what to do with all that tangy, bubbly discard? It piles up faster than you can imagine, and while discarding it is part of the process, it feels like such a waste! What if I told you that this seemingly useless byproduct is actually the secret ingredient to creating something incredibly delicious and satisfying? Welcome to the world of Easy Sourdough Discard Flatbread – fluffy, flavorful, and utterly simple flatbreads made entirely from your sourdough starter’s leftovers. No yeast needed, just the natural fermentation power of your discard, combined with a few pantry staples. These flatbreads capture the essence of sourdough – that wonderful tangy depth – without the lengthy fermentation times or complex kneading required for traditional loaves. They’re incredibly versatile, perfect for scooping up dips, wrapping around fillings, or serving as a warm, chewy base for your favorite toppings. Best of all, they’re incredibly forgiving and a fantastic way to reduce food waste while indulging in homemade goodness. Let’s dive into how you can transform your discard into these delightful flatbreads.
Ingredients Explained
Creating these flatbreads is remarkably straightforward, relying on just a handful of ingredients you likely already have. Here’s what you’ll need and why each plays a role:
- Sourdough Discard: This is the star! Typically, you’ll use about 1 cup (240ml) of discard that’s been sitting out for 12-24 hours, giving it a nice active, bubbly consistency. Its acidity and natural yeast provide flavor and structure. If your discard is very thick, you might need a splash more water; if it’s very thin, you might need a touch more flour.
- All-Purpose Flour: The backbone of the dough. It provides the gluten structure that gives the flatbreads their pleasant chew and helps them hold together. Bread flour can be used for an even chewier texture, but AP flour is perfectly fine and widely available.
- Warm Water: Essential for hydrating the flour and activating the sourdough discard. Use water that’s comfortably warm to the touch (around 100-110°F or 38-43°C), not hot, as hot water can kill the beneficial bacteria in your discard. Room temperature water works too, but warm water helps the dough come together slightly faster.
- Fine Sea Salt or Kosher Salt: Salt is crucial for flavor development and controlling fermentation. It enhances the sourdough tang and balances the dough. Use fine salt for even distribution; coarse salt might not dissolve as well initially but will still work. Start with 1 teaspoon and adjust to taste if needed after mixing.
- Optional Flavor Boosters (Add to Taste):
* Olive Oil: A tablespoon or two adds richness, tenderness, and helps prevent sticking. It also contributes to a slightly softer crust.
* Honey or Maple Syrup: A teaspoon or two adds a subtle sweetness that complements the sourdough tang beautifully. Great if you prefer a less pronounced sour flavor.
* Dried Herbs: A pinch of dried oregano, thyme, or rosemary adds an aromatic layer.
* Garlic Powder or Onion Powder: A small pinch for savory depth.
* Sesame Seeds or Poppy Seeds: Sprinkle on top before cooking for added texture and visual appeal.
Step-by-Step Instructions with Tips
Making these flatbreads is a breeze, but paying attention to a few key steps ensures success, especially for beginners. Here’s how to do it:
1. Combine the Discard & Water: In a large mixing bowl, whisk together your sourdough discard and warm water until smooth. If using any optional flavor boosters like oil, honey, herbs, or spices, whisk them in now. The mixture should be pourable but slightly thick, like pancake batter. If it’s too thick, add a tiny bit more water; if too thin, add a touch more flour.
2. Add the Flour & Salt: Gradually sift or whisk in the all-purpose flour and salt. Start with 2 cups (240g) of flour. Mix with a sturdy spoon or your hands until a shaggy dough forms and no dry flour remains. The dough will be quite sticky at this stage.
3. Knead Briefly (Optional but Recommended): Turn the dough out onto a lightly floured surface. Knead it gently for just 1-2 minutes. This helps develop a bit more gluten and ensures the flour is fully hydrated. Don’t overdo it – the dough should still feel soft and slightly tacky, not stiff. If it’s very sticky, add a tiny bit more flour (1 tablespoon at a time) during kneading.
4. First Rest (Autolyse): Cover the bowl loosely with plastic wrap or a damp kitchen towel and let the dough rest for 15-30 minutes. This “autolyse” period allows the flour to fully hydrate and the gluten to begin developing, making the subsequent kneading (if done) and shaping much easier.
5. Final Kneading & Shaping: After resting, gently knead the dough for another 30-60 seconds on a lightly floured surface until it becomes smoother and more cohesive. It should be soft, pliable, and hold its shape reasonably well when formed into a ball. Divide the dough into 6-8 equal portions (depending on desired flatbread size). Roll each portion into a smooth ball.
6. Rest the Dough Balls: Cover the dough balls loosely and let them rest for 15-20 minutes. This allows the gluten to relax, making them much easier to roll out thin and preventing them from springing back.
7. Roll Out the Flatbreads: On a lightly floured surface, gently flatten one dough ball with your palm. Using a rolling pin, roll it out into a thin circle or oval, about 1/8 inch (3mm) thick. Aim for even thickness. If the dough resists or springs back, let it rest for a few more minutes. The thinner you roll them, the crispier they’ll be; slightly thicker makes them softer and more bready. Repeat with the remaining dough balls.
8. Cook the Flatbreads: Heat a large skillet, griddle, or cast-iron pan over medium heat. You don’t need oil if the pan is hot enough and the dough has enough moisture, but a light spray of oil or a tiny dab of butter can help prevent sticking. Cook each flatbread for 1-2 minutes per side, or until golden brown spots appear on the bottom and the top looks set. They should puff up slightly in the center. If they brown too quickly before cooking through, reduce the heat slightly. Flip carefully.
9. Keep Warm: As you cook the flatbreads, stack them on a plate covered loosely with foil to keep them warm and soft. They’re best served immediately while still warm and pliable.
Tips for Success:
- Don’t Overmix: Mix the dough just until the flour is incorporated. Overmixing develops too much gluten, leading to tough flatbreads.
- Hydration is Key: The exact amount of water needed can vary slightly depending on your discard’s consistency and the humidity in your kitchen. Start with 1 cup water and adjust as needed. The dough should be soft and slightly sticky.
- Patience with Resting: Don’t skip the rest periods! They are crucial for developing texture and making rolling out easier.
- Hot Pan is Essential: A properly heated pan ensures good browning and puffing. If the pan isn’t hot enough, the flatbreads will steam instead of fry, resulting in a dense texture.
- Don’t Overcrowd: Cook flatbreads in batches if necessary to avoid lowering the pan temperature too much.
- Adjust Salt: Taste your discard before adding salt. If it’s already quite tangy, you might want to use slightly less salt.
Variations and Substitutions
The beauty of this recipe lies in its simplicity and adaptability. Here are some ideas to customize your sourdough discard flatbreads:
- Herb-Infused: Mix chopped fresh parsley, chives, or dill into the dough before rolling.
- Cheese Lover’s Delight: Sprinkle shredded mozzarella, parmesan, or feta on top of the rolled dough before cooking.
- Garlic & Herb: Add minced garlic and dried herbs to the dough.
- Sweet & Savory: Brush the cooked flatbreads with melted butter mixed with honey or maple syrup, then sprinkle with cinnamon or seeds.
- Whole Wheat Twist: Substitute up to half of the all-purpose flour with whole wheat flour for a nuttier flavor and denser texture.
- Gluten-Free Option: Use a 1:1 gluten-free flour blend (ensure it contains xanthan gum) and adjust liquid slightly as needed. The texture will be different but still delicious.
- Thicker Crust: Roll the dough slightly thicker (1/4 inch / 6mm) for a heartier, more bread-like flatbread.
- Thinner Crust: Roll the dough very thin (1/16 inch / 1.5mm) for crisp, cracker-like flatbreads.
Storage and Reheating Tips
- Cooling: Let the cooked flatbreads cool completely on a wire rack before storing. This prevents them from steaming and becoming soggy.
- Room Temperature: Store cooled flatbreads in an airtight container or resealable bag at room temperature for up to 2 days. They will soften slightly.
- Refrigeration: For longer storage (up to 5 days), refrigerate. They will firm up significantly. Reheat gently to restore softness.
- Freezing: Wrap individual flatbreads tightly in plastic wrap or foil, then place in a freezer bag or airtight container. Freeze for up to 3 months. Thaw at room temperature or reheat from frozen.
- Reheating Methods:
* Dry Skillet/Tawa: Heat a dry skillet or griddle over medium-low heat. Place the flatbread in and warm for 30-60 seconds per side until heated through and slightly crisp again.
* Oven: Wrap flatbreads in foil and place in a preheated 350°F (175°C) oven for 5-10 minutes.
* Toaster Oven: Place flatbreads directly on the rack and toast for 2-4 minutes until warmed through and crisp.
* Microwave (Use with Caution): Place flatbreads between slightly damp paper towels and microwave for 15-30 seconds. This helps restore some moisture but can make them slightly chewy.
Common Mistakes to Avoid
- Using Cold Discard: Cold discard can make the dough harder to work with. Let it sit out until it’s at room temperature and bubbly.
- Over-Flouring: Too much flour makes the dough tough and dry. Use minimal flour on your surface and hands, and add flour sparingly only if absolutely necessary.
- Skipping the Rest: Rushing the rest periods leads to a dough that’s difficult to roll out and results in dense flatbreads.
- Under-Heating the Pan: A pan that isn’t hot enough causes the flatbreads to steam instead of fry, leading to a gummy texture.
- Overcrowding the Pan: Cooking too many at once cools the pan too much, preventing proper browning.
- Overcooking: Cooking too long on one side makes them tough. Flip when the bottom is golden and the top looks set.
- Not Letting Them Cool: Storing warm flatbreads traps steam, making them soggy.
FAQs
- Q: Can I use discard that’s been in the fridge for a while?
A: Yes! Use discard that’s been refrigerated for up to a week. It might be thicker and less bubbly, so you might need a splash more water when mixing. Let it come to room temperature first.
- Q: Why are my flatbreads puffing up so much?
A: This is normal! The natural yeast in the discard creates gas, causing the flatbreads to puff slightly during cooking. It’s a sign of good fermentation.
- Q: My flatbreads are tough. What went wrong?
A: Likely overmixing the dough or using too much flour during kneading/shaping. Also, ensure your pan is hot enough and you’re not overcooking them.
- Q: Can I make these without any sourdough discard?
A: While the flavor and texture are uniquely sourdough, you can make a simple flatbread dough with just flour, water, salt, and a little oil. However, the discard adds that special tangy depth.
- Q: How do I know if my discard is active enough?
A: It should be bubbly, slightly domed, and smell pleasantly sour. If it’s very thin and watery, it might need a bit more time to develop bubbles.
- Q: Can I use this dough for pizza crust?
A: Absolutely! Roll it out thinner and bake it on a preheated pizza stone or steel at high heat for a delicious, tangy crust.
- Q: What if my dough is too sticky to roll out?
A: Lightly wet your hands or the rolling pin with water to prevent sticking. A tiny bit more flour can help, but avoid adding too much.
- Q: Can I add seeds or cheese to the dough?
A: Yes! Fold them in after the first rest period, before shaping the balls. Sprinkle on top before cooking.
- Q: How long do they last in the fridge?
A: Stored properly in an airtight container, they will keep for 2-3 days. Reheat gently to restore texture.
- Q: Can I freeze cooked flatbreads?
A: Yes! Wrap them well and freeze for up to 3 months. Thaw at room temperature or reheat from frozen.
Conclusion
Transforming your sourdough discard into these incredibly simple, fluffy, and flavorful flatbreads is a revelation. It’s a practical solution to a common problem, turning potential waste into a delicious, versatile kitchen staple. The tangy depth of sourdough shines through beautifully, offering a unique flavor profile that’s hard to replicate. Whether you’re using them as a base for a quick meal, a vehicle for dips, or a warm accompaniment to soup, these flatbreads deliver on taste and texture with minimal effort. They’re a testament to the power of fermentation and the resourcefulness of home bakers everywhere. Give this recipe a try – you’ll be amazed at what your leftover starter can achieve! Enjoy the process and the delicious results.
")