Contents
- 1 Your New Favorite Way to Use Sourdough Discard
- 2 Gathering Your Ingredients
- 3 Crafting Your Granola Bars: Step-by-Step
- 4 Flavor Variations to Try
- 5 Smart Substitutions
- 6 Storing Your Granola Bars
- 7 Solving Common Granola Bar Problems
- 8 Your Sourdough Granola Bar Questions Answered
- 9 More Than Just Zero Waste
Your New Favorite Way to Use Sourdough Discard
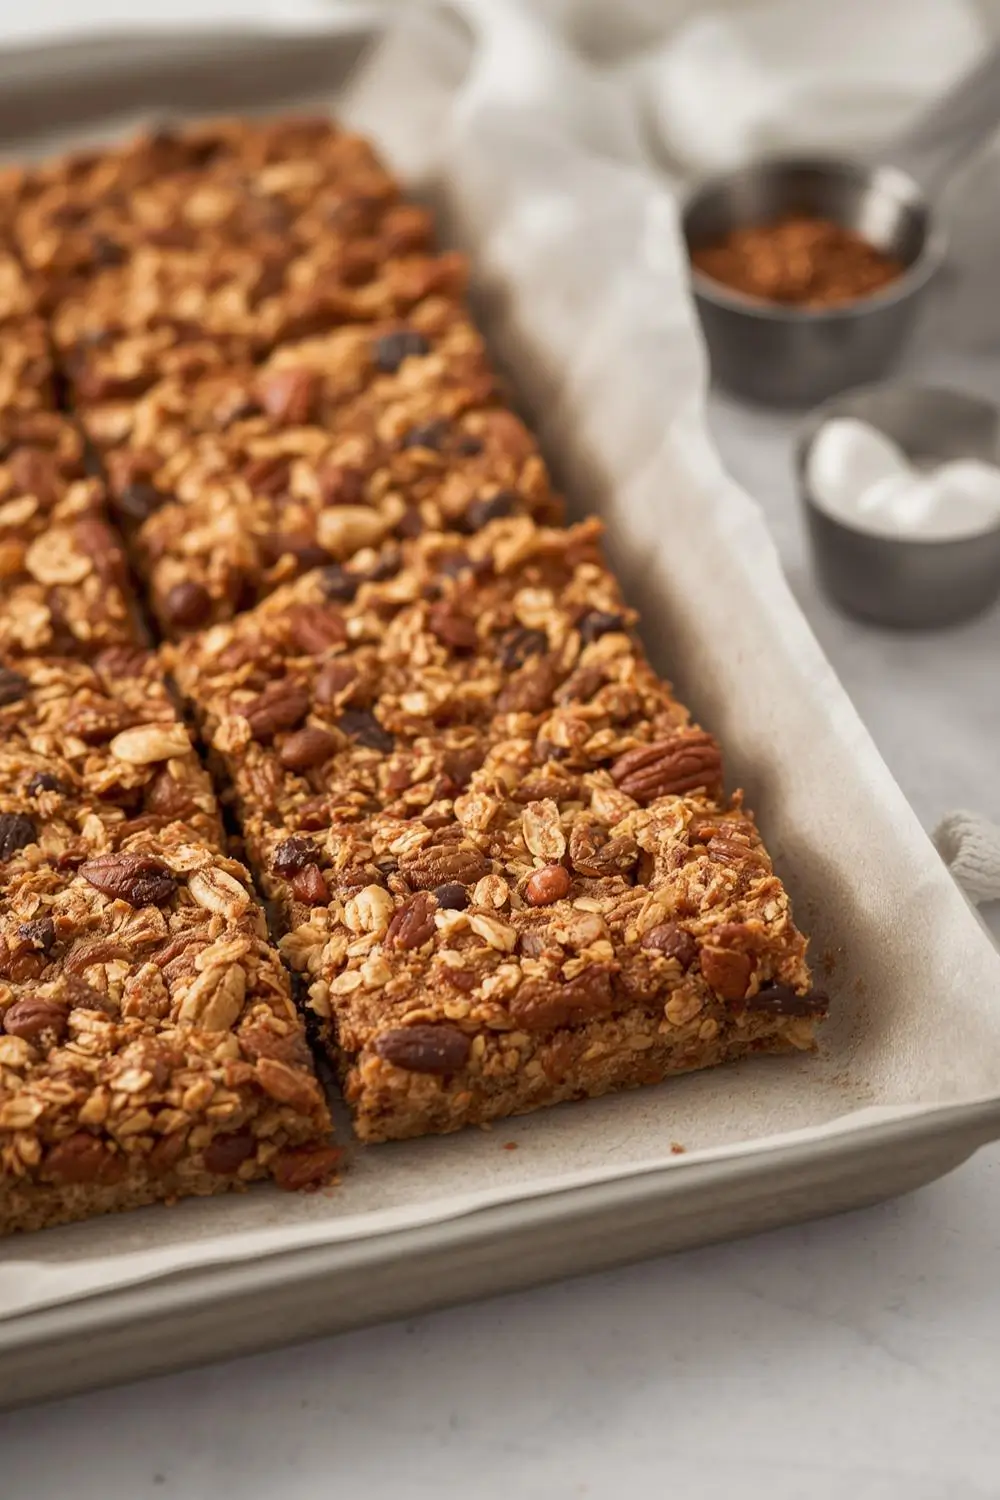
We’ve all been there – staring at that jar of sourdough discard, wondering if there’s life beyond crackers and pancakes. What if I told you that neglected starter could become chewy, nutrient-packed granola bars bursting with oats, nuts, and dried fruits? These sourdough discard granola bars are about to become your secret weapon against food waste and midday snack attacks.
Think less sugary store-bought bars, more wholesome homemade goodness with a subtle tang that makes them utterly addictive. The best part? You probably have everything you need in your pantry right now. No fancy equipment or obscure ingredients – just simple, honest food that keeps you fueled all day long.
I’ve tested this recipe countless times to achieve that ideal balance: crisp oat topping giving way to a satisfyingly chewy interior, with just enough sweetness to feel like a treat. They’re perfect for lunchboxes, post-workout refueling, or that 3pm slump when you need something sustaining. Let’s turn that discard into gold!
Why This Recipe Works
• Sourdough discard adds flavor depth – The fermented notes elevate simple ingredients
• Pantry staple ingredients – No special shopping required
• No-waste solution – Uses 1/2 cup of discard per batch
• Customizable mix-ins – Adapt based on your preferences
• Ready in under an hour – Minimal hands-on time
Gathering Your Ingredients
Creating these wholesome bars starts with understanding how each component contributes to the final texture and flavor. Here’s what you’ll need:
Wet Ingredients
• 1/2 cup sourdough discard (unfed, any hydration level)
• 1/3 cup creamy nut or seed butter (almond, sunflower, or peanut work great)
• 1/4 cup honey or maple syrup (adjust to taste, sticky sweeteners bind best)
• 1 tsp pure vanilla extract
Dry Mix
• 2 cups rolled oats (divided – 1.5 cups for base, 0.5 cup for topping)
• 1/3 cup chopped nuts or seeds (walnuts, pecans, pumpkin seeds, etc.)
• 1/4 cup dried fruit (cranberries, chopped apricots, or raisins)
• 2 tbsp ground flaxseed (helps bind and adds nutrition)
• 1/4 tsp sea salt
• 1/2 tsp cinnamon (optional but delicious)
Flavor Boosters
• 2 tbsp coconut oil (melted, for crisp topping)
• 1 tbsp brown sugar (optional, for extra crunch)
Crafting Your Granola Bars: Step-by-Step
Follow these detailed instructions for perfect bars every time. I’ve included all my test kitchen discoveries to help you avoid common pitfalls.
Preparation Essentials
1. Preheat oven to 325°F (163°C) and line an 8×8 baking pan with parchment paper
2. Gather two mixing bowls – one for wet ingredients, one for dry
3. Chop nuts and dried fruit into uniform pieces (bite-sized)
4. Measure all ingredients before starting – accuracy matters here
Mixing the Base
1. In a large bowl, combine 1.5 cups oats, nuts, dried fruit, flaxseed, salt, and cinnamon
2. In another bowl, whisk discard with nut butter, honey/maple syrup, and vanilla until smooth
3. Pour wet mixture into dry ingredients and stir with rubber spatula until fully coated
4. Let mixture rest 5 minutes (allows oats to absorb moisture)
Creating the Crunchy Top Layer
1. Toss remaining 0.5 cup oats with melted coconut oil (and brown sugar if using)
2. Spread oat mixture evenly in prepared pan, pressing firmly with your palms
3. Sprinkle coated oats over base layer, pressing lightly to adhere
Baking & Cooling
1. Bake 25-28 minutes until edges turn golden brown
2. Cool completely in pan (at least 2 hours) before slicing
3. Loosen edges with knife and lift parchment to remove entire block
4. Slice into 12 bars with sharp chef’s knife
Pro Tip: The Press Matters
Don’t skimp on pressing the base layer! I use a flat-bottomed measuring cup to compress every corner firmly. This prevents crumbly bars. If your mixture seems dry, add 1-2 tsp water before pressing.
Flavor Variations to Try
One base recipe, endless possibilities! Here are my favorite combinations:
Trail Mix Crunch
• Use sunflower seed butter
• Mix-ins: Pumpkin seeds, dried cherries, dark chocolate chips
• Dust finished bars with sea salt
Tropical Escape
• Use coconut oil in both layers
• Mix-ins: Macadamia nuts, dried pineapple, shredded coconut
• Top with toasted coconut flakes
Double Chocolate
• Add 2 tbsp cocoa powder to dry ingredients
• Mix-ins: Chopped almonds, cacao nibs
• Drizzle melted dark chocolate over cooled bars
Smart Substitutions
Missing an ingredient? No problem! Here’s your substitution cheat sheet:
Nut-Free Options
• Swap nut butter for sunflower seed butter or tahini
• Replace nuts with toasted pepitas or hemp seeds
Sweetener Swaps
• Maple syrup works 1:1 for honey
• For sugar-free: Use monk fruit syrup (may require extra binder)
Gluten Considerations
• Use certified gluten-free oats
• Ensure other mix-ins are GF compliant
Egg Substitute Notice
Some recipes use egg as binder. Our version relies on discard’s structure. For egg-free diets, ensure your discard is active enough (showing some bubbles) for best results.
Storing Your Granola Bars
Proper storage keeps these treats fresh and chewy:
Room Temperature
• Store in airtight container for up to 5 days
• Place parchment between layers to prevent sticking
Freezing for Later
• Individually wrap bars in wax paper
• Place in freezer bag for up to 3 months
• Thaw at room temperature (15 minutes) or microwave 10 seconds
Reviving Stale Bars
• Toast in 300°F oven for 5 minutes to refresh crispiness
• Microwave 8-10 seconds for softer texture
Solving Common Granola Bar Problems
Even experienced bakers encounter issues. Here’s how to troubleshoot:
Problem: Bars crumble when slicing
Solution: Press base layer more firmly next time. Let bars cool completely before cutting. Add 1 extra tbsp nut butter to binding mixture.
Problem: Topping doesn’t stay put
Solution: Press topping lightly into base before baking. Consider mixing 1 tsp honey into topping mixture for better adhesion.
Problem: Bars taste too sour
Solution: Use younger discard (fed within last 48 hours). Increase sweetener by 1 tbsp. Add 1/4 tsp more cinnamon.
Your Sourdough Granola Bar Questions Answered
Can I use active sourdough starter instead of discard?
Absolutely! The active starter works identically in this recipe. You might notice slightly more rise during baking, but texture remains similar.
My mixture seems too wet. How can I fix it?
Add rolled oats 1 tbsp at a time until texture improves. Let mixture rest longer before pressing (up to 10 minutes) to allow liquid absorption.
Can I make these completely nut-free?
Yes! Substitute seed butter (sunflower works best) and use allergy-friendly mix-ins like toasted coconut flakes and roasted chickpeas.
Why aren’t my bars getting crispy on top?
Try baking 5 minutes longer (watch carefully!). Spread topping in single layer rather than clumping. Ensure coconut oil is fully coating the top-layer oats.
Can I double this recipe?
Certainly! Double all ingredients and use a 9×13 pan. Baking time increases by approximately 5-7 minutes – watch for golden edges.
Is there a way to make these protein-packed?
Add 1-2 scoops unflavored protein powder (reduce oats by 2 tbsp per scoop). Soak powder in discard for 5 minutes before mixing to prevent grittiness.
More Than Just Zero Waste
These sourdough discard granola bars prove that sustainability can taste incredible. With every chewy bite, you’re not just nourishing your body – you’re honoring the rhythm of sourdough baking, transforming what might have been wasted into something wholesome and delicious.
The beauty lies in their adaptability. Maybe today’s version features cranberries and walnuts, while next week’s batch sports chocolate and orange zest. That ever-changing nature reflects the living spirit of sourdough itself – versatile, resilient, and full of surprises.
So next time you look at that discard jar, see possibility waiting to happen. Whip up a batch of these bars, tuck one in your pocket for adventures, and share extras with neighbors who’ll wonder about that magical tang. Happy baking, waste warriors – may your snacks always be chewy and your sourdough always bubbly!
")