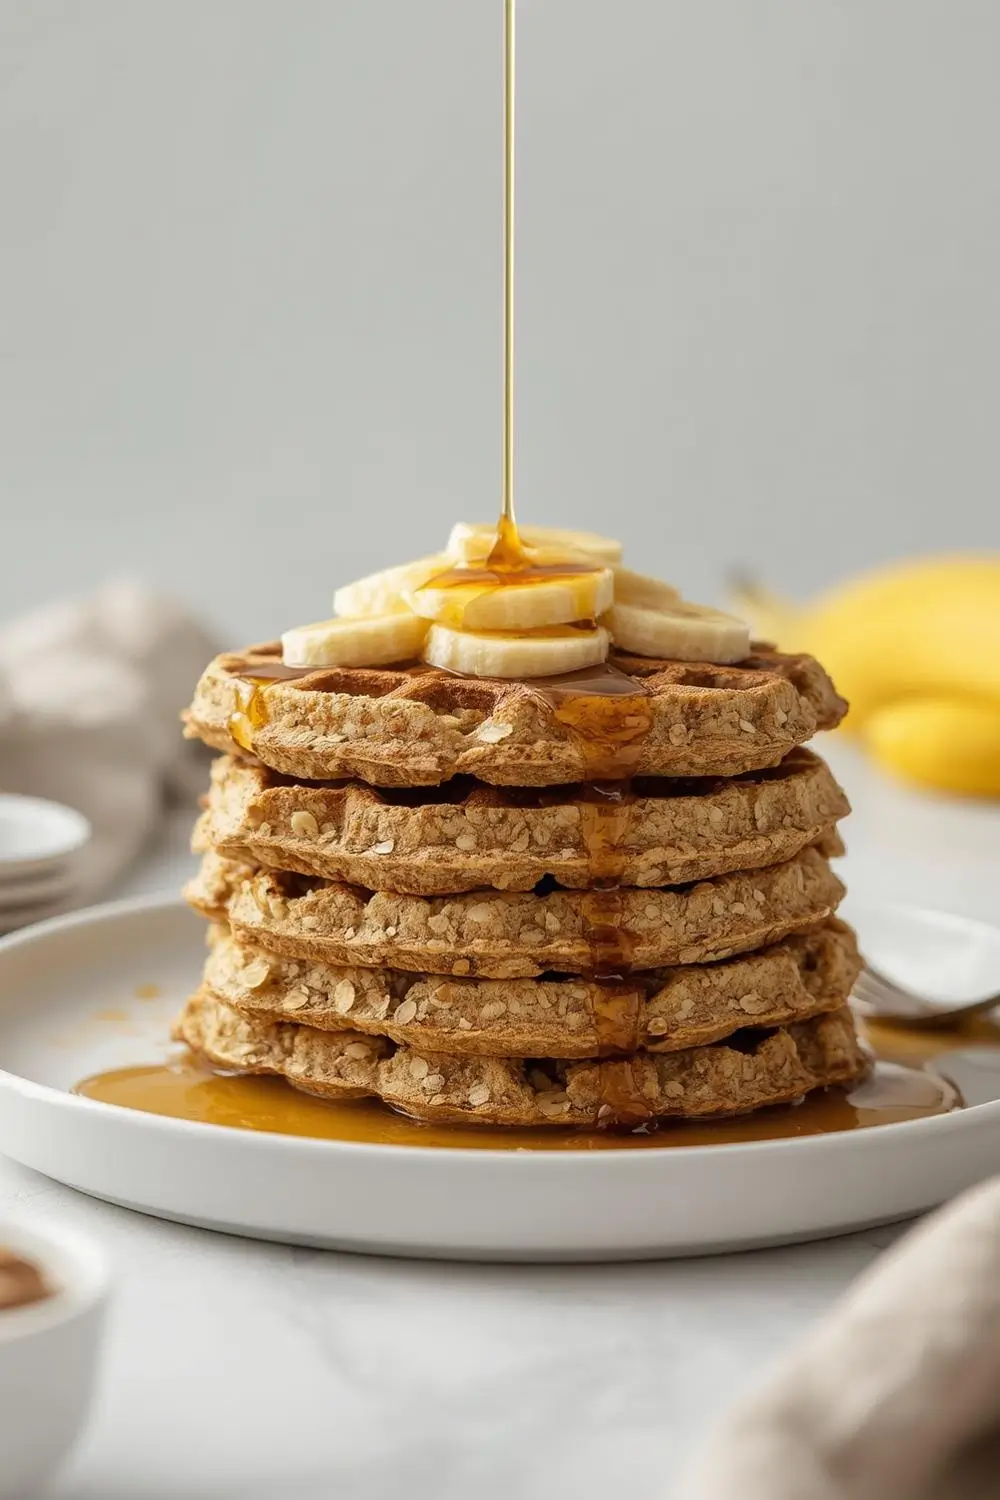
Fluffy Blender Banana Oat Waffles: The Ultimate Easy Breakfast Bliss
Imagine waking up to the irresistible aroma of warm, golden waffles, their crisp edges yielding to a tender, cloud-like interior. Now, picture those waffles bursting with the natural sweetness of ripe bananas, infused with the wholesome goodness of oats, all whipped up in a blender in under five minutes. Welcome to the world of Fluffy Blender Banana Oat Waffles – your new go-to for a truly effortless, nourishing, and utterly delicious homemade breakfast. These aren’t just waffles; they’re a celebration of simplicity, flavor, and the pure joy of starting your day right.
Forget complicated recipes or hours spent mixing bowls. This recipe harnesses the power of your blender to create a batter so smooth and cohesive that it practically pours itself into your waffle iron. The result? Waffles that are consistently light, airy, and perfectly cooked every single time. They’re naturally sweetened by the bananas, making them a wholesome choice packed with fiber and complex carbohydrates to fuel your morning. Best of all, they’re incredibly versatile – top them with fresh berries, a dollop of yogurt, a drizzle of nut butter, or simply a sprinkle of cinnamon. They’re the ultimate blank canvas for your favorite breakfast toppings.
This recipe is designed with the busy home cook in mind. It’s incredibly forgiving, making it perfect for beginners, and requires minimal cleanup. The oats provide a satisfying texture and heartiness, while the banana acts as a natural binder and sweetener, eliminating the need for refined sugars. Whether you’re rushing out the door or enjoying a leisurely weekend brunch, these blender banana oat waffles deliver on taste, nutrition, and convenience. Let’s dive into creating this breakfast masterpiece together.
The Heart of the Waffle: Understanding Your Ingredients
Before we blend, let’s appreciate the stars of the show:
- Ripe Bananas (2 large): The soul of these waffles. Look for bananas with plenty of brown spots – their natural sugars are at their peak, ensuring maximum sweetness and perfect banana flavor. They also act as a crucial binder, helping the waffles hold together beautifully without eggs. Mashed thoroughly is key!
- Old-Fashioned Rolled Oats (1 ½ cups): These are the foundation. They provide a lovely, slightly chewy texture and a robust, wholesome flavor. They also contribute significantly to the waffles’ fiber content. Do not use quick oats or instant oats; they lack the structure needed.*
- All-Purpose Flour (½ cup): This adds structure and helps the waffles rise slightly. You can substitute up to half with whole wheat flour for a nuttier flavor and extra fiber, but keep the total flour amount the same.
- Baking Powder (1 ½ teaspoons): Essential for lift and a light, fluffy texture. Make sure it’s fresh!
- Salt (¼ teaspoon): A pinch enhances all the other flavors, making the sweetness pop.
- Milk (1 cup): Creates the perfect batter consistency. Use any kind you prefer – dairy, almond, soy, oat, or coconut milk. The choice affects the final flavor slightly.
- Vanilla Extract (1 teaspoon): Adds a warm, comforting depth that complements the banana beautifully.
- Cinnamon (½ teaspoon, optional): A classic pairing with banana, adding warmth and aroma. Omit if you prefer a more neutral flavor.
- Melted Coconut Oil or Neutral Oil (2 tablespoons): This is crucial for richness, moisture, and helping the waffles achieve that beautiful golden crispness on the outside. Ensure it’s completely cool before adding to prevent cooking the eggs (though there are no eggs here!).
Step-by-Step: Blending Bliss into Breakfast
The beauty of this recipe lies in its simplicity. The blender does most of the work:
1. Prep the Banana: Peel your ripe bananas and place them directly into the blender jar. No need to chop them first – the blender will handle it.
2. Add the Dry Ingredients: Sprinkle the rolled oats, all-purpose flour, baking powder, and salt into the blender jar on top of the bananas.
3. Pour in the Wet Ingredients: Add the milk, vanilla extract, and melted coconut oil (ensure it’s cool!) to the blender.
4. Blend to Perfection: Secure the lid tightly. Blend on high speed for 45-60 seconds, stopping once to scrape down the sides with a spatula if needed. The batter should be completely smooth, with no visible oat chunks remaining. It will be quite thick – this is normal and desired. If it seems too thick to pour, add a tablespoon of milk at a time until it reaches a pourable consistency (similar to pancake batter).
5. Rest the Batter: Let the batter sit for 5-10 minutes. This allows the oats to absorb some liquid, resulting in even fluffier waffles.
6. Heat the Waffle Iron: Preheat your waffle iron according to its instructions. A properly preheated iron is key to getting that crisp exterior and fluffy interior.
7. Pour and Cook: Lightly grease the hot waffle iron grids with a little oil or cooking spray if needed (some irons are non-stick). Pour about ¾ to 1 cup of batter onto the center of the iron, depending on its size. Close the lid firmly.
8. Cook Until Golden: Cook for 3-5 minutes, or until the waffles are golden brown and crisp on the outside, and steam stops escaping from the iron. Cooking time varies slightly depending on your iron’s heat and the batter’s thickness. Avoid opening the lid too early, as this can release steam and make the waffles soggy.
9. Serve Immediately: Carefully remove the waffles using a fork or spatula. Serve them hot off the iron for the best texture and flavor. They’re best enjoyed fresh!
Mastering the Method: Tips for Waffle Perfection
- Ripe Bananas are Non-Negotiable: The brown spots are your friends! They provide the natural sweetness and binding power. Underripe bananas will make bland, less cohesive waffles.
- Oats Must Be Rolled: Quick oats or instant oats will turn your batter into a gluey mess. Stick with old-fashioned rolled oats.
- Don’t Overmix: Blend until smooth, but avoid over-blending once the oats are incorporated. Overmixing can develop gluten in the flour, leading to tougher waffles.
- Cool the Oil: Adding hot oil to the blender can cause the batter to cook slightly and become lumpy. Let it cool for a few minutes after melting.
- Preheating is Crucial: A cold waffle iron will result in soggy, undercooked waffles. Give it time to heat up properly.
- Don’t Overfill: Pouring too much batter makes it hard to close the iron and can lead to overflow. Stick to the recommended amount.
- Rest the Batter: This step is vital! Skipping it means less fluffy waffles. The oats need time to soften and absorb the liquid.
- Use a Waffle Iron with Good Heat Distribution: This ensures even cooking and consistent results.
Variations and Substitutions: Making it Your Own
The beauty of this recipe is its adaptability:
Add-Ins: Fold in ½ cup of chocolate chips, chopped nuts (walnuts, pecans), or blueberries into the batter after* blending but before resting. This adds delightful bursts of flavor and texture.
- Flavor Boosters: Add 1 teaspoon of ground cinnamon, ¼ teaspoon of nutmeg, or 1 tablespoon of cocoa powder to the dry ingredients for extra warmth or chocolate flavor.
- Protein Power: Stir in 2 tablespoons of ground flaxseed or chia seeds for extra fiber and plant-based protein.
Sweetener Swap: If you prefer less banana sweetness, you can add 1-2 tablespoons of pure maple syrup or honey to the batter after* blending. Adjust to taste.
- Flour Swap: Substitute up to ½ cup of the all-purpose flour with whole wheat flour, oat flour, or almond flour for a different flavor and texture profile. The batter will be slightly denser.
- Milk Alternatives: Any plant-based milk works beautifully. Oat milk adds a subtle sweetness, while almond milk offers a lighter flavor.
- Oat Flour Option: For an even smoother texture, substitute ½ cup of the rolled oats with ½ cup of oat flour (ground rolled oats in a blender or food processor).
Storage and Reheating: Keeping the Bliss Alive
- Refrigeration: Store leftover waffles in an airtight container in the refrigerator for up to 3 days.
- Freezing: Let waffles cool completely. Place them in a single layer on a baking sheet in the freezer for 1-2 hours until solid. Transfer to a freezer-safe bag or container. They freeze well for up to 1 month.
- Reheating:
* Toaster or Toaster Oven: This is the best method for restoring crispness. Place waffles in a toaster or toaster oven on medium heat for 1-3 minutes, checking frequently.
* Oven: Preheat oven to 350°F (175°C). Place waffles on a baking sheet and heat for 5-10 minutes until warmed through and crisp.
Microwave: Place waffles on a microwave-safe plate. Heat on high for 20-30 seconds. Note: This can make waffles slightly soggy; best used for quick reheating only.*
Avoiding Common Pitfalls: Waffle Wisdom
- Soggy Waffles: This usually happens if the waffle iron isn’t hot enough, the batter is too thin, or the waffles are overcooked. Ensure your iron is preheated, the batter is thick enough, and cook for the recommended time without opening the lid too early.
- Dry Waffles: Overcooking is the main culprit. Follow the cooking time guidelines and check for doneness. Using too much flour or not enough liquid can also contribute.
- Batter Too Thin: If the batter is runny, it won’t hold its shape. Blend longer or add a tablespoon of flour at a time until it thickens to a pourable consistency.
- Batter Too Thick: If the batter is too thick to pour, add a tablespoon of milk at a time until it reaches the right consistency.
- Waffles Not Golden: Ensure your waffle iron is properly preheated and set to the correct temperature. If it’s too low, the waffles won’t brown properly.
Your Questions Answered: FAQs
1. Can I use frozen bananas? Yes! Frozen bananas work perfectly. Peel and freeze them in a bag. When ready to use, thaw them slightly at room temperature for a few minutes, then peel and add them to the blender. They might make the batter slightly thicker, so you might need a tiny bit more milk.
2. Are these waffles gluten-free? No, this recipe contains all-purpose flour, which contains gluten. To make them gluten-free, substitute the all-purpose flour with an equal amount of a 1:1 gluten-free flour blend.
3. Can I make these without a blender? While the blender is key for the smooth texture, you can mix by hand. Mash the bananas very thoroughly first. Whisk together the dry ingredients (oats, flour, baking powder, salt). In a separate bowl, whisk the mashed banana, milk, vanilla, and oil. Gradually stir the dry ingredients into the wet ingredients until just combined (don’t overmix). The batter will be thicker than the blender version. Cook as usual.
4. How do I prevent the waffles from sticking? Ensure your waffle iron is properly preheated. Lightly grease the grids with oil or cooking spray before pouring the batter. Some non-stick irons may not require this, but it’s a good precaution. Avoid opening the lid too soon.
5. Can I add eggs? This recipe is designed without eggs for simplicity and dietary flexibility. The ripe bananas provide excellent binding. If you want to add eggs for extra richness or structure (e.g., for a different recipe), you would need to adjust the liquid and possibly the flour. This specific recipe does not include eggs.
6. What’s the best way to store leftovers? Store cooled waffles in an airtight container in the refrigerator for up to 3 days. For longer storage, freeze them as described above. Reheat using a toaster or toaster oven for the best texture.
7. Can I make these waffles savory? While these are designed as a sweet breakfast, you could experiment by omitting the vanilla and cinnamon, reducing the banana slightly, and adding savory toppings like cheese, spinach, or herbs. However, the recipe as written is intended for a sweet, wholesome breakfast.
8. Do I need to use coconut oil? Coconut oil adds a subtle flavor and richness. You can substitute it with any neutral oil like vegetable, canola, or avocado oil. Melted butter also works well for a richer flavor.
9. Can I use almond flour instead of some of the all-purpose flour? Yes! Substituting up to ½ cup of the all-purpose flour with almond flour is a great way to add more protein and a nutty flavor. The batter will be slightly denser.
10. How can I make these waffles extra fluffy? Ensure your baking powder is fresh. Let the batter rest for the full 5-10 minutes before cooking. Don’t overmix the batter after adding the dry ingredients. Cook them in a preheated waffle iron until they are golden brown and crisp.
The Final Scoop: A Breakfast Revolution
There you have it – the ultimate guide to creating Fluffy Blender Banana Oat Waffles right in your own kitchen. This recipe embodies the perfect balance of simplicity, nutrition, and pure, unadulterated deliciousness. It transforms humble ingredients into a breakfast experience that feels like a special treat, yet requires minimal effort. The natural sweetness of the bananas shines through, complemented by the wholesome heartiness of the oats, all held together by the magic of your blender. Whether you’re a seasoned cook or just starting your culinary journey, these waffles are guaranteed to become a beloved staple. They’re the kind of breakfast that makes you look forward to the morning, a warm, comforting hug in waffle form. So, gather your ripe bananas, grab your blender, and get ready to whip up a batch of breakfast bliss. Enjoy every fluffy, golden bite!
")