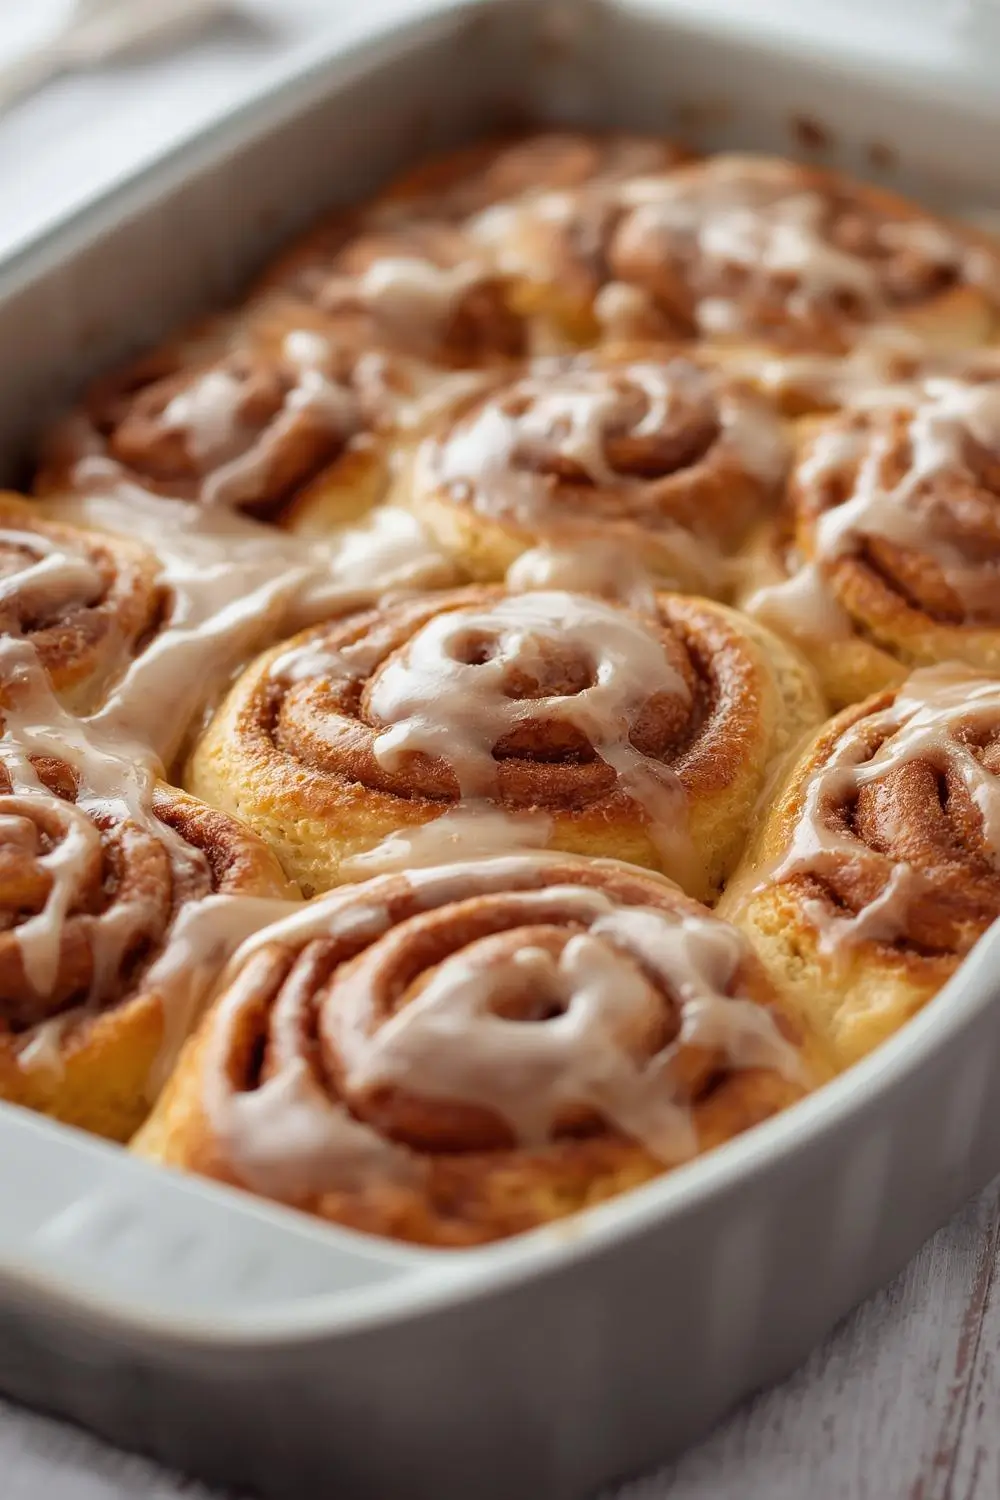
There’s something undeniably magical about the scent of cinnamon and warm dough filling a kitchen. It whispers of cozy mornings, lazy weekends, and the simple joy of sharing something truly homemade. Today, we’re diving into the heart of that magic with a recipe for Golden Swirled Cinnamon Rolls with Sweet Icing. These aren’t just rolls; they’re a celebration of texture, flavor, and the pure comfort of baking. Imagine layers of soft, pillowy dough, generously swirled with a fragrant blend of cinnamon and brown sugar, baked until they achieve a beautiful, golden-brown hue. Then, they’re crowned with a smooth, luscious icing that melts into every crevice, creating the perfect balance of sweet and spiced. This is the kind of recipe that becomes a cherished tradition, a treat you’ll find yourself making again and again.
Why These Cinnamon Rolls Shine
What sets these rolls apart? It starts with the dough. We’re using a simple, reliable yeast dough enriched with butter and milk, creating rolls that are incredibly tender and light. The filling is a classic cinnamon-sugar blend, but we’re elevating it slightly with a touch of brown sugar for deeper caramel notes. The star, however, is the icing. Instead of a thick, glazy topping, we’re going for a smooth, pourable sweet icing that seeps into the rolls as they cool, infusing every bite with sweetness. The result? Rolls that are golden, fluffy, and absolutely irresistible.
Gathering Your Ingredients: The Foundation of Flavor
Before we get our hands (and aprons) dirty, let’s gather everything you’ll need. This recipe is designed to be approachable, but using quality ingredients makes a noticeable difference.
- For the Dough:
* 2 ¼ teaspoons (1 standard packet) Active Dry Yeast (or Instant Yeast)
* 1 cup (240ml) Warm Milk (Whole milk is best for richness, but any milk works)
* ¼ cup (50g) Granulated Sugar
* ½ cup (115g) Unsalted Butter, melted and slightly cooled
* 1 large Egg, at room temperature
* 1 teaspoon Salt
* 4 ½ to 5 cups (560-625g) All-Purpose Flour, plus more for dusting
- For the Filling:
* ½ cup (100g) Brown Sugar (packed)
* 2 tablespoons Ground Cinnamon
* ¼ cup (50g) Granulated Sugar (optional, but adds extra sweetness)
* ¼ cup (57g) Unsalted Butter, softened
- For the Sweet Icing:
* 2 cups (240g) Powdered Sugar (Confectioners’ Sugar)
* 3-4 tablespoons Milk or Heavy Cream (adjust for desired consistency)
* 1 teaspoon Pure Vanilla Extract
* Pinch of Salt
The Art of Making the Dough: From Liquid to Loaves
Creating the perfect cinnamon roll dough is all about patience and gentle handling. We’ll start by activating the yeast, a crucial step that ensures your rolls rise beautifully.
1. Activate the Yeast: In a large mixing bowl, combine the warm milk, ¼ cup of granulated sugar, and the yeast. Stir gently and let it sit for about 5-10 minutes. You’ll know it’s working if it becomes foamy on top – this means your yeast is alive and ready to work its magic.
2. Combine Wet Ingredients: Add the melted butter, egg, and salt to the yeast mixture. Whisk everything together until well combined.
3. Incorporate the Flour: Gradually add the flour, about 1 cup at a time, stirring with a wooden spoon or dough whisk after each addition. The dough will start to come together and become quite sticky. Once the flour is mostly incorporated, switch to kneading.
4. Knead the Dough: Turn the dough out onto a lightly floured surface. Knead for about 8-10 minutes. This develops the gluten, giving the rolls their structure and chew. The dough should become smooth, elastic, and slightly tacky but not sticky. If it’s too sticky, add a tablespoon of flour at a time. If it’s too dry, add a teaspoon of milk. The goal is a soft, pliable dough ball.
5. First Rise: Place the dough ball in a lightly oiled bowl, turning it once to coat. Cover the bowl tightly with plastic wrap or a damp kitchen towel. Let it rise in a warm, draft-free spot until doubled in size, which usually takes 1 to 1.5 hours. You can test if it’s ready by gently pressing two fingers into the dough; if the indentation remains, it’s risen enough.
Rolling, Filling, and Cutting: Creating the Swirls
Now comes the fun part – transforming that beautiful dough into those iconic swirls.
1. Prepare the Filling: While the dough rises, make the filling. In a small bowl, whisk together the brown sugar, cinnamon, and optional granulated sugar. Set aside. Soften the ¼ cup of butter by beating it with a fork until smooth and spreadable.
2. Roll Out the Dough: Punch down the risen dough gently to release air bubbles. Turn it out onto a lightly floured surface. Roll it out into a large rectangle, roughly 12 inches by 18 inches. Aim for an even thickness, about ¼ to ½ inch thick.
3. Spread the Butter: Using an offset spatula or the back of a spoon, spread the softened butter evenly over the entire surface of the dough, leaving a small border around the edges.
4. Add the Cinnamon Sugar: Sprinkle the cinnamon sugar mixture evenly over the buttered dough, pressing it down gently so it adheres.
5. Roll Up the Dough: Starting from the long edge closest to you, carefully roll the dough up tightly into a log. Pinch the seam closed firmly to seal. Try to roll as evenly as possible.
6. Cut the Rolls: Using a sharp knife or dental floss (for a cleaner cut), slice the log into 12 equal pieces. A piece of unflavored dental floss works wonders for getting clean cuts without squishing the dough. Place the rolls cut-side up in a lightly greased 9-inch round or square baking pan, or an 8×8 inch pan. They should fit snugly, touching each other slightly.
7. Second Rise: Cover the pan loosely with plastic wrap or a damp towel. Let the rolls rise again in a warm spot until they look puffy and have nearly doubled in size, about 30-45 minutes. They should look much fuller than before.
Baking to Golden Perfection
The moment of truth! Baking transforms the soft, risen dough into those irresistible golden rolls.
1. Preheat and Bake: Preheat your oven to 350°F (175°C). Place the rolls in the center of the oven. Bake for 25-35 minutes, or until the tops are a deep, golden brown and the rolls sound hollow when tapped on the bottom. The edges should be nicely browned. Keep an eye on them towards the end to prevent over-browning.
2. Cool Slightly: Remove the pan from the oven and let the rolls cool in the pan for at least 10-15 minutes. This allows them to set slightly and makes them easier to handle when you add the icing.
Creating the Perfect Sweet Icing: Smooth and Silky
The icing is the crowning glory, adding that final touch of sweetness and moisture.
1. Make the Icing: In a medium bowl, whisk together the powdered sugar, milk or cream, vanilla extract, and a pinch of salt until smooth and free of lumps. The consistency should be pourable but thick enough to coat the back of a spoon. If it’s too thick, add a tiny bit more milk. If it’s too thin, add a teaspoon of powdered sugar.
2. Drizzle the Icing: Once the rolls have cooled for 10-15 minutes, drizzle the icing evenly over the top of the warm rolls. The heat from the rolls will help the icing melt slightly and seep into the crevices, creating that signature sweet, gooey texture. You can also spread it gently with an offset spatula if you prefer.
Variations and Substitutions: Making it Your Own
While this recipe is fantastic as is, feel free to tweak it to suit your tastes or what you have on hand:
- Different Sugars: Use light or dark brown sugar for the filling for a deeper flavor. Substitute granulated sugar for the brown sugar if preferred.
- Flavor Boosters: Add 1-2 teaspoons of ground cinnamon to the filling for extra warmth. For a citrus twist, add the zest of 1 lemon or orange to the filling.
- Nutty Addition: Fold in ½ cup of chopped pecans, walnuts, or almonds into the filling for added crunch and flavor.
- Butter Alternatives: Use softened coconut oil or a dairy-free butter substitute for the filling and icing if needed.
- Milk Swap: Use almond milk, soy milk, oat milk, or any plant-based milk you prefer. The rolls will still be delicious.
- Icing Variations: Add a splash of lemon juice or orange juice to the icing for a bright note. Stir in ½ teaspoon of ground cinnamon or a pinch of nutmeg. For a richer icing, use heavy cream instead of milk.
Storage and Reheating: Keeping the Magic Alive
You’ll likely have leftovers (or maybe you baked a little extra!). Here’s how to keep them fresh:
- Room Temperature: Store leftover rolls in an airtight container at room temperature for up to 2 days. They’re best enjoyed fresh, but they’re still good the next day.
- Refrigeration: For longer storage (up to 4 days), refrigerate the rolls in an airtight container. Let them come to room temperature before serving.
- Freezing: For the absolute longest storage, wrap individual rolls tightly in plastic wrap and then place them in a freezer-safe bag or container. Freeze for up to 3 months. To reheat, thaw overnight in the fridge and then warm gently in a low oven (300°F/150°C) for 10-15 minutes, or microwave for 20-30 seconds per roll. For the icing, you can drizzle it on after reheating or make a fresh batch.
Common Mistakes to Avoid: Ensuring Success Every Time
Even experienced bakers can hit a snag. Here are a few pitfalls to watch out for:
- Yeast Not Active: If your yeast doesn’t foam after 5-10 minutes, it’s likely dead. Start over with fresh yeast.
- Dough Too Sticky: Don’t be afraid to add a little more flour during kneading. The dough should be soft but manageable.
- Dough Not Rising Enough: Ensure your rising spot is warm and draft-free. If it’s too cold, the yeast won’t activate properly. Don’t rush the rise time.
- Rolls Too Dense: Over-kneading can make the dough tough. Knead just until smooth and elastic. Under-kneading can also lead to dense rolls. The dough should spring back slightly when poked.
- Icing Too Thick or Thin: Adjust the milk or cream gradually until you get the perfect pourable consistency. It should drizzle easily but not run off the rolls.
- Burning the Tops: If your rolls are browning too quickly, tent them loosely with aluminum foil for the last 10-15 minutes of baking.
Frequently Asked Questions: Your Cinnamon Roll Queries Answered
- Can I make these ahead of time? Absolutely! You can prepare the dough through the first rise, shape the rolls, and let them rise in the pan overnight in the refrigerator. In the morning, let them come to room temperature for about 30 minutes, then bake as directed. You can also make the rolls ahead, cool them completely, freeze them, and reheat as needed.
- Why are my rolls not very fluffy? This often happens if the dough wasn’t kneaded enough, the yeast wasn’t active, or the rolls didn’t rise long enough. Ensure proper kneading and rising times.
- Can I use instant yeast instead of active dry yeast? Yes! You can use instant yeast in place of active dry yeast. You don’t need to activate it in warm milk first; just add it directly to the dry ingredients with the flour.
- How do I prevent the rolls from sticking to the pan? Generously grease your baking pan with butter or non-stick spray. You can also line the pan with parchment paper for easy removal.
- What if my icing is too thin? Simply whisk in a little more powdered sugar, a teaspoon at a time, until it reaches the desired thickness.
- Can I add fruit to the filling? Yes! Fold in ½ cup of chopped apples, berries, or raisins into the cinnamon sugar mixture before rolling. Drain any excess juice from fresh fruit first.
- How do I know when the rolls are done baking? They should be a deep golden brown on top and sound hollow when tapped on the bottom. The internal temperature should be around 190-200°F (88-93°C) if you have a thermometer.
The Final Touch: A Warm Welcome
There’s a profound satisfaction in pulling a pan of these golden cinnamon rolls from the oven. The aroma alone is enough to make anyone smile. The moment you drizzle that sweet icing over the warm, fluffy rolls, watching it melt into the crevices, is pure magic. These rolls are more than just a breakfast treat; they’re a symbol of comfort, a gesture of love, and a delicious reminder of the simple joys found in baking. So, gather your ingredients, roll up your sleeves, and create this weekend baking dream. Share them with family, friends, or simply savor them with a cup of coffee. Enjoy every golden, swirled, sweet bite!
")