Contents
Why This Version Stands Out
Typical green bean casseroles are creamy and comforting but often mild. By leaning into sautéed mushrooms and roasted or caramelized garlic, this version adds depth, earthiness, and savory complexity. You’ll taste the mushrooms’ umami, the garlic’s warmth, and the green beans’ brightness — all balanced in a creamy sauce. The crispy onion topping (optional) adds that familiar crunch, but this dish shines even without overdoing textures.
Ingredients & Tools You’ll Need
Ingredients (serves 6–8)
-
1½ to 2 lbs fresh green beans, trimmed and cut into bite‑size pieces
-
2 tablespoons butter (or olive oil, or a mix)
-
1 medium onion, finely diced
-
10–12 oz mushrooms (button, cremini, or mixed), sliced
-
3–4 cloves garlic, minced (or roasted garlic for mellower flavor)
-
2 tablespoons all-purpose flour
-
1 to 1¼ cups milk (whole milk or a mix of milk + cream)
-
½ cup broth (vegetable or chicken)
-
½ teaspoon dried thyme (or fresh)
-
Salt and freshly ground black pepper
-
1 to 1¼ cups crispy fried onions (store-bought or homemade) — optional or partial
-
Fresh parsley or chives for garnish
Tools & Equipment
-
Large pot or saucepan for blanching
-
Skillet or sauté pan
-
Baking dish (~9×13 or similar)
-
Mixing bowls
-
Whisk, spatula, spoon
-
Knife, cutting board
-
Oven preheating
Step‑by‑Step Instructions
1. Preheat & Prepare Beans
Preheat oven to 375 °F (190 °C).
Trim ends off the green beans and cut into ~1–1.5 inch segments. Bring a large pot of salted water to a boil. Blanch the beans 3–4 minutes (just until bright green, still a little crisp). Drain and optionally plunge into cold water to stop cooking and preserve color. Drain thoroughly.
Blanching helps ensure green beans don’t become mushy during casserole baking.
2. Sauté Onion, Mushrooms & Garlic
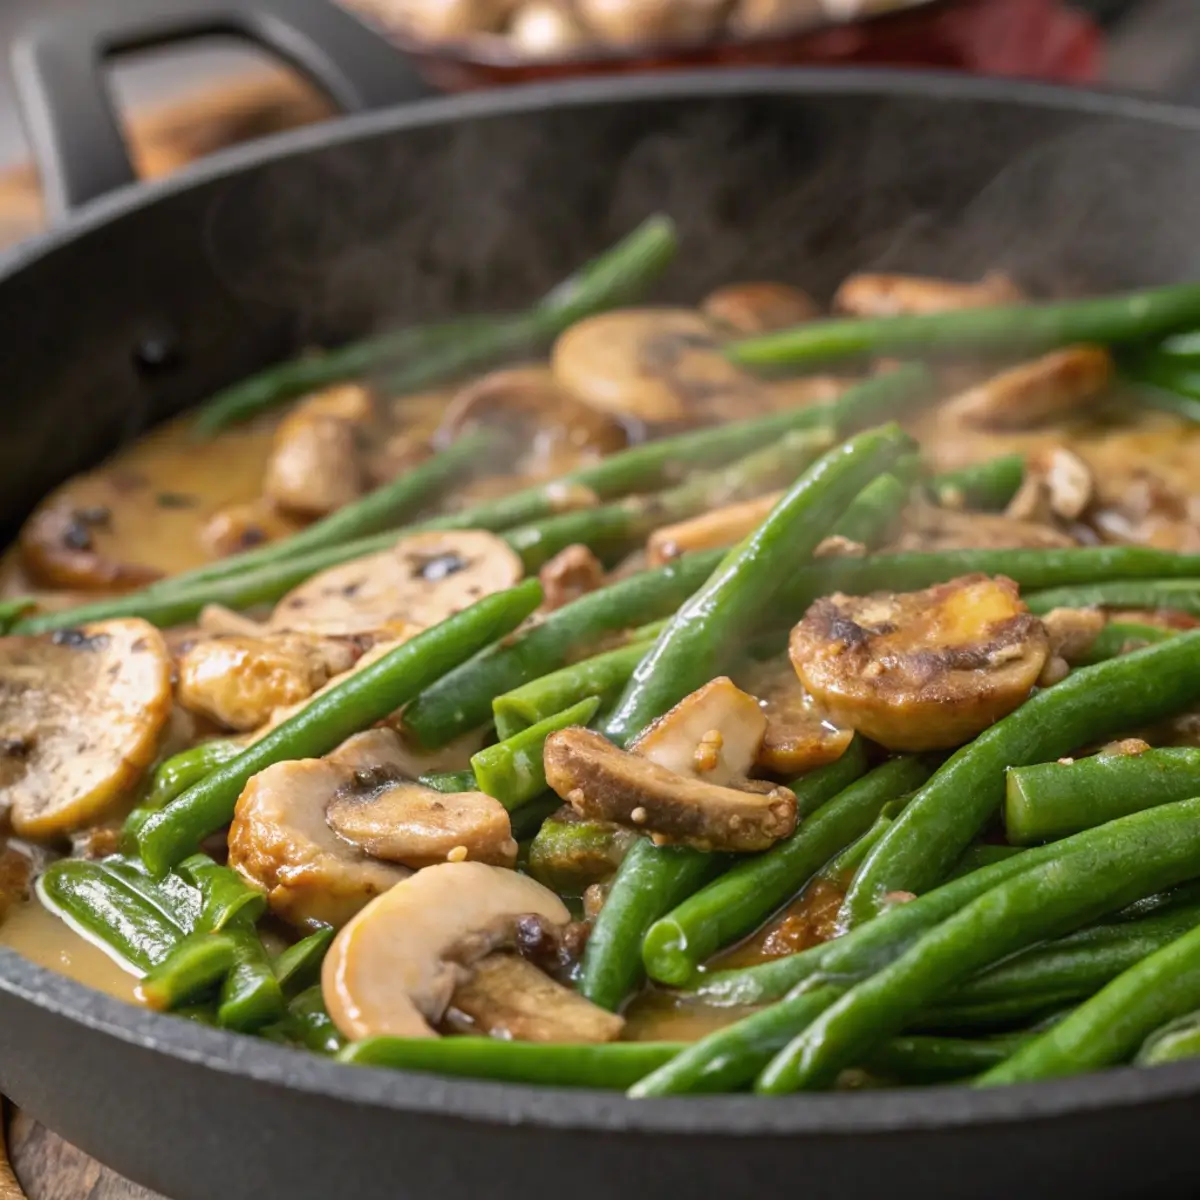
In a skillet over medium heat, melt butter (or warm oil). Add the diced onion and cook until translucent (4–5 minutes). Add mushrooms and sauté until they release moisture and begin to brown (5–7 minutes). Add garlic and cook about 30 seconds more, being careful not to burn. If using roasted garlic instead, stir it in near the end for mellow flavor.
This develops savory layers before the sauce.
3. Build the Sauce
Sprinkle the flour over the onion–mushroom–garlic mixture, stirring to coat. Cook ~1 minute to eliminate raw flour taste. Gradually whisk in milk and broth, stirring constantly to avoid lumps. Bring to a simmer, allow to thicken (2–4 minutes). Stir in thyme, salt, and pepper to taste.
If desired, you may stir in ½ cup of cheese (cheddar, Gruyère) for additional richness.
4. Combine Beans & Sauce, Add Onion Crunch
Gently fold the blanched beans into this creamy mushroom-garlic sauce until well coated. For extra onion flavor inside, fold in half of your crispy fried onions (optional). This ensures that some crunch is embedded inside, not just on top.
5. Transfer & Top
Transfer the bean + sauce mix into your greased baking dish, spreading evenly. Sprinkle the remaining crispy fried onions over the top. If the topping seems dry, you can drizzle a little melted butter or cream to encourage browning.
6. Bake
Bake uncovered for 25–30 minutes, until sauce bubbles and edges look set. If the topping isn’t golden enough, switch to broiler for 1–2 minutes (watch carefully) to crisp the onions.
7. Rest, Garnish & Serve
Let the casserole rest for 5–10 minutes so the sauce firms slightly, making it easier to serve. Garnish with chopped fresh parsley or chives before serving.
Tips & Flavor Enhancements
-
Roasted garlic: Roast whole garlic cloves ahead, mash, and stir into sauce for a mellow, rich garlic flavor.
-
Mushroom variety: Use cremini, shiitake, or a wild mushroom mix to deepen umami.
-
Less topping, more flavor: You don’t need a huge onion topping; subtle amounts suffice when your sauce is flavorful.
-
Cheese layer: A light layer of melting cheese just under the topping gives extra richness.
-
Make it ahead: Assemble (beans + sauce) and refrigerate covered, up to 24 hours. Top with onions just before baking.
-
Adjust texture: If you like your green beans firmer, reduce blanch time. If softer, bake a bit longer.
Serving & Pairing Suggestions
Serve this as a standout side with:
-
Roast turkey or chicken
-
Mashed potatoes
-
Stuffing
-
Cranberry sauce
-
Roasted root vegetables
-
Dinner rolls
Because it’s rich, include a crisp or acidic side (e.g. a green salad with vinaigrette) to balance.
Storage & Reheating
-
Leftovers: Store in airtight container in refrigerator for 3–4 days.
-
Reheat: Warm in oven at ~325 °F (160 °C) until hot, uncovered to preserve occasional crispness.
-
Refresh topping: If topping softens, sprinkle fresh onions or broil briefly before serving.
Nutritional & Health Notes
-
This recipe emphasizes vegetables and controlled dairy; you can lighten by reducing butter or using lower-fat milk.
-
Mushrooms and garlic bring nutrients and antioxidants.
-
By embedding some crispy onions rather than overloading the top, you moderate added fat or oil.
Frequently Asked Questions
Can I skip the crispy onions?
Yes — the dish is still excellent without them. The flavor from mushrooms and garlic carries it.
Can I use frozen or canned beans?
Yes. Thaw and drain frozen beans. For canned, drain and rinse well. Texture might be softer, but acceptable.
Can I make it vegan or dairy-free?
Yes. Use plant milk + plant-based butter or oil, and a vegan cheese or omit cheese. The method remains largely the same.
How far ahead can I prep it?
You can prepare the bean + sauce mixture and keep it refrigerated (without topping) 24 hours ahead. Then top and bake when needed.
Will the topping burn under broiler?
It can if too close or too long. Only broil 1 minute or two, and keep eye on it. Start it slightly further from heat.
")