Contents
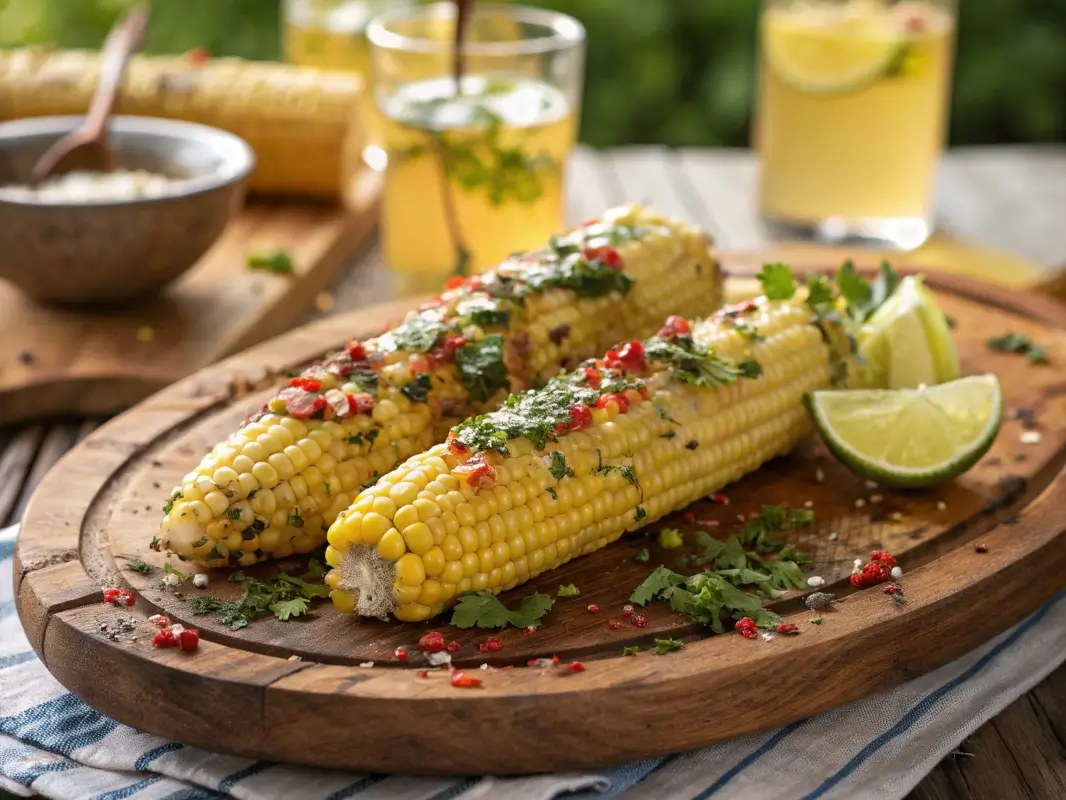
Grilled corn on the cob is a quintessential summer dish that brings out the best of sweet corn flavor while adding a delicious smoky char. When slathered with homemade herb butter, it transforms into a mouthwatering side that’s perfect for barbecues, picnics, or weeknight dinners. In this article, we’ll walk you through a detailed recipe for Grilled Corn on the Cob with Herb Butter, share tips to get it just right, and answer some frequently asked questions.
Why Grilled Corn is a Summer Staple
Few things say summer like the sound of corn sizzling on the grill. Corn on the cob is already delicious when boiled or steamed, but grilling elevates it by caramelizing the natural sugars in the kernels and adding a slightly smoky flavor. It’s easy to prepare, fun to eat, and loved by adults and kids alike.
What Makes This Recipe Unique?
While many recipes rely on plain butter or mayonnaise-based toppings, this one features a homemade herb butter with a blend of fresh herbs, garlic, and citrus zest. This adds a burst of flavor and freshness that makes each bite memorable. Plus, it’s customizable—you can adjust the herbs to match your meal or mood.
Ingredients
For the Corn:
-
6 ears of fresh corn, husked and cleaned
-
1 tbsp olive oil
-
Salt and pepper to taste
For the Herb Butter:
-
1/2 cup (1 stick) unsalted butter, softened
-
1 tbsp fresh parsley, finely chopped
-
1 tbsp fresh chives, finely chopped
-
1 tsp fresh thyme leaves
-
1 garlic clove, minced
-
Zest of 1 lemon
-
1/2 tsp sea salt
-
Optional: pinch of red pepper flakes for heat
How to Make Grilled Corn on the Cob with Herb Butter
Step 1: Prepare the Herb Butter
Start by making the herb butter so it has time to meld.
-
In a small bowl, combine the softened butter, parsley, chives, thyme, garlic, lemon zest, salt, and red pepper flakes (if using).
-
Mix well with a spoon or spatula until the herbs and seasonings are evenly distributed.
-
Transfer the butter to a piece of parchment paper or plastic wrap, roll into a log, and refrigerate for at least 30 minutes.
Step 2: Preheat the Grill
Heat your grill to medium-high (about 400°F or 200°C). Clean the grates well to prevent sticking.
Step 3: Prep the Corn
-
Brush each ear of corn lightly with olive oil.
-
Sprinkle with a pinch of salt and pepper for seasoning before grilling.
Step 4: Grill the Corn
-
Place the corn directly on the grill grates.
-
Cook for 10–12 minutes, turning every 2–3 minutes to ensure even charring.
-
Remove from the grill once the kernels are tender and have golden-brown char marks.
Step 5: Add the Herb Butter
-
While the corn is still hot, spread generous pats of the chilled herb butter over each ear.
-
Let the butter melt slightly into the corn before serving.
Tips for Perfect Grilled Corn
Choose Fresh Corn
Look for bright green husks that are tightly wrapped around the cob. The kernels should be plump and milky when pierced.
Don’t Overcook
Overcooked corn can become tough. Keep a close eye and turn the cobs often for that perfect grill mark without drying them out.
Herb Butter Variations
-
Cilantro & Lime: Swap the parsley for cilantro and add lime zest.
-
Smoky Paprika: Add smoked paprika and roasted garlic for a deeper flavor.
-
Parmesan Basil: Mix in grated Parmesan and chopped basil for an Italian twist.
Serving Suggestions
Grilled corn pairs well with almost anything. Here are a few ideas:
-
Grilled chicken, steak, or ribs
-
Summer salads like tomato and cucumber
-
Burgers and hot dogs
-
Vegetarian dishes like portobello mushrooms or grilled tofu
You can also slice the corn off the cob after grilling and mix it into salads, salsas, or tacos.
Nutritional Benefits
Corn is naturally gluten-free and provides a good source of fiber, vitamins B and C, and antioxidants. Using herb butter in moderation adds flavor without the need for excessive salt or processed sauces.
Frequently Asked Questions (FAQs)
Can I grill corn with the husks on?
Yes, grilling corn with the husks on helps steam the corn while adding a smoky flavor. Just soak the husks in water for 15 minutes first to prevent burning.
How do I store leftover grilled corn?
Allow the corn to cool completely, then wrap it in foil or place in an airtight container. Refrigerate for up to 3 days. Reheat on the grill or in the microwave.
Can I make herb butter ahead of time?
Absolutely! Herb butter can be made up to 5 days in advance and kept in the fridge. You can also freeze it for up to 3 months.
What if I don’t have fresh herbs?
You can use dried herbs in a pinch. Just remember: dried herbs are more concentrated, so use about one-third the amount.
Can I make this recipe vegan?
Yes! Simply use a plant-based butter alternative for the herb butter. Many brands offer vegan options that work well with herbs and garlic.
Final Thoughts
Grilled Corn on the Cob with Herb Butter is more than just a side dish—it’s a celebration of summer flavors. With just a handful of ingredients and a few simple steps, you can create a delicious, crowd-pleasing dish that’s bursting with freshness and character.
Whether you’re hosting a backyard BBQ or looking for a new way to enjoy seasonal produce, this recipe delivers big flavor with minimal fuss. So fire up the grill, grab some fresh corn, and let the herb butter work its magic!
