There’s something undeniably magical about the scent of cinnamon rolls baking in the oven. That warm, sweet, buttery aroma promises pure comfort and indulgence. While many reach for a bread machine for convenience, true cinnamon roll perfection lies in the hands of the baker, using simple ingredients and a little patience. Forget the machine – this guide will walk you, step-by-step, through creating soft, pillowy, cinnamon-scented rolls bursting with gooey filling and crowned with a luscious cream cheese frosting, all from scratch. Get ready to transform your kitchen into a cinnamon roll haven!
Why Go From Scratch?
You might wonder, “Why bother without a machine?” The answer is simple: control and connection. Making cinnamon rolls by hand allows you to feel the dough transform, understand its texture, and truly appreciate the process. The result? Rolls that are often lighter, more tender, and imbued with a warmth that pre-made or machine-made versions simply can’t replicate. Plus, it’s incredibly satisfying! This recipe relies on pantry staples: flour, yeast, milk, butter, sugar, eggs, and spices. No fancy equipment required – just your hands, a bowl, and a little love.
The Heart of the Recipe: Ingredients Explained
Let’s break down what makes these rolls special, focusing on accessible ingredients perfect for the USA home baker.
- All-Purpose Flour (4 1/2 cups / 560g): This is your foundation. While bread flour offers extra chew, all-purpose works beautifully here, creating tender rolls. Spoon flour into your measuring cup and level it off for accuracy.
- Active Dry Yeast (2 1/4 tsp / 1 packet): The magical ingredient that makes your dough rise. Ensure it’s fresh! If your yeast is old, it might not activate properly. Check the expiration date.
- Warm Milk (1 1/2 cups / 360ml): Crucial for activating the yeast. Use whole milk for the richest flavor and tenderness, but 2% or even skim will work. The milk should feel comfortably warm to the touch, like a baby’s bottle – not hot enough to scald.
- Unsalted Butter (1/2 cup / 115g, melted): Adds incredible richness and tenderness. Use good quality butter for the best flavor. Let it cool slightly before adding to the warm milk mixture to avoid killing the yeast.
- Granulated Sugar (1/2 cup / 100g): Sweetens the dough and feeds the yeast. You’ll use more for the filling!
- Large Eggs (2, room temperature): Adds structure, richness, and helps the rolls rise beautifully. Room temperature eggs incorporate more easily.
- Salt (1 1/2 tsp): Enhances all the other flavors. Don’t skip it!
- Ground Cinnamon (1 1/2 tbsp): The star spice! Use a high-quality cinnamon for the best aroma and flavor.
- Softened Butter (1/2 cup / 115g): For the filling. Softened means it’s pliable but not melted or greasy. This helps create that perfect, spreadable layer.
- Brown Sugar (1 cup / 200g, packed): Adds deep molasses notes and helps create that signature gooey caramelization. Packed means pressing it firmly into the measuring cup.
- Cream Cheese Frosting (1/2 cup / 115g softened cream cheese, 1/4 cup softened unsalted butter, 1 1/2 cups powdered sugar, 1 tsp vanilla extract): The crowning glory. This frosting is rich, tangy, and perfectly sweet. Ensure your cream cheese and butter are softened to room temperature for a smooth, lump-free frosting.
The Magic Begins: Step-by-Step Instructions
Now, let’s transform these ingredients into glorious rolls. This process involves mixing, kneading, rising, shaping, baking, and finally, the most rewarding part – frosting!
1. Activating the Yeast (The First Rise):
* In a large mixing bowl, combine the warm milk, melted butter, and granulated sugar. Stir gently until the sugar dissolves.
* Sprinkle the active dry yeast evenly over the warm milk mixture. Let it sit undisturbed for about 5-10 minutes. You’ll see it become foamy and bubbly – this is the yeast waking up and getting ready to work its magic! If it doesn’t foam, your yeast might be inactive, and you’ll need to start over with fresh yeast.
2. Building the Dough:
* Add the room temperature eggs, salt, and 4 cups (500g) of the all-purpose flour to the yeast mixture. Using a sturdy spoon or your hands, mix until a shaggy dough forms. It will be sticky at first.
* Turn the dough out onto a lightly floured surface. Begin kneading. This is where the real work happens! Knead for about 8-10 minutes. Push the dough away with the heel of your hand, fold it over, give it a quarter turn, and repeat. The dough is ready when it becomes smooth, elastic, and springs back when you gently poke it. It should be soft but not overly sticky. If it’s too sticky, add a tablespoon of flour at a time. If it’s too dry, add a teaspoon of milk.
Tip:* Kneading by hand develops the gluten, giving your rolls their light, airy structure. Don’t rush this step!
3. The First Rise (Bulk Fermentation):
* Lightly grease a large bowl with a little oil or butter. Place the kneaded dough ball into the bowl, turning it once to coat it lightly with oil. Cover the bowl tightly with plastic wrap or a damp kitchen towel.
* Let the dough rise in a warm, draft-free spot until it has doubled in size. This usually takes 1 to 1.5 hours. You can test if it’s ready by gently pressing two fingers about 1 inch into the dough. If the indentation remains, it’s risen enough. Avoid letting it rise too long, or the rolls can become overly airy and collapse slightly when baked.
4. Preparing the Filling & Shaping the Rolls:
* While the dough rises, make the filling. In a small bowl, combine the softened butter, brown sugar, and cinnamon. Mix until it forms a thick, spreadable paste. Set aside.
* Once the dough has doubled, punch it down gently to release the air. Turn it out onto a lightly floured surface and roll it into a large rectangle, roughly 18×24 inches. Aim for an even thickness.
* Spread the cinnamon-sugar butter mixture evenly over the entire surface of the dough, leaving a small border around the edges. This helps the rolls seal when rolled up.
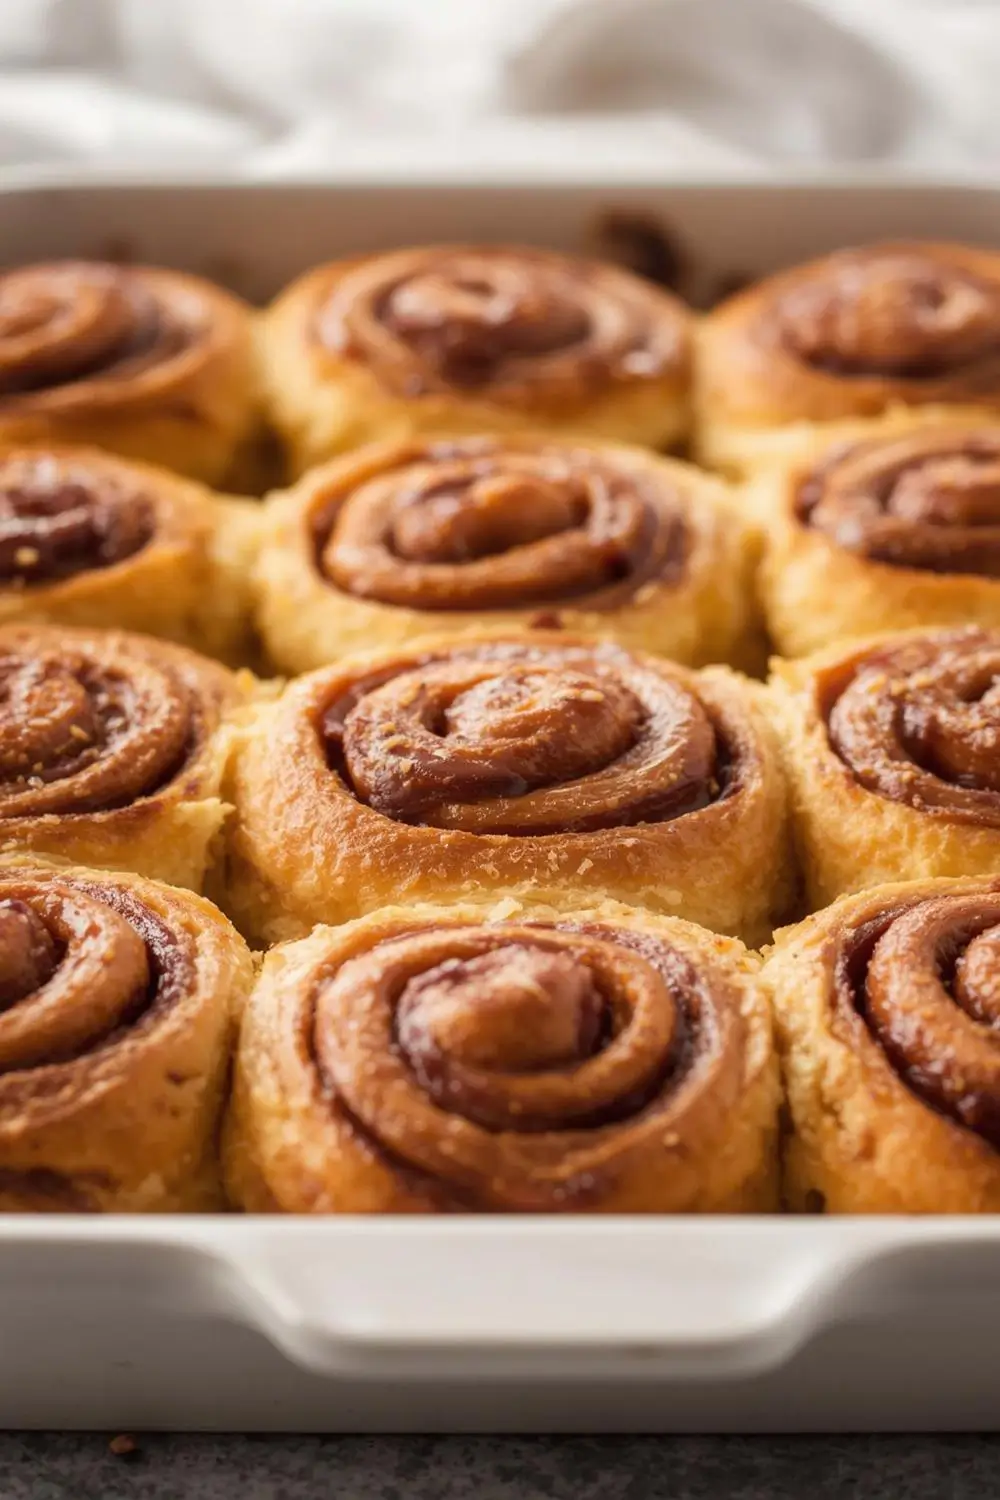
* Starting from the long end, carefully roll the dough up tightly into a log. Pinch the seam closed firmly. Using a sharp knife or dental floss, cut the log into 12 equal pieces (about 1.5-2 inches thick). Place the rolls cut-side up in a lightly greased 9×13 inch baking pan, leaving a little space between them for expansion. Cover loosely with plastic wrap or a towel.
5. The Second Rise (Proofing):
* Let the rolls rise again in a warm spot until they are noticeably puffy and almost doubled in size, about 30-45 minutes. They should look much fuller than before.
6. Baking to Golden Perfection:
* Preheat your oven to 375°F (190°C) while the rolls are proofing.
* Bake the rolls for 18-22 minutes, or until they are deeply golden brown on top and sound hollow when tapped on the bottom. The internal temperature should reach about 190°F (88°C) if you have a thermometer. They should be beautifully puffed and irresistible.
7. The Grand Finale: Frosting:
* As soon as the rolls come out of the oven, spread the cream cheese frosting generously over the warm rolls. The heat helps the frosting melt slightly and soak into the rolls, creating an incredible gooey texture. If you prefer, you can frost them after they cool slightly, but warm frosting is divine!
Tip:* For the creamiest frosting, ensure your cream cheese and butter are at room temperature before mixing. Beat them together until smooth before gradually adding the powdered sugar and vanilla.
Variations and Substitutions: Making it Your Own
The beauty of this recipe is its adaptability. Here are some ideas to customize your cinnamon rolls:
- Add-Ins: Fold in chopped pecans, walnuts, or raisins into the filling for extra crunch or chew. A handful of chocolate chips can create a decadent twist.
- Different Frostings: Swap the cream cheese frosting for a classic vanilla glaze (powdered sugar, milk, vanilla) or a maple glaze. A simple sprinkle of coarse sugar on top before baking adds sparkle.
- Flavor Boosters: Add a teaspoon of pure vanilla extract to the dough or a pinch of nutmeg to the filling for extra depth.
- Whole Wheat Twist: Substitute up to 1 cup of the all-purpose flour with whole wheat flour for a heartier, nuttier flavor (though the texture will be slightly denser).
- Vegan Option: Use plant-based milk (like almond or oat) and a flax egg (1 tbsp ground flaxseed + 3 tbsp water, mixed and rested 5 mins) in place of the regular egg. Use vegan butter and cream cheese. The texture might be slightly different, but it’s still delicious!
Storage and Reheating: Keeping the Magic Alive
- Cooling: Let the baked rolls cool in the pan for at least 10-15 minutes before transferring to a wire rack. This prevents them from becoming soggy.
- Room Temperature: Store cooled rolls in an airtight container at room temperature for up to 2 days. They are best enjoyed fresh!
- Refrigeration: For longer storage (up to 5 days), wrap individual rolls tightly in plastic wrap or place them in a sealed container. Let them come to room temperature before serving.
- Freezing: Cool the rolls completely. Wrap each roll tightly in plastic wrap, then place them in a freezer-safe bag or container. Freeze for up to 3 months. To reheat, thaw overnight in the fridge and warm gently in a 300°F (150°C) oven for 10-15 minutes, or microwave a single roll for 15-20 seconds. Frost after reheating for the best texture.
Common Mistakes to Avoid: Mastering the Process
- Killing the Yeast: Using milk that’s too hot (above 120°F / 49°C) will kill the yeast. Stick to comfortably warm milk.
- Under-Kneading: Insufficient kneading results in dense, tough rolls. Knead until the dough is smooth and elastic.
- Over-Kneading: Over-kneading can make the dough tough. Stop when it’s smooth and springs back.
- Rushing the Rise: Yeast needs time. Don’t skip the rises or rush them. Cold environments slow them down significantly.
- Overfilling: Too much filling can cause the rolls to leak and burn. Spread it evenly, leaving a border.
- Frosting Too Early: Frosting hot rolls can make the frosting melt and slide off. Wait until they are just warm.
- Using Expired Yeast: Old yeast won’t activate, leading to flat rolls. Always check the expiration date.
Your Frequently Asked Questions (FAQs)
- Q: Can I make these rolls ahead of time? Absolutely! You can prepare the dough through shaping the rolls, let them rise in the pan overnight in the fridge (cover tightly), then bake them in the morning. They might need a few extra minutes in the oven.
- Q: Why are my rolls dense? This usually happens from under-kneading, using old yeast, or not letting them rise long enough. Ensure you knead properly and give them ample time to rise.
- Q: Can I use a bread machine? While this recipe is designed without one, you can* use a bread machine on the dough cycle. Add ingredients in the order recommended by your machine (usually yeast first, then liquids, then flour, then add-ins). Once the cycle finishes, proceed with shaping, rising, and baking as directed.
- Q: How do I know when the dough has doubled? Press two fingers about 1 inch into the dough. If the indentation remains, it’s ready. It should look puffy and look like it’s taken up more space.
- Q: Can I use bread flour instead of all-purpose? Yes! Bread flour has more protein, which creates a slightly chewier texture. You might need a tiny bit less flour when kneading due to its absorbency.
- Q: What’s the best way to store frosting? Keep it covered in the refrigerator. Let it sit at room temperature for 15-30 minutes before spreading to make it easier to work with.
- Q: Can I freeze the baked rolls? Yes! Cool them completely, wrap tightly in plastic wrap, then place in a freezer bag or container. Freeze for up to 3 months. Thaw at room temperature or reheat gently as described.
The Final Verdict: Pure Cinnamon Roll Bliss
Creating these homemade cinnamon rolls without a bread machine is a journey worth taking. The process, from kneading the dough to the moment you pull the golden-brown rolls from the oven and spread that luscious cream cheese frosting over their warm, gooey centers, is deeply rewarding. The aroma that fills your home is pure magic, and the taste – soft, tender, cinnamon-spiced, and utterly decadent – is a testament to the simple joy of baking from scratch. They are the perfect treat for a weekend brunch, a special occasion, or simply a moment of pure, sweet indulgence. So, gather your ingredients, roll up your sleeves, and get ready to experience the unparalleled delight of homemade cinnamon rolls. Enjoy every heavenly bite!
")