Contents
- 1 Why Lemon Bars Belong on Your Labor Day Table
- 2 Ingredients – Simple & Bright
- 3 How to Make Zesty Lemon Bars
- 4 Tips for Perfect Lemon Bars
- 5 Variations & Serving Ideas
- 6 Nutrition Snapshot (Approximate per Serving—1/12 bar)
- 7 Frequently Asked Questions (FAQs)
- 8 Why They’re Ideal for Labor Day & Summer Gatherings
- 9 Historical Notes & Fun Facts
- 10 Final Thoughts
Why Lemon Bars Belong on Your Labor Day Table
-
Bright and refreshing — the perfect palate cleanser after smoky BBQs
-
Portable and easy to serve — great for potlucks or picnic desserts
-
Make ahead-friendly — bake in advance, chill, and dust sugar only before serving
-
No alcohol or odd ingredients — safe for every guest
-
Classic meets convenient — a timeless American treat with a fresh twist
Originating in the U.S. in the 1960s, lemon bars (“lemon squares”) combine a buttery shortbread crust with a citrusy, egg-based filling for one unforgettable bite.
Ingredients – Simple & Bright
For the Shortbread Crust
-
1 cup (227 g) unsalted butter, softened
-
½ cup (65 g) powdered sugar (plus extra for dusting)
-
1 2⁄3 cups (210 g) all-purpose flour
-
¼ teaspoon salt
-
Optional: 1 teaspoon finely grated lemon zest (enhances crust flavor)
For the Lemon Filling
-
4 large eggs, room temperature
-
1½ cups (300 g) granulated sugar
-
1 tablespoon lemon zest (from 1–2 lemons)
-
½ cup fresh lemon juice (about 3–4 small lemons)
-
⅔ cup (85 g) all-purpose flour
-
Pinch of salt
-
Optional: 1 teaspoon vanilla extract for depth
How to Make Zesty Lemon Bars
Step 1: Prepare the Crust
-
Preheat oven to 350°F (175 °C). Line a 9×9-inch baking pan with parchment paper, leaving overhang for easy removal.
-
In a bowl, cream together butter and powdered sugar until just combined. Stir in lemon zest if using.
-
Add flour and salt, mixing until the dough resembles coarse crumbs or holds together when pressed.
-
Press evenly into the lined pan. Bake for 15 minutes, or until edges begin to turn golden. Let cool for 5–10 minutes.
Step 2: Make the Lemon Filling
-
While crust bakes, whisk together eggs, granulated sugar, lemon zest and juice, flour, salt, and vanilla.
-
Whisk gently until blended—don’t overbeat to avoid air pockets.
-
Pour filling over warm crust. Tap pan on counter to release bubbles.
Step 3: Bake Again & Cool
-
Bake for 20–25 minutes until the center is just set and only slightly wobbles. Avoid over-baking to ensure creamy texture.
-
Let cool to room temperature (1–2 hours), then refrigerate at least another hour (or overnight) before slicing.
Step 4: Dust with Powdered Sugar & Slice
-
Use parchment overhang to lift the entire slab from the pan.
-
Dust generously with powdered sugar just before serving—this hides small cracks and adds sweetness.
-
Slice into 12 or 16 squares as desired.
Tips for Perfect Lemon Bars
-
Use fresh lemon juice and zest—nothing compares to fresh citrus for brightness.
-
Avoid overmixing the filling—gentle whisking yields a smooth texture. Overmixing introduces bubbles that can create holes in the custard.
-
Bake crust thoroughly before adding filling—this ensures a crisp, not soggy base.
-
Chill completely before slicing to allow filling to set and make clean cuts.
-
Clean knife between cuts to keep edges neat and avoid crumb transfer.
Variations & Serving Ideas
Flavor Twists
-
Berry swirl: Gently swirl crushed raspberries or strawberry puree into lemon filling before baking
-
Citrus combinations: Use lime or orange zest instead of—or in addition to—lemon
-
Gluten-free crust: Substitute gluten-free flour blend 1:1 for all-purpose flour
Presentation & Pairing
-
Mini tart version: Bake in muffin tins or mini tart pans for individual servings
-
Rustic look: Cut into triangles or wedges and serve on a platter dusted with powdered sugar
-
Serving suggestion: Best served alongside iced tea, lemonade, or fresh berries
Make-Ahead & Storage
-
Bars can be baked a day ahead, chilled, and stored covered in fridge until serving.
-
Freeze uncut bars (before dusting) for up to 3 months. Thaw overnight in fridge and dust sugar before serving.
Nutrition Snapshot (Approximate per Serving—1/12 bar)
-
Calories: ~230 kcal
-
Total Fat: ~11 g
-
Carbohydrates: ~32 g
-
Sugars: ~20–25 g
-
Protein: ~3 g
-
Fiber: <1 g
(Values vary based on crust thickness and sugar amount.)
Frequently Asked Questions (FAQs)
Can I use bottled lemon juice?
Fresh lemon juice is preferred; bottled can be less flavorful and slightly bitter.
Why did my crust go soggy?
Likely not baked long enough or filling seeped underneath. Press crust up the pan edges to prevent this.
My filling is bubbly—what happened?
Avoid vigorous whisking; bubbles rise during bake. Tap pan after pouring to release bubbles before baking.
How long do lemon bars last?
They keep in fridge about 4–5 days. Bars stored well in airtight container retain texture and flavor.
Why They’re Ideal for Labor Day & Summer Gatherings
-
Light citrus dessert contrasts well with smoky barbecue or heavy side dishes
-
Easy to transport cold and pre-sliced
-
Bright color and flavor fit perfectly with summer or patriotic-themed menus
-
Scalable recipe—double ingredients to fit larger pans or extended guest list
-
Kids and adults both love them—refreshing without excessive sweetness
Historical Notes & Fun Facts
-
Lemon bars first appeared in a widely published recipe in the Chicago Daily Tribune on August 27, 1962.
-
Lemon curd and shortbread both have deep roots: curd dates to 19th century Britain, while shortbread came from medieval Scotland.
-
Today, lemon bars remain a beloved staple at summer events, bake sales, and backyard parties nationwide.
Final Thoughts
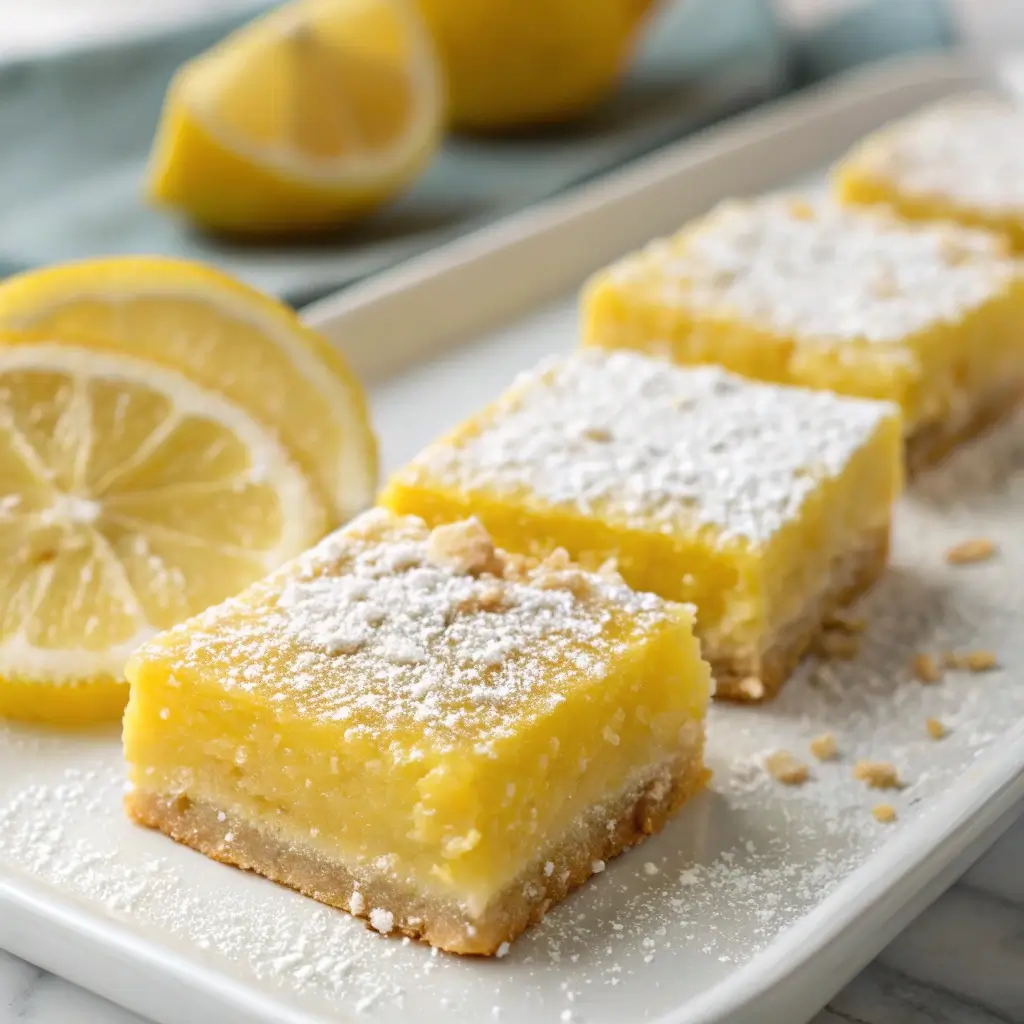
These Zesty Lemon Bars are a bright, buttery slice of summer that’s ideal for Labor Day or a sunny afternoon treat. Crisp shortbread, tangy lemon custard, and a snowy dusting of sugar deliver refreshment in every bite. They’re easy enough for novice bakers, elegant enough for gatherings, and reminiscent enough of classic comfort to feel timeless.
Celebrate with sunshine, flavor, and simplicity—and let these lemon bars bring a little zest to your holiday dessert lineup.
")