Contents
Magical Lucky Charms Rice Krispie Treats for Kid Party Fun
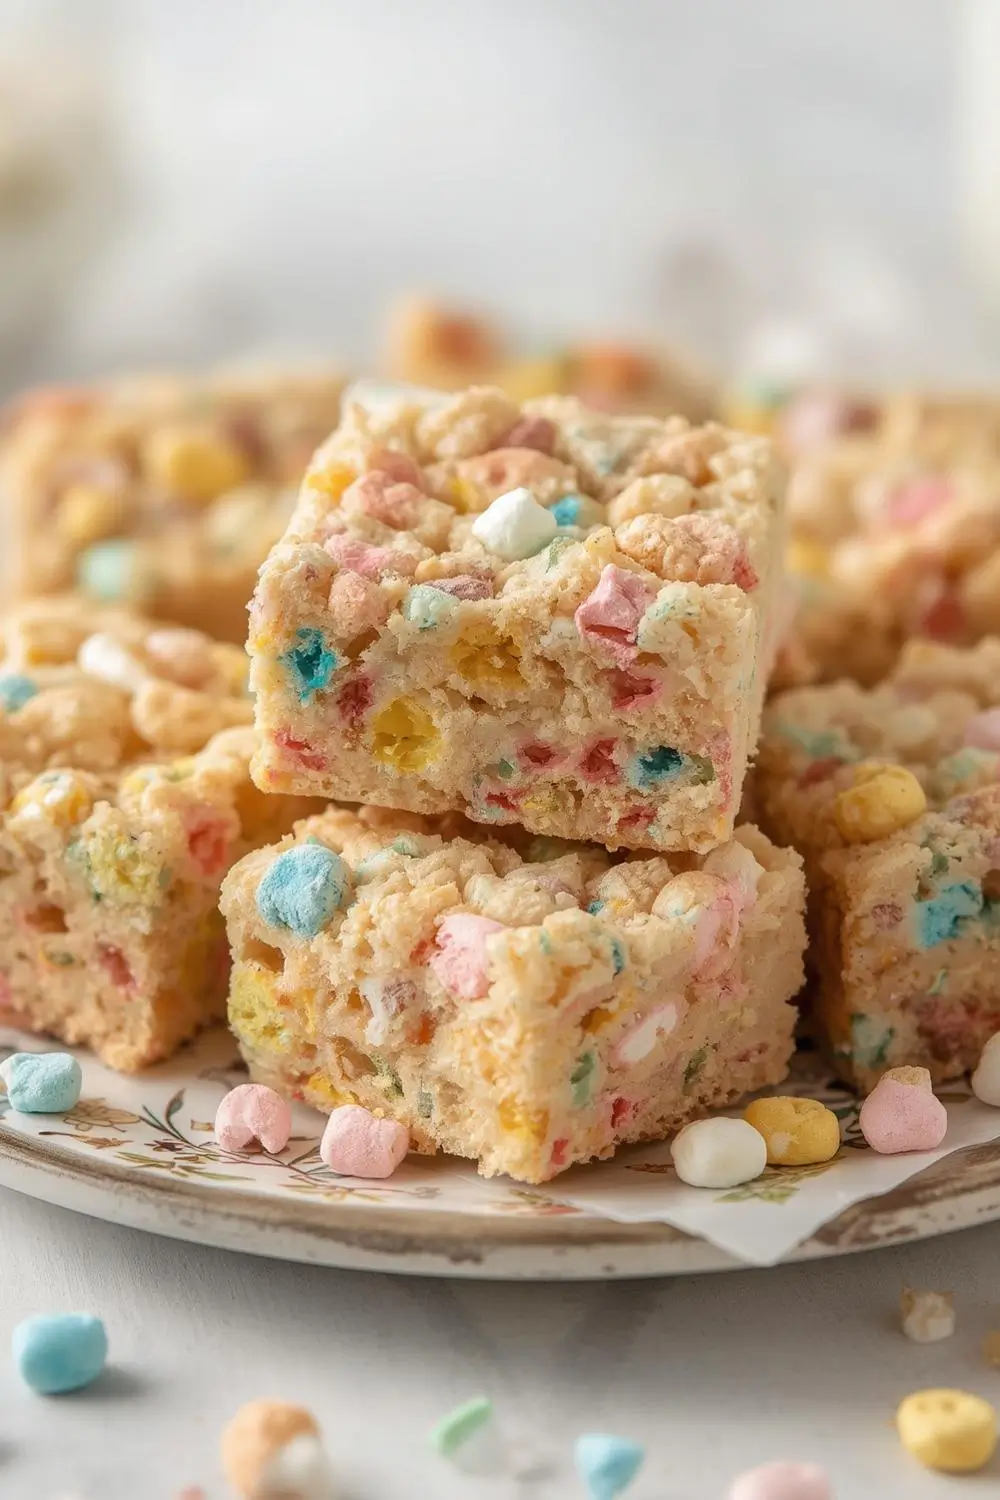
There’s something truly magical about watching children’s eyes light up when they spot a rainbow of edible joy. These Lucky Charms Rice Krispie Treats capture that wonder in every bite – crispy, chewy, and bursting with colorful marshmallow surprises. Perfect for birthday parties, classroom celebrations, or just because days, these treats transform ordinary ingredients into extraordinary edible happiness with minimal effort.
What makes these bars truly special? The playful texture contrast between the classic crispy rice base and those signature colorful marshmallow bits creates a delightful experience that appeals to both kids and playful adults. Best of all, you don’t need any special baking skills – just a stove, a few pantry staples, and about 20 minutes of magic-making time.
Why You’ll Love This Recipe
• No oven required – perfect for warm weather events
• Done in under 30 minutes (including setup time)
• Customizable with different mix-ins
• Easily adapts for dietary restrictions
• Makes a large batch for parties
• Perfect make-ahead treat
• Creates minimal kitchen mess
• Guaranteed kid pleaser
Ingredients You’ll Need (And Why They Matter)
Let’s break down every component for perfect results. Exact measurements appear in the printable recipe card below.
Core Ingredients
• Butter (salted or unsalted): Forms the rich base and prevents sticking. Salted butter balances sweetness beautifully, but unsalted works too (just add a pinch of salt). Use stick butter for easiest measuring – never margarine or spreads containing liquid.
• Marshmallows (regular-sized or mini): The glue that holds everything together. Mini marshmallows melt faster, but standard work fine. Always use fresh marshmallows – stale ones create tough bars.
• Crispy Rice Cereal (name brand): Provides the classic crunch. Generic cereals often lack the proper crispness. Check gluten-free labels if needed.
• Lucky Charms Cereal (with marshmallows): The star attraction! Reserve some magical bits from the box for decoration before mixing. Measure after removing marshmallows if you want precise ratios.
Optional Ingredients
• Vanilla extract: Adds depth to the flavor profile
• Pinch of salt: Enhances sweetness and balances flavors
• Food coloring: Pastel gel colors make treats extra festive
• Sprinkles: For decorating before the treats set
Equipment Checklist
• Large heavy-bottomed pot (prevents burning)
• Heatproof silicone spatula (marshmallows won’t stick)
• 9×13-inch baking dish (lightly greased)
• Parchment paper (for easy removal)
• Measuring cups and spoons
• Sharp chef’s knife (for clean cuts)
• Cooling rack (optional)
Step-by-Step Instructions for Magical Treats
Follow these easy steps for perfect results every time. I’ve included professional tricks learned through years of sticky fingers and grinning taste-testers.
Step 1: Prepare Your Workspace
Lightly grease your baking dish with butter or cooking spray. Line with parchment paper, leaving overhangs on two sides for easy lifting later. Measure all ingredients before starting – marshmallow mixtures wait for no one!
Pro Tip: Lightly grease your spatula and measuring cups with butter or spray to prevent marshmallow adhesion.
Step 2: Melt the Butter
In your large pot over low heat, melt the butter completely. Swirl the pot occasionally for even melting. The butter should be liquid but not bubbling vigorously – we’re not browning it here.
Low heat prevents scorching and allows gentle marshmallow melting later.
Step 3: Melt the Marshmallows
Add all marshmallows to the melted butter. Stir constantly with your spatula until completely smooth and melted, about 4-5 minutes on low heat. If adding vanilla or salt, mix them in now.
Critical Note: Never walk away from melting marshmallows. They can burn quickly if heat’s too high or left unattended.
Step 4: Combine the Cereals
Remove pot from heat immediately after marshmallows melt. Quickly add crispy rice cereal and stir until evenly coated. Gently fold in the Lucky Charms cereal (with most marshmallows) just until distributed – overmixing crushes those precious shapes.
Texture Trick: For defined marshmallow bits, let mixture cool 90 seconds before adding Lucky Charms.
Step 5: Press Into Pan
Transfer mixture to your prepared pan. Lightly grease your hands with butter or cooking spray. Gently press mixture evenly into the pan without compacting too hard – dense bars lose their magical lightness.
Step 6: Decorate (Optional)
While still warm, press reserved Lucky Charms marshmallows and sprinkles into the surface. This creates a professional bakery-style finish.
Step 7: Cool Completely
Let treats cool at room temperature for at least 2 hours. Never refrigerate before cooling – condensation makes them soggy. For faster setting, place in cool (not cold) area with airflow.
Expert Variations & Creative Twists
Make these treats uniquely yours with these festive adaptations:
Holiday Themes
• St. Patrick’s Day: Add green food coloring to marshmallow mix with rainbow sprinkles
• Birthday Fun: Mix in colorful candy-coated chocolates
• Valentine’s Day: Use pink/red food coloring and heart-shaped sprinkles
Texture Variations
• Extra Crunch: Add ¼ cup crushed pretzels
• Chewy Upgrade: Mix in ½ cup mini marshmallows
• Chocolate Lovers: Drizzle melted chocolate over cooled treats
Dietary Adaptations
• Gluten-Free: Use certified GF crispy rice and Lucky Charms varieties
• Dairy-Free: Substitute plant-based butter
• Egg-Free: Naturally contains no eggs
Storage & Freshness Tips
Keep your treats magical with proper storage:
• Room Temperature: Store in airtight container at room temperature up to 3 days
• Refrigeration: Not recommended – makes treats hard
• Freezing: Individually wrap bars in parchment, then freeze in airtight container up to 2 months
Reviving Stale Treats: Place individual bars in microwave for 5 seconds to restore softness.
7 Common Mistakes to Avoid
Learn from others’ kitchen mishaps:
1. Burned Marshmallows: Always use low heat and constant stirring
2. Crumbly Bars: Not enough marshmallow mixture – measure precisely
3. Hard Bars: Overpressing mixture in the pan
4. Soft Bars: Undercooking marshmallow mixture
5. Marshmallow Separation: Letting mixture sit before pressing
6. Soggy Texture: Using stale cereal – always check freshness
7. Sticky Cutting: Not greasing knife between cuts
FAQ Section
Can I use different cereal combinations?
Absolutely! Try Fruity Pebbles for extra color or Cocoa Krispies for chocolate lovers. Adjust marshmallow amounts slightly if using denser cereals.
My mixture is too sticky to handle – what now?
Lightly moisten your hands with water (shake off excess) instead of butter. The water creates a temporary barrier against sticking.
Can I make these vegetarian/vegan?
Yes! Use plant-based butter and vegan marshmallows. Many supermarkets now carry gelatin-free marshmallows near baking supplies.
Do these ship well for care packages?
Ship in airtight containers with wax paper layers. Avoid hot weather shipping as marshmallows soften. These make excellent college care package treats!
My Lucky Charms bag has few marshmallows – any fixes?
Purchase additional cereal marshmallows online or pick marshmallow bits from second box. In a pinch, use pastel mini marshmallows for similar effect.
Can I mix in candies like M&Ms?
Wait until mixture cools slightly (2 minutes) before folding in candies to prevent melting. Small chocolate chips or freeze-dried fruit also work wonderfully.
Conclusion
These enchanting Lucky Charms Rice Krispie Treats will become your secret weapon for creating joyful moments. Whether building magical unicorn party buffets or surprising lunchboxes with rainbow smiles, these no-bake wonders check all the boxes: easy, affordable, nostalgic, and irresistibly whimsical.
The real magic happens in the making – little hands love helping press marshmallows into the pan or choosing creative decorations. So grab your spatula, cue up some festive music, and prepare for the sweetest compliments when you unveil these magical treats. Tag me in your creations – I adore seeing your edible rainbows come to life!
")