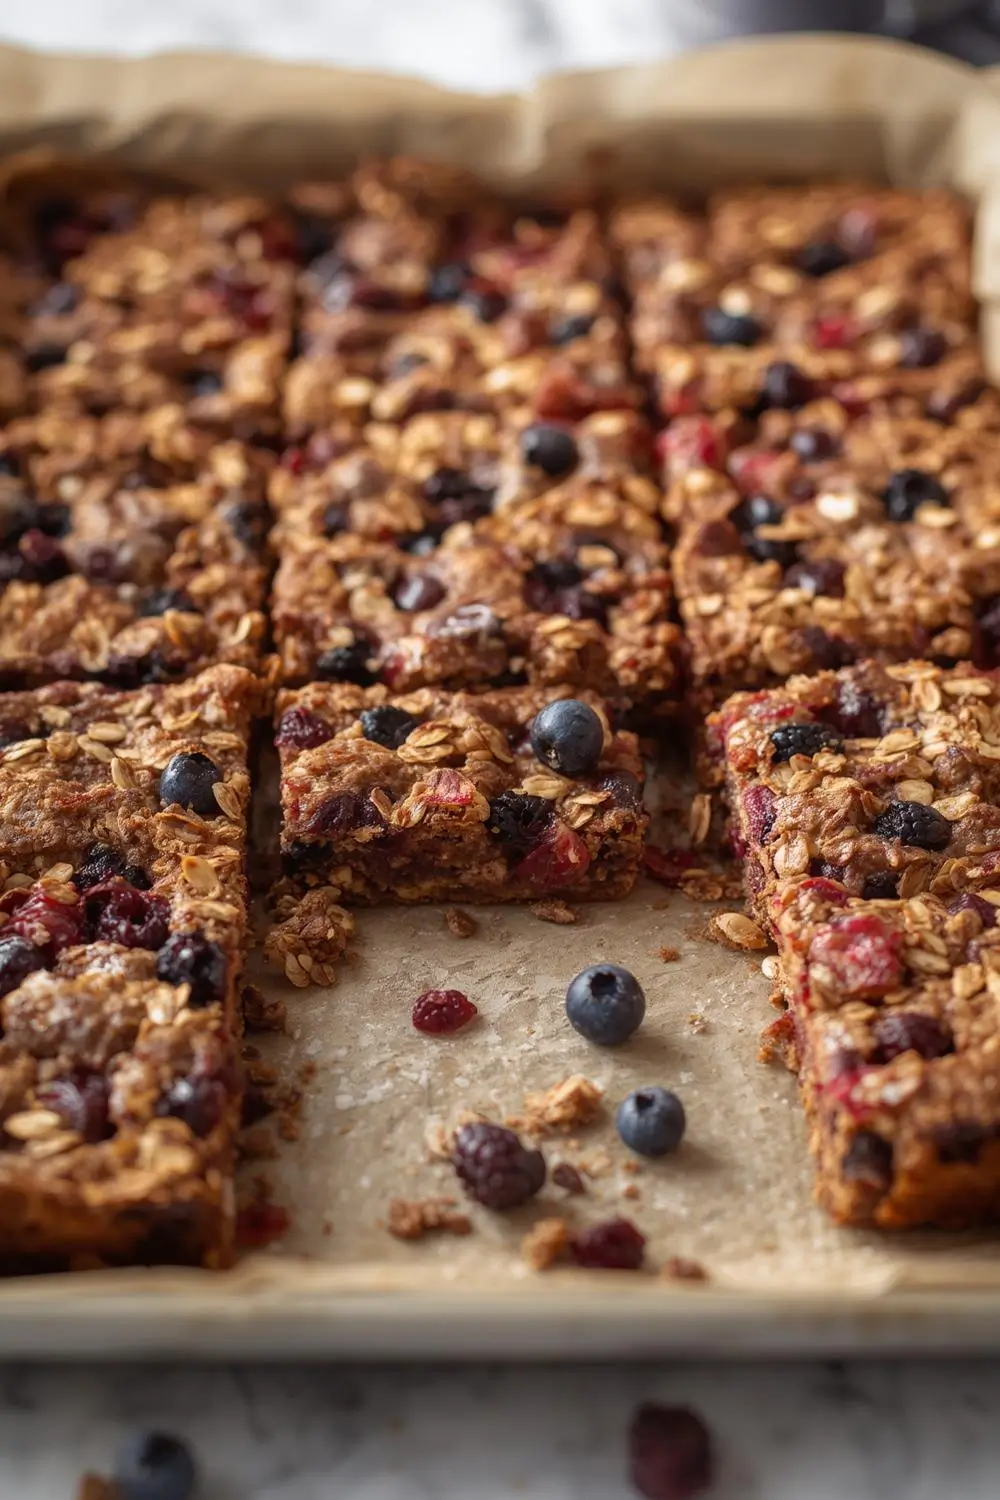
The Ultimate Make-Ahead Berry BreakfastOatmeal Bars: Your Secret Weapon for Stress-Free Mornings
Imagine waking up to the promise of a delicious, nutritious breakfast already waiting for you. No frantic morning scrambles, no unhealthy grab-and-go options. Just pure, satisfying goodness packed with fiber, antioxidants, and the natural sweetness of ripe berries. Welcome to the world of these incredible Make-Ahead Berry Breakfast Oatmeal Bars. They are the ultimate solution for busy mornings, supporting your weight loss goals, and embracing clean eating effortlessly. Baked to golden perfection with wholesome ingredients, these bars are your new breakfast obsession.
Why These Bars Are a Game-Changer
Life gets hectic. Mornings are often the busiest time, leaving little room for a proper, healthy breakfast. That’s where these bars shine. They transform your morning routine from chaotic to calm. Packed with rolled oats, a powerhouse of soluble fiber, they provide sustained energy and keep you feeling full until lunchtime. The mixed berries – fresh or frozen – burst with vitamins, minerals, and antioxidants, fighting inflammation and boosting your immune system. Natural sweetness comes from mashed ripe bananas and a touch of maple syrup or honey, eliminating the need for refined sugars. Plus, they’re incredibly versatile, easy to customize, and freeze beautifully for weeks of effortless breakfasts.
The Heart of the Recipe: Ingredients Explained
Creating these bars is simple, but understanding why each ingredient matters elevates your baking. Here’s your comprehensive ingredient list:
- Rolled Oats (2 cups): The foundation. Look for old-fashioned rolled oats, not quick oats. They hold their shape beautifully during baking and provide the perfect chewy texture. They’re gluten-free if certified GF.
- Mixed Berries (2 cups): Fresh or frozen (thawed and drained) work wonders. Blueberries, raspberries, strawberries, and blackberries create a beautiful mosaic of color and flavor. Frozen berries are often more affordable and equally nutritious.
- Mashed Banana (1 large, about 1 cup): This is your natural sweetener and binder. A ripe banana adds moisture, subtle sweetness, and helps hold the bars together. It also contributes potassium and vitamins.
- Maple Syrup or Honey (1/4 cup): Adds sweetness and enhances the flavor profile. Maple syrup offers a richer taste, while honey is a classic choice. Adjust to taste.
- Unsweetened Applesauce (1/4 cup): Adds moisture and helps keep the bars tender without extra fat. It also contributes fiber.
- Vanilla Extract (1 tsp): A splash of pure vanilla extract elevates all the flavors, making them taste more complex and delicious.
- Baking Powder (1 tsp): Ensures the bars rise slightly and have a pleasant texture.
- Salt (1/4 tsp): Enhances all the other flavors, making them taste more balanced and vibrant.
- Cinnamon (1/2 tsp): Adds warmth and complements the berries perfectly. Optional, but recommended.
- Optional Add-Ins: Feel free to get creative! A handful of chopped nuts (walnuts, pecans, almonds), seeds (chia, flax, pumpkin), or even a sprinkle of dark chocolate chips can be stirred in for extra texture and nutrition.
Step-by-Step Instructions: Baking Bliss
Now, let’s turn these ingredients into magic. Follow these steps carefully for perfect results every time.
1. Prep the Pan: Preheat your oven to 350°F (175°C). Lightly grease an 8×8 inch baking pan or line it with parchment paper, leaving an overhang on two sides for easy removal. This step is crucial for clean-up and bar removal.
2. Combine Dry Ingredients: In a large bowl, whisk together the rolled oats, baking powder, salt, and cinnamon (if using). This ensures even distribution and prevents clumping.
3. Mix Wet Ingredients: In a separate medium bowl, whisk together the mashed banana, maple syrup or honey, applesauce, and vanilla extract until smooth. This creates your wet base.
4. Combine Wet and Dry: Pour the wet mixture into the bowl with the dry ingredients. Stir gently but thoroughly until just combined. Be careful not to overmix; a few small lumps are perfectly fine. Overmixing can lead to tough bars.
5. Fold in Berries: Gently fold in the mixed berries. Be gentle to avoid crushing them too much. The berries will release some juice, which is perfectly normal.
6. Transfer to Pan: Pour the mixture into your prepared baking pan. Using a spatula, press the mixture down very firmly and evenly into the pan. This step is vital! Pressing down ensures the bars hold together when cut and have a satisfying, cohesive texture. Make sure the top is smooth and compact.
7. Bake to Perfection: Place the pan in the preheated oven and bake for 30-35 minutes. The bars are done when the top is golden brown, the edges look set, and a toothpick inserted near the center comes out clean or with just a few moist crumbs (not wet batter). The bars will firm up significantly as they cool.
8. Cool Completely: This is non-negotiable! Remove the pan from the oven and place it on a wire rack. Let the bars cool completely in the pan, ideally for at least 2-3 hours, or even overnight. Cutting into warm bars will result in a crumbly, messy disaster. Patience pays off here for clean slices.
9. Slice and Serve: Once completely cool, lift the bars out of the pan using the parchment paper overhang. Place them on a cutting board. Using a sharp knife, slice into squares or rectangles. Wipe the knife clean between cuts for neat slices. Enjoy warm or at room temperature. They’re fantastic cold too!
Variations & Substitutions: Make It Yours
The beauty of these bars lies in their adaptability. Here are some ideas to personalize them:
- Berry Swap: Use any combination of berries you love. Frozen berries work great and are often more economical. If using very tart berries like raspberries, you might add a tiny bit more sweetener.
- Nutty Twist: Add 1/2 cup of chopped walnuts, pecans, or almonds for crunch and healthy fats.
- Seed Power: Stir in 2-3 tablespoons of chia seeds, flax seeds (ground), or pumpkin seeds for extra fiber and omega-3s.
- Spice It Up: Add a pinch of nutmeg or ginger along with the cinnamon for a different flavor profile.
- Chocolate Lover’s Delight: Fold in 1/2 cup of dark chocolate chips (at least 70% cocoa) for a decadent treat.
- Gluten-Free: Ensure your rolled oats are certified gluten-free if needed.
- Vegan Option: Use maple syrup instead of honey. Ensure your baking powder is vegan (most are, but check labels).
Storage & Reheating: Keeping Them Fresh
These bars are designed for convenience:
- Room Temperature: Store cooled bars in an airtight container at room temperature for up to 3 days. They stay wonderfully moist.
- Refrigerator: For longer freshness (up to a week), store them in the fridge. They might firm up slightly, but they’re still delicious. Let them come to room temperature before eating for the best texture.
- Freezer: The ultimate make-ahead strategy! Place cooled bars in a single layer on a baking sheet and freeze for 1-2 hours until solid. Then transfer them to a freezer-safe bag or container. They’ll keep for up to 3 months. Thaw overnight in the fridge or at room temperature for a quick breakfast.
Reheating: For a warm, comforting treat, reheat a bar in the microwave for 15-20 seconds or wrap it in foil and warm it in a 300°F (150°C) oven for 5-7 minutes. Enjoy!
Common Mistakes to Avoid: Baking Wisdom
Even experienced bakers can slip up. Here’s how to avoid pitfalls:
Overmixing: This is the #1 culprit for tough bars. Mix until just* combined. Lumps are okay!
- Under-Pressing: If you don’t press the mixture firmly into the pan, the bars will crumble when you cut them. Use the bottom of a glass or a spatula for maximum pressure.
- Cutting Too Soon: Cutting warm bars is a recipe for disaster. Wait for complete cooling (2+ hours) for clean slices.
- Using Quick Oats: They turn mushy and don’t hold their shape. Stick with rolled oats.
- Omitting Salt: Salt enhances sweetness and balances flavors. Don’t skip it!
- Using Too Much Liquid: If your mixture seems too wet, add a tablespoon more oats. If it’s too dry, add a teaspoon of applesauce or milk.
Your Burning Questions Answered (FAQs)
- Can I use quick oats instead of rolled oats? No, quick oats will make the bars mushy and crumbly. Stick with rolled oats.
- Can I make these gluten-free? Yes! Use certified gluten-free rolled oats.
- Can I use frozen berries? Absolutely! Just make sure to thaw them and drain off any excess juice before folding them in.
- How long do they last? Stored properly in the fridge, they last up to a week. Frozen, they keep for up to 3 months.
- Can I add nuts or seeds? Yes! Stir in 1/2 cup of chopped nuts or seeds like chia or flax after mixing the wet and dry ingredients.
- Are they vegan? Yes, if you use maple syrup instead of honey.
- Can I make them sweeter? Increase the maple syrup or honey to 1/3 cup if desired. You can also add a mashed extra banana.
- Why do they need to cool completely? Cutting them warm causes them to crumble. Cooling allows them to set firmly.
- Can I add chocolate chips? Yes! Fold in 1/2 cup of dark chocolate chips for a delicious twist.
- What if my bars are too dry? They might need a bit more applesauce or mashed banana next time. Storing them in an airtight container helps retain moisture.
The Final Bite: A Conclusion You’ll Love
These Make-Ahead Berry Breakfast Oatmeal Bars are more than just a recipe; they’re a lifestyle upgrade. They embody the principles of clean eating, provide sustained energy, and eliminate the morning rush. With their wholesome ingredients, natural sweetness, and incredible convenience, they become a staple in your kitchen. Whether you’re aiming for weight loss, seeking healthier meal prep options, or simply craving a delicious, satisfying breakfast, these bars deliver. They’re beginner-friendly, endlessly customizable, and freeze beautifully for weeks of effortless mornings. So, gather your ingredients, preheat your oven, and experience the joy of a breakfast that’s ready when you are. Enjoy every wholesome, berry-filled bite!
")