The Ultimate Make-Ahead Cinnamon Rolls: Sweet Holiday Magic in Your Freezer
Imagine waking up on Christmas morning, the scent of cinnamon and sugar already filling your kitchen, and finding perfectly baked, gooey cinnamon rolls waiting for you. No frantic mixing, kneading, or rising times. Just warm, tender rolls, ready to share with family and friends. That’s the magic of these make-ahead cinnamon rolls. Designed for the busy holiday season, they offer the ultimate convenience without sacrificing flavor or texture. This detailed guide will walk you through creating these holiday treasures, ensuring your mornings are filled with joy, not stress.
Why Make-Ahead Cinnamon Rolls are a Holiday Game-Changer
The holidays are a whirlwind of preparations, gatherings, and cherished traditions. The last thing you need is another thing to rush around for. Make-ahead cinnamon rolls transform your holiday baking from a time-consuming chore into a seamless part of your celebration. By preparing the dough, shaping the rolls, and even baking them partially ahead of time, you reclaim precious moments. You can focus on decorating the tree, wrapping gifts, or simply enjoying the company of loved ones, knowing that a warm, homemade breakfast is just a few minutes away. These rolls are incredibly versatile – perfect for Christmas morning, New Year’s brunch, or any special gathering. They freeze beautifully, allowing you to batch-bake and store them for months, ensuring you always have a special treat on hand.
The Heart of the Roll: Understanding Your Dough
The foundation of any great cinnamon roll is its dough. This recipe uses a rich, slightly sweet yeast dough that balances beautifully with the cinnamon-sugar filling and the luscious cream cheese frosting. Don’t be intimidated by yeast! With a few simple steps and attention to temperature, you’ll master it. The dough needs time to rise, but this rising happens primarily in the refrigerator overnight, developing complex flavors and making the dough incredibly pliable. This cold fermentation is key to the rolls’ tender crumb and deep flavor profile.
Gathering Your Ingredients: What You’ll Need
Here’s everything you’ll need to create these holiday delights. I’ll explain the role of each ingredient, especially important for beginners understanding the ‘why’ behind the recipe.
- For the Dough:
* Warm Milk (1 cup / 240ml): Crucial for activating the yeast. It needs to be warm, not hot (around 105-110°F / 40-43°C). Too hot kills the yeast; too cold won’t activate it. Whole milk adds richness, but 2% works fine.
* Active Dry Yeast (2 1/4 tsp / 1 standard packet): The leavening agent that makes the dough rise. Ensure it’s fresh!
* Granulated Sugar (1/4 cup / 50g): Feeds the yeast and adds a touch of sweetness. Also helps tenderize the gluten.
* Large Eggs (2, room temperature): Add richness, structure, and moisture. Room temperature eggs incorporate better.
* Unsalted Butter (1/2 cup / 115g, melted and slightly cooled): Provides flavor, tenderness, and richness. Melted butter is easier to mix in.
* Salt (1 1/2 tsp): Enhances all the flavors, balances the sweetness, and strengthens the gluten structure.
* All-Purpose Flour (4 1/2 – 5 cups / 560-625g): The main structure. Start with 4 1/2 cups and add more as needed. Bread flour can be used for extra chew, but AP is perfect here.
* Vanilla Extract (1 tsp): Adds a subtle depth of flavor that complements the cinnamon beautifully.
- For the Cinnamon Sugar Filling:
* Brown Sugar (3/4 cup / 150g, packed): Provides a deeper molasses flavor and moisture compared to white sugar.
* Ground Cinnamon (2 tbsp): The star flavor! Use high-quality cinnamon for the best taste.
* Salt (1/4 tsp): Enhances the cinnamon flavor.
* Unsalted Butter (1/4 cup / 57g, softened): Creates a spreadable paste that binds the filling and adds richness.
- For the Cream Cheese Frosting:
* Cream Cheese (8 oz / 225g, softened): The creamy, tangy base. Full-fat is essential for the best texture and flavor.
* Unsalted Butter (1/4 cup / 57g, softened): Adds richness and helps the frosting spread smoothly.
* Powdered Sugar (2 1/2 – 3 cups / 300-375g): Sweetens the frosting and gives it structure. Sift it for a smooth texture.
* Vanilla Extract (1 tsp): Enhances the overall flavor.
* Salt (1/4 tsp): Balances the sweetness.
Step-by-Step: Bringing the Dough to Life
Now, let’s get hands-on! This process is straightforward, but patience with the rising times is key.
1. Activate the Yeast (5-10 minutes): Warm the milk gently until it reaches the right temperature. Pour it into a large mixing bowl. Sprinkle the yeast and 1 tablespoon of the granulated sugar over the warm milk. Give it a gentle stir and let it sit undisturbed for 5-10 minutes. You’ll see it become foamy and bubbly – this means your yeast is alive and active! If it doesn’t foam, your yeast might be expired, and you’ll need to start over.
2. Combine Wet Ingredients: Add the melted butter, room temperature eggs, remaining granulated sugar, salt, and vanilla extract to the yeast mixture. Whisk everything together until well combined and smooth.
3. Incorporate the Flour: Add 4 1/2 cups of the flour to the wet mixture. Using a sturdy spoon or a dough hook attachment on your mixer, stir or mix on low speed until a shaggy dough forms and most of the flour is incorporated. The dough will be sticky at this stage.
4. Knead the Dough (5-8 minutes): Turn the dough out onto a lightly floured surface. Begin kneading. Push the dough away from you with the heel of your hand, fold it back over itself, give it a quarter turn, and repeat. Add small amounts of flour (about 1 tablespoon at a time) only if the dough is extremely sticky and sticking to your hands or the surface. You want a smooth, elastic dough that is slightly tacky but not sticky. Kneading develops the gluten, giving the rolls their light, airy texture. Continue kneading for 5-8 minutes until the dough is smooth, springy, and passes the “windowpane test” (you can stretch a small piece thin enough to see light through it without tearing).
5. First Rise (1-2 hours): Lightly grease a large bowl with oil or nonstick spray. Place the kneaded dough ball into the bowl, turning it once to coat it lightly with oil. Cover the bowl tightly with plastic wrap or a damp kitchen towel. Let the dough rise in a warm, draft-free spot until it has doubled in size. This usually takes 1 to 1.5 hours, but it can vary depending on the room temperature. Don’t rush this step; proper rising is crucial for flavor and texture.
6. Chill the Dough (Overnight or 4+ hours): Once doubled, punch the dough down gently to release the air bubbles. Turn it out onto a lightly floured surface. Cover it loosely and refrigerate it for at least 4 hours, or ideally overnight (up to 24 hours). This slow chill relaxes the gluten, making the dough much easier to roll out without springing back, and develops deeper flavor. If you’re short on time, 4 hours is sufficient, but overnight is best.
7. Prepare the Filling: While the dough chills, make the cinnamon sugar filling. In a small bowl, whisk together the brown sugar, cinnamon, and salt. Cut the softened butter into small pieces and work it into the sugar mixture using a fork or your fingers until it forms a crumbly paste. Set aside.
8. Shape the Rolls (After Chilling): Lightly flour your work surface. Remove the chilled dough from the fridge. It will be very firm. Gently press and roll it out into a large rectangle, roughly 12 inches by 18 inches. Aim for an even thickness, about 1/4 to 1/2 inch thick. If the dough resists, let it rest for 5-10 minutes; it’s still cold and needs to warm slightly.
9. Add the Filling: Spread the softened butter evenly over the entire surface of the dough rectangle, leaving a 1/2-inch border along the top edge. Sprinkle the cinnamon sugar mixture evenly over the butter, pressing it gently so it adheres.
10. Roll Up the Dough: Starting from the long edge closest to you, carefully roll the dough up tightly into a log. Pinch the seam closed firmly to seal. Try to roll it as evenly as possible.
11. Cut the Rolls: Using a sharp knife or dental floss (which is excellent for clean cuts), cut the log into 12 equal pieces (about 1.5 inches thick each). Place the rolls cut-side up into a lightly greased 9×13 inch baking dish or two 9-inch round pans. They should fit snugly but not be overcrowded.
12. Second Rise (1-2 hours): Cover the dish loosely with plastic wrap or a damp towel. Let the rolls rise again in a warm spot until they are noticeably puffy and have doubled in size, usually 1 to 1.5 hours. They should look soft and full.
13. Preheat and Bake: While the rolls rise, preheat your oven to 350°F (175°C). Once the rolls have risen, place them in the preheated oven and bake for 25-35 minutes, or until the tops are golden brown and the rolls are cooked through. Baking times can vary slightly depending on your oven and pan. The rolls should sound hollow when tapped on the bottom.
14. Make the Frosting: While the rolls bake, prepare the cream cheese frosting. In a medium bowl, beat the softened cream cheese and butter together with an electric mixer until smooth and creamy. Gradually add the sifted powdered sugar, beating well after each addition. Mix in the vanilla and salt until the frosting is light and fluffy.
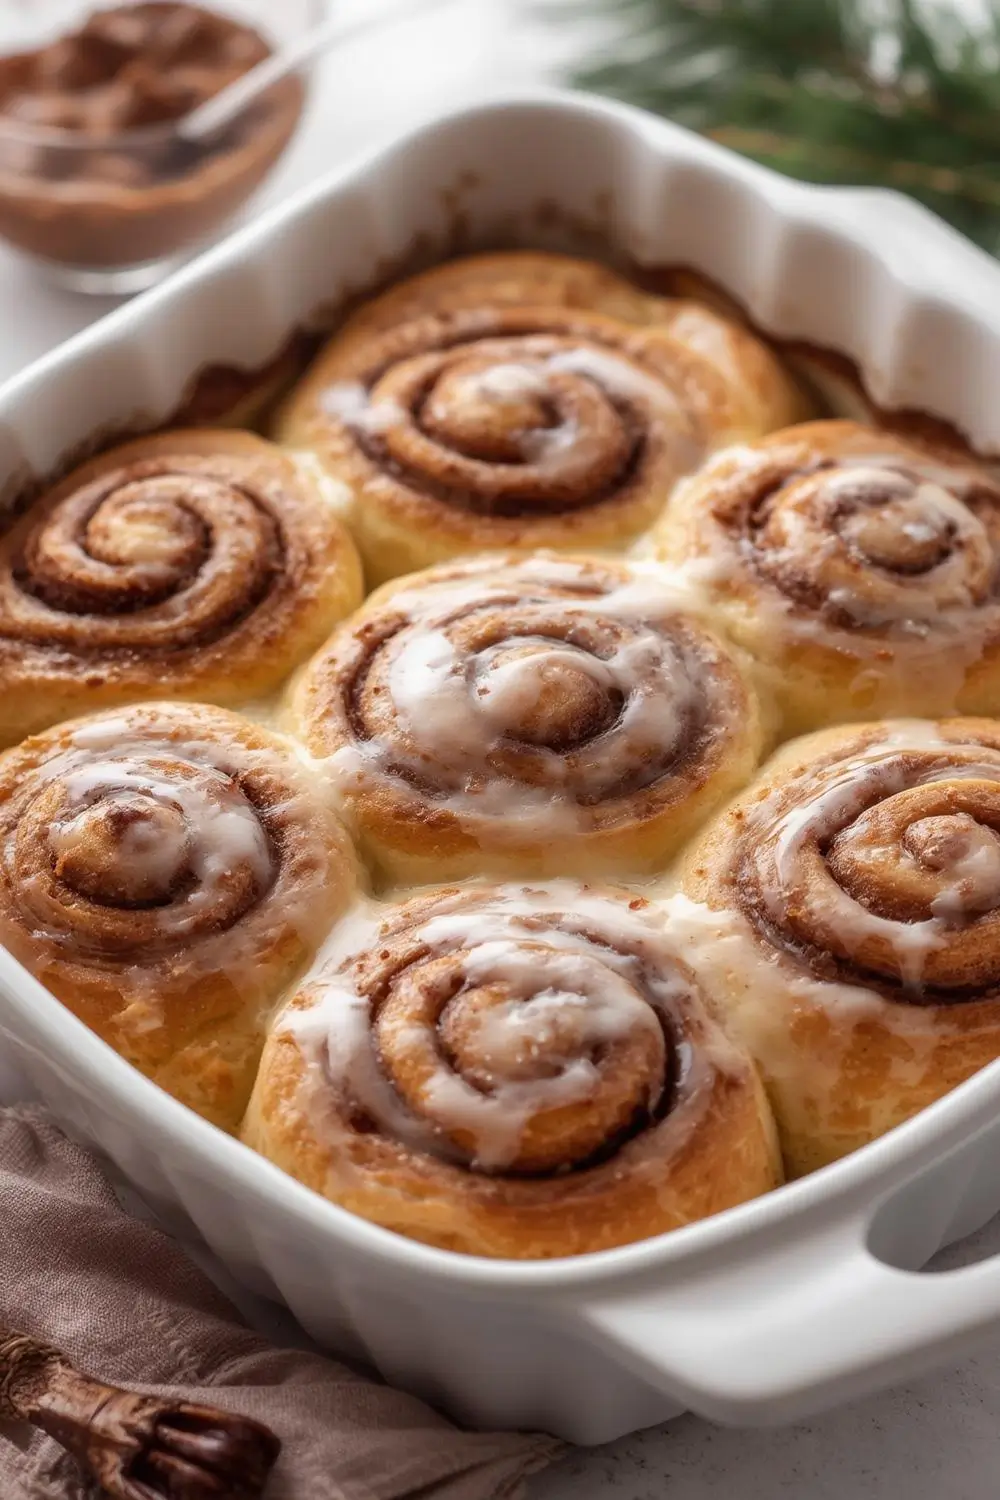
15. Frost and Serve: As soon as the rolls come out of the oven, spread the frosting generously over the warm rolls. The heat from the rolls will melt the frosting slightly, creating a beautiful, glossy glaze. Serve immediately for the ultimate warm, gooey experience. They are also fantastic served slightly cooled, where the frosting sets into a creamy layer.
Variations and Substitutions: Tailoring to Your Taste
- Add-Ins: Fold in 1 cup of chopped pecans, walnuts, or raisins into the dough after the first rise for extra texture and flavor. Sprinkle some over the filling before rolling.
- Different Sugars: Use all brown sugar for a deeper caramel flavor. Substitute half the brown sugar with granulated sugar if preferred.
- Flavor Boosters: Add 1-2 teaspoons of ground nutmeg or cardamom to the cinnamon sugar filling for a unique twist.
- Frosting Variations: Swap the cream cheese frosting for a simple vanilla glaze (powdered sugar + milk + vanilla) or a maple glaze. For a richer frosting, add 1/2 cup of melted chocolate to the cream cheese mixture.
- Gluten-Free Option: Use a high-quality gluten-free all-purpose flour blend (check for xanthan gum). The dough may be slightly more delicate; handle it gently and allow extra rising time. The rolls may not rise as high but will still be delicious.
- Dairy-Free Option: Use a dairy-free cream cheese alternative and a dairy-free butter substitute in both the dough and frosting. Ensure your yeast and other ingredients are dairy-free. The flavor and texture will be very close.
Storage and Reheating: Keeping the Magic Alive
- Refrigeration (Fresh Rolls): Store frosted or unfrosted rolls in an airtight container in the refrigerator for up to 3 days. Frost them just before serving.
- Freezing (Unbaked Rolls): After shaping the rolls and placing them in the baking dish, cover them tightly with plastic wrap and foil. Freeze for up to 1 month. When ready to bake, thaw the rolls overnight in the refrigerator. Remove from the fridge, let them come to room temperature for 30-45 minutes, then bake as directed, adding 5-10 minutes to the baking time if needed.
- Freezing (Baked Rolls): Bake the rolls completely, let them cool completely, then wrap them tightly in plastic wrap and foil. Freeze for up to 1 month. To reheat, thaw at room temperature for 1-2 hours, then warm in a preheated 350°F (175°C) oven for 10-15 minutes, or until heated through. Alternatively, microwave individual rolls for 20-30 seconds.
- Reheating (Fresh Rolls): Reheat frosted or unfrosted rolls in a 350°F (175°C) oven for 8-12 minutes, or until warmed through. For individual rolls, microwave for 20-30 seconds. Avoid reheating in the microwave if possible, as it can make the frosting runny.
Common Mistakes to Avoid: Ensuring Perfect Rolls Every Time
- Killing the Yeast: Using milk that’s too hot (above 110°F / 43°C) is the most common mistake. Test the milk temperature with your finger or a thermometer.
- Under-Kneading: Under-kneaded dough results in dense, tough rolls. Knead until the dough is smooth, elastic, and passes the windowpane test.
- Over-Kneading: Over-kneaded dough can make the rolls tough. Stop kneading once the dough is smooth and elastic.
- Rushing the Rise: Skipping or rushing the rise times leads to dense rolls with poor texture. Be patient, especially during the first rise and the second rise before baking.
- Overfilling: Too much filling can cause the rolls to leak and burn. Spread the filling evenly and leave a border.
- Cutting with a Dull Knife: A dull knife can squish the rolls and make uneven cuts. Use a sharp knife or dental floss for clean cuts.
- Frosting Too Early: Frosting the rolls before* they are completely cool can cause the frosting to melt and slide off. Frost them warm, but not hot, or wait until they are completely cool for a set frosting.
- Not Letting Dough Rest After Chilling: Cold, firm dough is hard to roll. Letting it rest for 5-10 minutes after taking it out of the fridge makes rolling much easier.
Frequently Asked Questions (FAQs)
- Can I use active dry yeast instead of instant yeast? Yes, but you need to activate it in the warm milk first, as described in step 1. Instant yeast can be mixed directly with the dry ingredients.
- My dough is too sticky. What should I do? Add flour gradually, 1 tablespoon at a time, while kneading. Don’t add too much at once. The dough should be slightly tacky but not sticky to the touch.
- My rolls didn’t rise much in the second rise. Why? Ensure your oven is truly preheated and the rolls are in a warm, draft-free spot. The dough might have been too cold when you started the second rise. Letting it rest for 10-15 minutes before placing it in the warm spot can help.
- Can I make these rolls ahead of time for Christmas morning? Absolutely! Prepare the dough through shaping the rolls and placing them in the pan. Cover tightly and refrigerate overnight. The next morning, let them come to room temperature for 30-45 minutes, then bake as directed. They’ll be ready just in time for breakfast!
- How do I know when the rolls are done baking? They should be golden brown on top and sound hollow when tapped on the bottom. The internal temperature should reach about 190-200°F (88-93°C) if you have a thermometer.
- Can I use a bread machine? Yes, you can use the dough cycle on your bread machine. Add the ingredients in the order recommended by your machine, usually liquids first, then dry ingredients, with yeast last. Once the cycle finishes, proceed with shaping and baking the rolls as directed.
- Why is my frosting runny? This usually happens if the butter or cream cheese is too warm, or if you added too much liquid. Ensure both are softened but not melted. Sift the powdered sugar to avoid lumps. If it’s too runny, add more powdered sugar, 1/4 cup at a time, until it reaches the desired consistency.
- Can I freeze the frosting separately? Yes, you can make the frosting ahead and freeze it in an airtight container for up to 1 month. Thaw it in the refrigerator overnight, then beat it with an electric mixer until smooth and creamy before spreading on the rolls.
- Are these rolls suitable for people with dairy allergies? These rolls contain dairy (milk, butter, cream cheese). For a dairy-free version, use the substitutions mentioned earlier (dairy-free milk, butter, and cream cheese alternative). Always check labels to ensure all ingredients are dairy-free.
- What can I serve with these cinnamon rolls? They are delicious on their own, but pair them beautifully with a simple fruit salad, scrambled eggs, or a savory breakfast casserole. A hot cup of coffee or a glass of cold milk is the perfect accompaniment.
The Final Touch: A Warm Welcome
There’s something deeply comforting about the aroma of cinnamon rolls baking, especially during the holidays. These make-ahead cinnamon rolls capture that essence perfectly, offering you the joy of a homemade breakfast without the holiday morning rush. The tender, buttery dough, the sweet, spiced filling, and the rich, tangy cream cheese frosting come together to create a treat that feels like a special gift. Whether you’re preparing for Christmas, New Year’s, or simply a cozy weekend brunch, these rolls are sure to become a beloved tradition. Gather your ingredients, take your time with the process, and enjoy the delicious reward of your patience. Happy baking, and may your holiday mornings be filled with warmth, sweetness, and the simple pleasure of sharing a perfect roll with those you love.
")