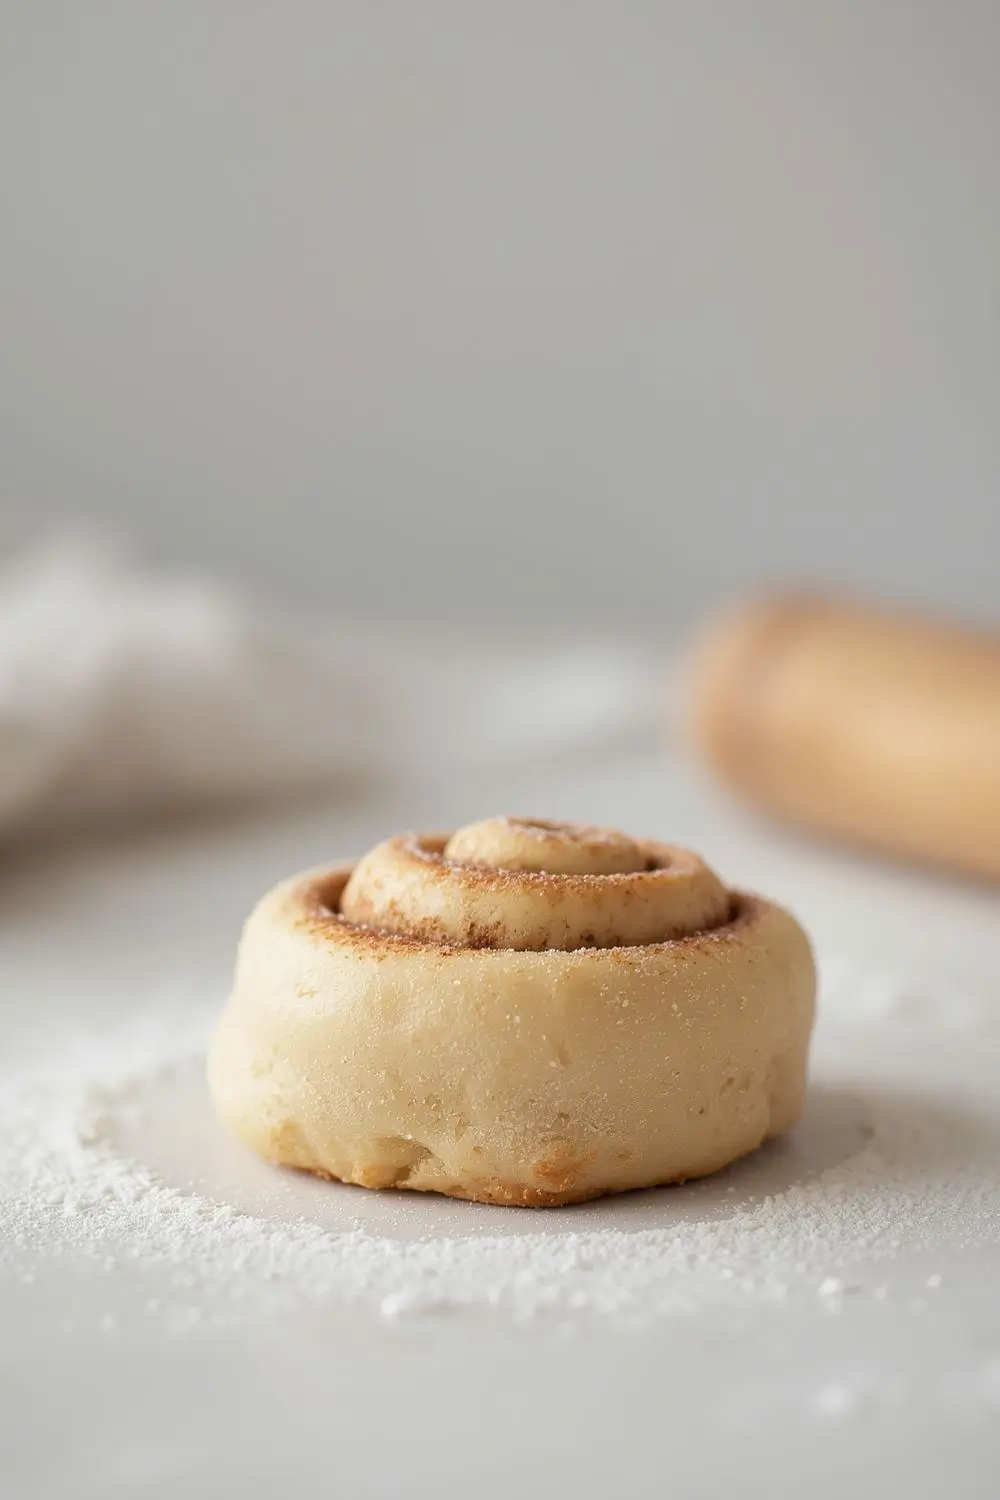
TheUltimate One Rise Cinnamon Roll: Soft, Gooey, and Ready in a Snap!
Picture this: a warm, inviting kitchen filled with the irresistible aroma of cinnamon and sugar. Your family wakes up to the promise of a truly special breakfast, one that feels like a weekend treat but happens on a busy weekday. Welcome to the magic of One Rise Cinnamon Rolls. Forget complicated doughs requiring multiple proofs and hours of waiting. This recipe delivers fluffy, tender layers bursting with gooey cinnamon goodness in a fraction of the time. Perfect for those hectic mornings when you crave something homemade and comforting, yet crave simplicity even more.
This isn’t just about saving time; it’s about reclaiming the joy of baking without the stress. The dough comes together in one bowl, requiring minimal kneading and just one gentle rise. The result? Rolls that are incredibly soft, almost cloud-like, with a perfectly balanced cinnamon-sugar filling that melts into every bite. The buttery glaze drizzles over the top, adding a touch of sweetness that complements the warm spices beautifully. It’s the perfect balance of effort and reward, designed for bakers of all levels, especially those new to yeast doughs.
Why Choose One Rise Cinnamon Rolls?
- Unbeatable Softness: The single rise method allows the gluten to develop just enough for structure while keeping the rolls incredibly tender and pillowy.
- Effortless Preparation: Minimal steps, one bowl, and no complicated techniques. Perfect for beginners or anyone short on time.
- Flavor Packed: The cinnamon-sugar filling is generously spiced and gooey, not dry or sparse. The buttery glaze seals in moisture and adds richness.
- Perfect for Busy Mornings: Ready to bake in under 2 hours from start to finish. Ideal for weekend brunches or a special weekday treat.
- Customizable: Easily adapt the filling or glaze to suit your taste or dietary needs.
Ingredients Explained: Building Your Perfect Cinnamon Roll
Gathering the right ingredients is the first step to success. Here’s what you’ll need, with a little insight into why each one matters:
- All-Purpose Flour (3 ½ Cups / 420g): The workhorse of the recipe. Provides the right balance of structure and tenderness. Spoon and level for accuracy.
- Warm Milk (1 Cup / 240ml): Crucial for activating the yeast. Should be around 110°F (43°C) – warm to the touch, not hot. Too hot kills the yeast; too cold won’t activate it.
- Active Dry Yeast (2 ¼ tsp / 7g packet): The leavening agent that makes the dough rise. Ensure it’s fresh and within its expiration date.
- Granulated Sugar (¼ Cup / 50g): Feeds the yeast and adds a touch of sweetness. Also helps tenderize the dough.
- Salt (1 ½ tsp / 8g): Enhances flavor and controls yeast activity. Don’t skip it!
- Large Eggs (2, room temperature): Adds richness, structure, and moisture. Room temperature eggs incorporate better.
- Unsalted Butter (½ Cup / 115g, melted): Adds incredible flavor and tenderness. Use good quality butter.
- Vanilla Extract (1 tsp): A subtle depth of flavor that complements the cinnamon beautifully.
- Brown Sugar (¾ Cup / 150g, packed): For the filling. Its molasses content adds a deeper, richer caramel note compared to white sugar.
- Ground Cinnamon (2 ½ Tbsp / 25g): The star of the show! Use a high-quality, fresh cinnamon for the best flavor.
- Cream Cheese (4 oz / 115g, softened): For the glaze. Full-fat cream cheese gives the best texture and flavor.
- Powdered Sugar (2 Cups / 240g): Creates the smooth, sweet glaze. Sift for lump-free results.
- Milk or Heavy Cream (2-4 Tbsp): Adjusts the glaze consistency. Heavy cream makes it richer.
- Salt (Pinch): A tiny pinch in the glaze balances the sweetness.
Step-by-Step Instructions: From Bowl to Beautiful Rolls
Now, let’s transform these ingredients into delicious rolls. This process is designed to be straightforward and stress-free.
1. Activate the Yeast (5-10 mins):
* In a large mixing bowl, combine the warm milk, granulated sugar, and active dry yeast. Stir gently and let it sit for 5-10 minutes. You’ll see it become foamy on top – this means the yeast is alive and active! If it doesn’t foam, your yeast might be expired, and you’ll need to start over.
2. Combine Wet Ingredients:
* Add the melted butter, room temperature eggs, and vanilla extract to the yeast mixture. Whisk thoroughly until everything is well combined and smooth.
3. Incorporate Dry Ingredients:
* Add the all-purpose flour and salt to the wet mixture. Using a sturdy spoon or your hands, mix until a shaggy dough forms. It will be sticky at first.
4. Knead the Dough (5-7 mins):
Turn the dough out onto a lightly floured surface. Knead for 5-7 minutes until the dough becomes smooth, elastic, and no longer sticky. It should pass the “windowpane test” – stretching thinly without tearing. Add only a tiny* bit more flour if absolutely necessary during kneading, but try to minimize flour use to keep the rolls tender.
5. First Rise (1 hour):
* Lightly grease a large bowl with oil or non-stick spray. Place the kneaded dough ball into the bowl, turning it once to coat it lightly with oil. Cover the bowl tightly with plastic wrap or a damp kitchen towel. Let it rise in a warm, draft-free spot for about 1 hour, or until it has roughly doubled in size. It should look puffy and feel soft.
6. Prepare the Filling:
* While the dough rises, make the cinnamon sugar filling. In a small bowl, combine the packed brown sugar, ground cinnamon, and a pinch of salt. Mix well. Set aside.
7. Shape the Rolls:
* Once the dough has risen, punch it down gently to release the air. Turn it out onto a lightly floured surface. Roll the dough into a 12×18 inch rectangle. It should be about ¼ inch thick.
* Spread the softened butter evenly over the dough, leaving a ½ inch border around the edges.
* Sprinkle the cinnamon sugar filling evenly over the buttered dough.
* Starting from the long edge, carefully roll the dough up tightly into a log. Pinch the seam closed firmly.
* Using a sharp knife or dental floss, cut the log into 12 equal pieces (about 1 ½ inches thick each). Place the rolls cut-side up in a lightly greased 9×13 inch baking pan, leaving a little space between them. They will expand.
8. Second Rise (30-45 mins):
* Cover the pan loosely with plastic wrap or a damp towel. Let the rolls rise again in a warm spot for 30-45 minutes. They should look noticeably puffy and almost doubled in size again.
9. Bake (18-22 mins):
* Preheat your oven to 350°F (175°C) during the last 10 minutes of the second rise.
* Bake the rolls for 18-22 minutes, or until they are golden brown on top and the edges look set. The internal temperature should reach about 190°F (88°C) if you have a thermometer. They should sound hollow when tapped on the bottom.
10. Make the Glaze:
* While the rolls bake, prepare the cream cheese glaze. In a medium bowl, beat the softened cream cheese until smooth. Gradually add the powdered sugar, beating until combined. Add the milk or heavy cream and vanilla extract, beating until the glaze is smooth and pourable. Add more milk if needed for desired consistency.
11. Glaze and Serve:
* As soon as the rolls come out of the oven, spread or drizzle the warm glaze evenly over the hot rolls. The heat helps the glaze melt slightly and soak in slightly, creating an extra layer of flavor. Let them cool for 5-10 minutes before serving. Enjoy the warm, gooey perfection!
Variations and Substitutions: Making it Your Own
The beauty of this recipe is its flexibility. Here are some ideas to customize it:
- Different Fillings: Swap the cinnamon sugar for a chocolate-hazelnut spread (like Nutella), a simple brown sugar and butter filling, or even a pumpkin spice mixture for fall.
- Add-Ins: Fold in chopped pecans, walnuts, or raisins into the filling before rolling. Add a teaspoon of orange zest to the filling for a bright note.
- Glaze Variations: Use lemon juice and zest instead of vanilla for a tangy glaze. Add a pinch of nutmeg or cardamom to the glaze. Drizzle with a simple powdered sugar and milk glaze instead of cream cheese.
- Whole Wheat Option: Substitute up to 1 cup of the all-purpose flour with whole wheat flour for a nuttier flavor and added fiber (dough may be slightly denser).
- Dairy-Free: Use almond milk or oat milk instead of dairy milk. Use a dairy-free butter substitute and a dairy-free cream cheese alternative in the glaze. Ensure your yeast is dairy-free if needed.
- Vegan: Use a flax egg (1 tbsp ground flaxseed + 3 tbsp water, let sit 5 mins) instead of regular eggs. Use plant-based milk and butter substitutes. Ensure your yeast is vegan.
Storage and Reheating: Keeping the Magic Alive
- Room Temperature: Store leftover rolls in an airtight container at room temperature for up to 2 days. They stay wonderfully soft.
- Refrigerator: For longer storage (up to 5 days), wrap the container tightly and refrigerate. The rolls will stay moist but may firm up slightly.
- Reheating:
* Oven: Reheat wrapped in foil at 350°F (175°C) for 10-15 minutes until warmed through.
* Microwave: Warm individual rolls for 15-20 seconds for a quick, soft reheat. Be careful not to overheat.
* Toaster Oven: For a crispier edge, use a toaster oven on a low setting.
Freezing: You can freeze the unbaked* rolls. After cutting them and placing them in the pan, cover tightly with plastic wrap and foil. Freeze for up to 1 month. Thaw overnight in the refrigerator, then let them rise and bake as directed. You can also freeze baked rolls: cool completely, wrap tightly, and freeze for up to 3 months. Reheat as above.
Common Mistakes to Avoid: Baking Success
- Killing the Yeast: Using water that’s too hot (above 110°F/43°C) is the most common mistake. Test the milk temperature with your finger or a thermometer.
- Over-Kneading: While kneading is important, over-kneading develops too much gluten, leading to tough rolls. Knead just until smooth and elastic.
- Under-Kneading: Under-kneaded dough won’t rise properly or develop the right texture. Ensure it’s smooth and passes the windowpane test.
- Rushing the Rise: Yeast needs time. Don’t skip the rise periods or place the dough in a cold spot. A warm, draft-free environment is key.
- Overfilling: Too much filling can make the rolls soggy and cause them to leak. Spread filling evenly and avoid overpacking.
- Cutting with a Dull Knife: A sharp knife or dental floss gives clean cuts. Dull knives can squish the dough.
- Skipping the Second Rise: This rise is crucial for the rolls to reach their full potential height and texture. Don’t skip it!
- Over-Baking: Watch them closely towards the end. They should be golden brown, not dark brown or burnt. They continue to cook slightly after being removed from the oven.
Frequently Asked Questions: Your Cinnamon Roll Queries Answered
- Q: Can I make these rolls the night before?
A: Yes! Prepare the dough through step 7 (cutting into rolls and placing in the pan). Cover tightly and refrigerate overnight. The next morning, let them come to room temperature for about 30 minutes, then let them rise for 30-45 minutes before baking as directed. They might take a little longer to bake.
- Q: Why didn’t my rolls rise enough?
A: Check your yeast (is it fresh?), the temperature of your milk (too cold?), the rising environment (too cold?), or if you over-kneaded the dough (which can weaken gluten). Ensure the dough is in a warm, draft-free spot.
- Q: Can I use instant yeast instead of active dry yeast?
A: Yes! You can use the same amount of instant yeast. You don’t need to activate it in warm milk first; just add it directly to the dry ingredients with the flour and salt.
- Q: How do I know when the rolls are done baking?
A: They should be golden brown on top, sound hollow when tapped on the bottom, and an internal temperature of about 190°F (88°C) is ideal. Don’t rely solely on time, as oven temperatures vary.
- Q: Can I make these rolls without a mixer?
A: Absolutely! You can mix the dough by hand using a sturdy spoon and then knead it on a floured surface. It just takes a bit more elbow grease.
- Q: Why is my glaze too thick?
A: Add a little more milk or heavy cream, a teaspoon at a time, until you reach the desired pourable consistency.
- Q: Can I use a different type of milk?
A: Yes! Almond milk, oat milk, or soy milk work well. Avoid ultra-pasteurized milks as they can affect rising slightly.
- Q: How do I prevent the rolls from sticking to the pan?
A: Generously grease the pan with butter or non-stick spray before placing the rolls in. You can also line the pan with parchment paper for easy removal.
- Q: Can I add nuts or dried fruit to the filling?
A: Definitely! Fold in chopped pecans, walnuts, or raisins into the cinnamon sugar mixture before rolling. Start with about ½ cup and adjust to taste.
- Q: What’s the best way to store leftover rolls?
A: Store them in an airtight container at room temperature for up to 2 days, or in the refrigerator for up to 5 days. Reheat gently in the oven or microwave as needed.
Conclusion: The Joy of Simple Baking
The One Rise Cinnamon Roll is more than just a recipe; it’s a celebration of effortless baking. It proves that incredible flavor and tender, fluffy texture don’t require hours of labor or complex techniques. With just one rise, a handful of simple ingredients, and a little bit of patience, you can create a breakfast or brunch centerpiece that brings warmth and joy to your table. The aroma that fills your kitchen, the gooey cinnamon filling, and the melt-in-your-mouth softness are rewards worth every minute. So, gather your ingredients, embrace the simplicity, and experience the pure, unadulterated delight of baking something truly special with minimal fuss. Your taste buds – and your busy morning – will thank you.
")