Contents
- 1 Why Peanut Butter Blossoms Are Perfect for Beginners
- 2 Ingredients for Beginner Peanut Butter Blossom Cookies
- 3 Step-by-Step Beginner Instructions
- 4 Tips for Beginner Bakers
- 5 What to Expect the First Time You Make These Cookies
- 6 Common Beginner Mistakes (and How to Fix Them)
- 7 Fun Beginner-Friendly Variations
- 8 How to Store Beginner Peanut Butter Blossom Cookies
- 9 Beginner Baking FAQ
- 10 Why Beginners Love This Cookie Recipe
Baking peanut butter blossom cookies is one of the best ways for beginners to step into the world of homemade treats. These cookies are simple, cozy, nostalgic, and guaranteed to impress—even if it’s your first time picking up a mixing bowl. With their soft, peanut-buttery centers and iconic chocolate-topped look, peanut butter blossoms are the perfect “first cookie recipe” for teens, kids learning to bake, or adults finally diving into homemade desserts.
This beginner-friendly peanut butter blossom cookie recipe is designed to walk you through every single step—from mixing and shaping to baking and topping. You won’t need fancy tools, special ingredients, or advanced baking skills. If you can stir, roll, and bake, you can make these cookies beautifully.
Keep this recipe saved for holidays, school events, last-minute treats, or anytime you want a reliable, fuss-free cookie. Every bite gives that classic soft texture, warm peanut butter flavor, and delightful chocolate finish that makes these cookies a timeless favorite.
Why Peanut Butter Blossoms Are Perfect for Beginners
Peanut butter blossoms are a staple for new bakers because the process is simple and forgiving. Even if you make small mistakes, the cookies still turn out delicious and charming.
Here’s why this recipe works so well for beginners:
The Dough Is Easy to Handle
The dough is soft but not sticky, which makes it easier to shape into balls. No chilling required unless you want to.
The Ingredients Are Pantry Staples
You only need basic ingredients you probably already have. Nothing fancy, nothing complicated.
The Shape Helps Mask Imperfections
Even if your cookies aren’t perfectly round, they become adorable once the chocolate top is pressed in.
It Teaches Baking Basics
You’ll learn essential skills like:
-
creaming butter and sugar
-
mixing dry and wet ingredients properly
-
shaping dough
-
understanding bake times
-
decorating with chocolate
These skills transfer to nearly every other cookie recipe.
They Always Taste Amazing
Even slightly overbaked or slightly uneven cookies still have great flavor and texture.
For new bakers, confidence is everything—and peanut butter blossoms are confidence in cookie form.
This recipe avoids pork, alcohol, wine, beer, or whisky—just classic wholesome ingredients.
Dry Ingredients
-
1 ½ cups all-purpose flour
-
1 teaspoon baking soda
-
½ teaspoon baking powder
-
¼ teaspoon salt
Wet Ingredients
-
½ cup unsalted butter, softened
-
¾ cup creamy peanut butter
-
½ cup granulated sugar
-
½ cup packed brown sugar
-
1 large egg
-
1 teaspoon vanilla extract
Coating & Topping
-
¼ cup granulated sugar for rolling
-
24–30 chocolate kisses or chocolate drops
These ingredients create soft, chewy, classic peanut butter blossoms with minimal effort.
Step-by-Step Beginner Instructions
If you’ve never baked cookies before, this section is your new best friend. Follow each step and you’ll get perfect blossoms every time.
Step 1: Prepare Your Workspace
Before mixing anything, gather your tools:
-
2 mixing bowls
-
measuring cups
-
measuring spoons
-
hand mixer (or a sturdy whisk)
-
baking sheet
-
parchment paper or nonstick spray
Preheat your oven to 350°F (175°C).
Step 2: Mix Dry Ingredients
In a medium bowl, stir together:
-
flour
-
baking soda
-
baking powder
-
salt
Set aside. This step ensures your leavening ingredients are evenly distributed.
Step 3: Cream Butter, Peanut Butter & Sugars
In a large bowl, add:
-
softened butter
-
peanut butter
-
granulated sugar
-
brown sugar
Beat until the mixture looks light and fluffy.
This is a key baking technique that helps cookies become soft and airy rather than dense.
Step 4: Add Egg and Vanilla
Mix in:
-
1 egg
-
vanilla extract
Beat until smooth and evenly combined.
Step 5: Add Dry Ingredients to Wet
Slowly add the dry mixture into the wet mixture.
Mix until a soft dough forms—don’t overmix.
Step 6: Shape Cookie Dough Balls
Use a tablespoon or small cookie scoop to portion the dough. Roll each piece into a ball using your hands.
Step 7: Roll in Sugar
Roll each dough ball in granulated sugar.
This step creates the sparkle and crackled appearance blossoms are known for.
Step 8: Place on Baking Sheet
Line your baking sheet with parchment and place dough balls at least 2 inches apart.
Step 9: Bake
Bake for 8–10 minutes, or until the edges look slightly set.
Step 10: Add Chocolate Tops
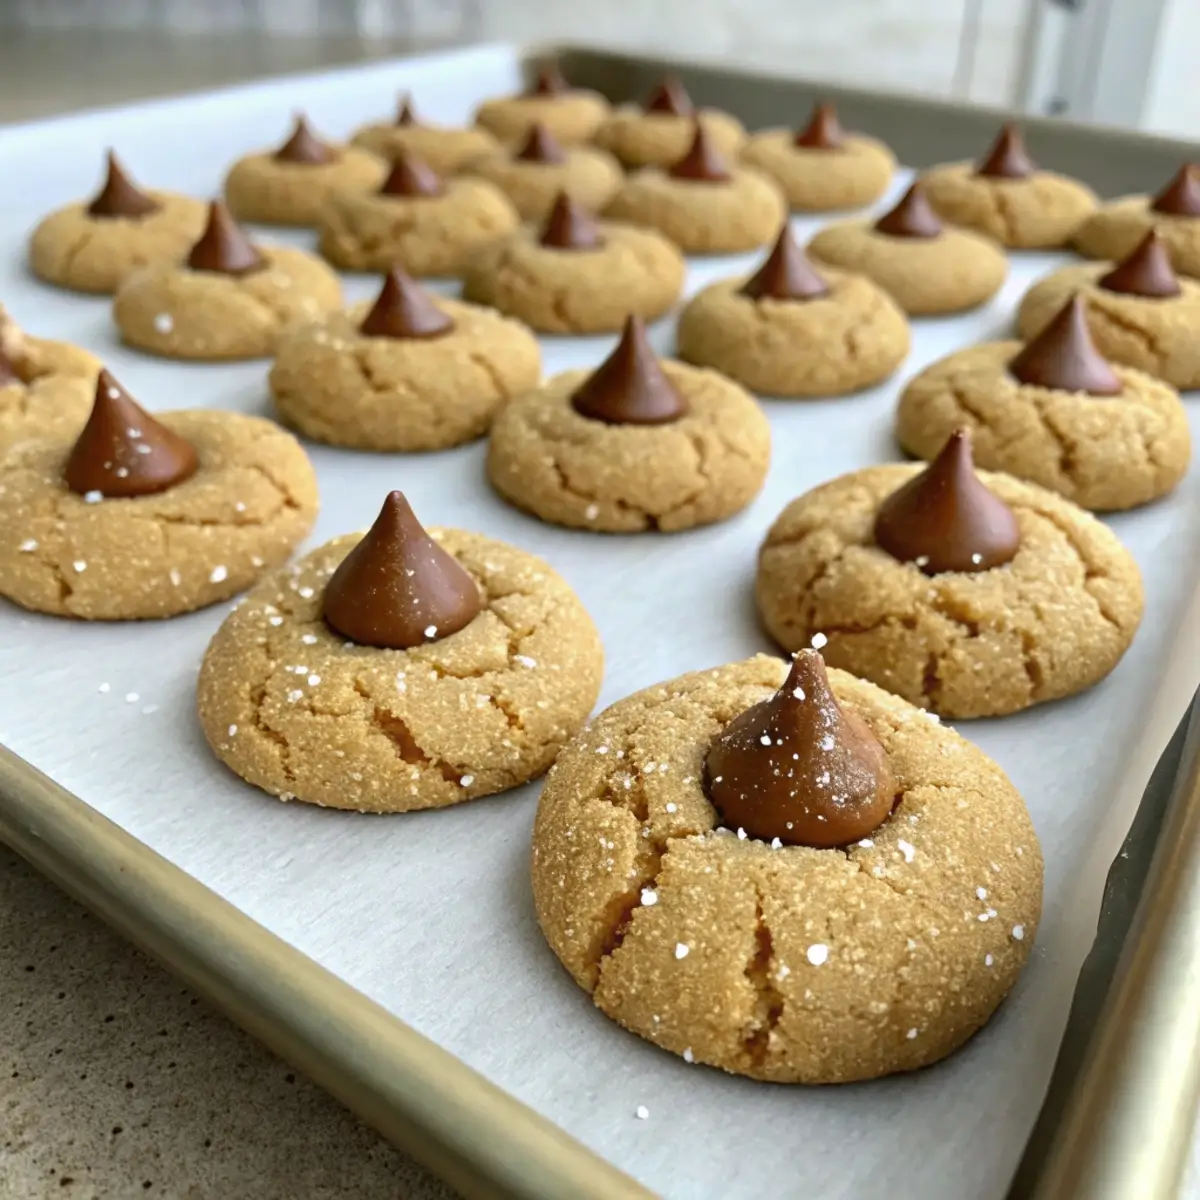
Immediately after removing from the oven, press one chocolate kiss or chocolate drop into the center of each warm cookie.
As the cookies settle, they will form beautiful cracks and cradle the chocolate perfectly.
Step 11: Cool
Let cookies cool for 5 minutes on the pan before transferring to a rack.
Congratulations—you just baked beginner-perfect peanut butter blossoms!
Tips for Beginner Bakers
If you’re new to baking, use these helpful tips to ensure cookie success:
Soften Butter Properly
Butter should be soft like clay—not melted.
If it’s too soft, cookies spread too much.
Measure Flour Lightly
Scoop flour into a measuring cup using a spoon and level it with a knife.
Packed flour will make dry cookies.
Don’t Overbake
The cookies should be slightly underdone when you remove them. They continue cooking as they cool.
Use Standard Peanut Butter
Avoid natural peanut butter with oil separation; it makes dough too greasy and unpredictable.
Chill Chocolate Candy
Cold chocolate holds its shape better when pressed into warm cookies.
Keep Cookies Same Size
Uniform dough balls help cookies bake evenly and look professional.
If you’ve never baked before, it’s normal to wonder what’s right or wrong. Here’s what to look for:
Your Dough
-
Soft
-
Easy to roll
-
Slightly sticky but manageable
Your Cookies After Baking
-
Puff up slightly
-
Don’t spread too much
-
Look pale with faint cracks
-
Solid edges but soft centers
After Adding Chocolate
-
Classic blossoming cracks appear
-
Chocolate softens slightly
-
Cookies firm up while cooling
Even if they don’t look perfect on your first try, the flavor will still be amazing.
Common Beginner Mistakes (and How to Fix Them)
Cookies Spread Too Much
Likely causes:
-
butter too soft
-
natural peanut butter used
-
too little flour
Fix: Add 1–2 tablespoons flour next time.
Cookies Don’t Crack
You may have overmixed the dough or skipped rolling in sugar.
Fix: Mix less and roll generously in sugar.
Cookies Turn Out Dry
Likely overbaked or flour packed too tightly.
Fix: Measure lightly and reduce bake time by 1–2 minutes.
Chocolate Completely Melts
Candy wasn’t chilled, or room was warm.
Fix: Refrigerate chocolate 10 minutes before using.
Fun Beginner-Friendly Variations
Once you master the classic version, try one of these simple twists:
Holiday Sprinkle Blossoms
Roll dough balls in red & green sprinkles instead of sugar.
Chocolate Peanut Butter Blossoms
Use chocolate peanut butter cups instead of kisses.
Mini Blossoms
Make tiny cookies for party platters.
Brown Sugar Blossoms
Use all brown sugar for deeper flavor and extra softness.
Stuffed Blossoms
Place a mini chocolate chip inside each dough ball before rolling.
These variations keep baking interesting while remaining beginner-friendly.
These cookies stay soft and delicious for days if stored properly.
Room Temperature
Keep in an airtight container for up to 5 days.
Keep Them Soft
Add a marshmallow or small piece of bread to the container to maintain moisture.
Freezer-Friendly
Freeze baked cookies or dough balls for up to 3 months.
To bake frozen dough, add about 1 extra minute of baking time.
Beginner Baking FAQ
Can kids make these cookies?
Absolutely! With adult supervision near the oven, this is a great first recipe.
Do I need a mixer?
A hand mixer makes it easier, but you can mix by hand using a sturdy whisk or spoon.
Why do blossoms crack?
Because the sugar coating interacts with heat to create iconic cookie cracks.
Can I use chocolate chips instead of kisses?
Yes! Use chocolate drops, disks, or even mini peanut butter cups.
Do I need to chill the dough?
No. This beginner recipe is intentionally no-chill.
Can I make the dough ahead of time?
Yes—you can refrigerate it for up to 3 days or freeze for later.
This recipe provides everything a beginner baker needs:
-
Easy steps
-
Minimal tools
-
No complicated techniques
-
Quick baking time
-
Delicious flavor
-
Predictable results
-
Soft texture
-
Classic holiday appeal
Peanut butter blossom cookies give beginners the confidence to continue baking. After mastering this recipe, you’ll be ready to try chocolate chip, sugar cookies, snickerdoodles, and more.
The best part? These cookies aren’t just beginner-friendly—they’re loved by expert bakers too.
Whether you’re baking for your family, surprising a friend, or bringing a treat to school or work, these blossom cookies never disappoint.
")