Contents
- 1 Your New Favorite Weeknight Dinner Just Landed
- 2 Gathering Your Flavor Arsenal
- 3 Crafting Your One-Pan Masterpiece
- 4 Critical Success Factors
- 5 Make It Your Own: Customizations Galore
- 6 Keeping & Reheating Like a Pro
- 7 Your Sheet Pan BBQ Questions Answered
- 8 Why This Recipe Earns Permanent Rotational Status
Your New Favorite Weeknight Dinner Just Landed
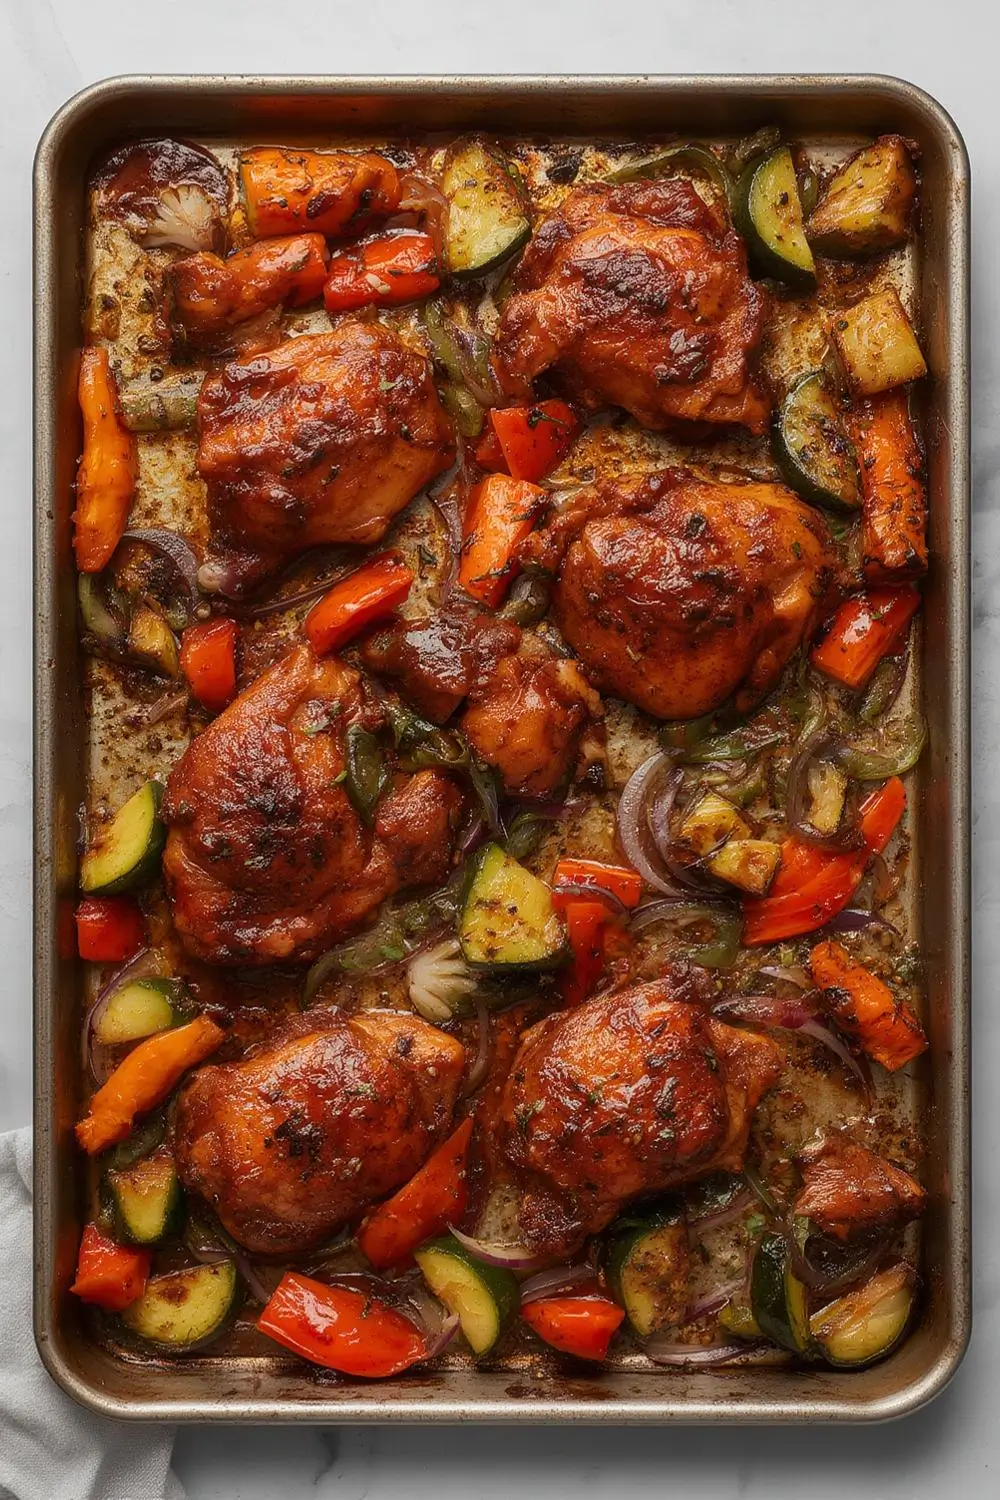
There’s something magical about opening your oven to find complete dinner perfection on a single sheet pan. Juicy chicken with caramelized edges, vibrant vegetables roasted to tender-crisp excellence, and that sticky-sweet BBQ glaze weaving everything together into pure comfort. This Sheet Pan BBQ Chicken & Veggies isn’t just another recipe—it’s your ticket to reclaiming evenings drowned in dish duty and complicated cooking routines.
Perfect for hectic weekdays but impressive enough for casual gatherings, this dish delivers big flavors with minimal effort. We’re talking 10 minutes of hands-on prep, one pan to wash (or just line with foil for zero cleanup!), and ingredients you can customize based on what’s in your fridge. The secret? High heat roasting creates that irresistible caramelization while keeping chicken thighs succulent and veggies beautifully blistered.
Why This Recipe Will Be On Repeat
- Flavor That Punches Above Its Weight: Smoky-sweet BBQ glaze clings to every nook and cranny
- Texture Paradise: Crispy chicken skin meets tender interiors alongside charred veggie edges
- Adaptable Canvas: Easily swaps vegetables based on seasonality or preferences
- Gluten-Free Friendly: Uses naturally gluten-free ingredients (check your BBQ sauce label)
- 30-Minute Hero: Faster than most delivery options and infinitely more satisfying
Gathering Your Flavor Arsenal
The Chicken: Thighs Take the Crown
Don’t even think about substituting breasts here—chicken thighs are essential. Their higher fat content ensures juicy, forgiving results even if you accidentally overcook them slightly. We’re using bone-in, skin-on thighs for maximum flavor and that crave-worthy crispy skin texture.
Protein-Free Option: Swap chicken for 1.5 lbs firm tofu (pressed dry) or cauliflower florets. Adjust cooking time to 20-25 minutes.
Veggie Dream Team
Our colorful trio balances sweetness, texture, and roasting performance:
- Bell Peppers: 2 large, any color combo (red sweeps, green adds bitterness)
- Zucchini: 2 medium, cut into robust pieces that won’t turn mushy
- Red Onion: 1 large, the natural sugars caramelize beautifully
Veggie Variations: Try broccoli florets, carrots (slice thin!), or mushrooms. Avoid watery vegetables like tomatoes.
BBQ Glaze That Makes Magic
Store-Bought Shortcut: Choose a thick, smoky sauce labeled “gluten-free” if needed. Kansas City-style sauces work best for their balanced sweetness.
Homemade Alternative (No-Cook):
- 1/2 cup ketchup
- 2 tbsp apple cider vinegar
- 1 tbsp maple syrup
- 1 tsp smoked paprika
- 1/2 tsp onion powder
- 1/4 tsp garlic powder
The Supporting Cast
- Olive oil
- Salt & black pepper
- Optional: 1 tsp chili powder for heat, 1 tsp dried oregano for earthiness
Crafting Your One-Pan Masterpiece
Step 1: The Preheat Power Move
Game-Changer Tip: Place your empty sheet pan in the oven as it preheats to 425°F (220°C). A screaming hot pan jumpstarts caramelization the moment ingredients hit the surface.
Step 2: Veggie Prep Like a Pro
1. Chop bell peppers into 1.5-inch chunks—big enough to char without disappearing
2. Cut zucchini into half-moons about 1/2-inch thick
3. Slice red onion into wedges, keeping root ends intact so layers stay together
Why Uniformity Matters: Similar-sized pieces ensure even cooking. Overcrowding leads to steaming instead of roasting!
Step 3: Chicken Prep Secrets
1. Pat thighs EXTRA dry with paper towels—moisture is the enemy of crisp skin
2. Lightly coat with oil, salt, and pepper under AND over the skin
3. Leave space between each thigh on the hot pan for optimal air circulation
Step 4: Strategic Roasting Sequence
1. First 15 Minutes: Chicken thighs go on preheated pan skin-side down (no vegetables yet!). This jumpstarts skin crispiness without burning.
2. Flip & Glaze: Turn thighs skin-side up, brush generously with BBQ sauce
3. Veggie Addition: Toss vegetables with oil and seasoning, scatter around chicken
4. Final 15 Minutes: Roast until chicken reaches 165°F (74°C) and veggies are tender
Pivotal Timing Trick: Add veggies halfway through to prevent overcooking while ensuring chicken cooks thoroughly.
Critical Success Factors
Troubleshooting Before It Happens
- Problem: Soggy Vegetables
Fix: Don’t overcrowd pan—use two pans if needed. Pat veggies dry before oiling.
- Problem: Burnt BBQ Sauce
Fix: Apply sauce only during last 15 minutes. Sugar burns easily!
- Problem: Rubbery Chicken Skin
Fix: Start skin-side down on hot pan. NEVER cover during roasting.
The Art of Serving & Garnishing
Let everything rest 5 minutes before serving—this allows juices to redistribute. For restaurant-worthy presentation:
- Scatter fresh chopped parsley or cilantro
- Drizzle with extra BBQ sauce
- Offer lime wedges for bright acidity
- Serve with cooked rice or crusty bread to soak up pan juices
Make It Your Own: Customizations Galore
Heat Level Adjustments
- Subtle Warmth: Add 1/2 tsp smoked paprika to BBQ glaze
- Medium Fire: Include 1/4 tsp cayenne pepper in dry rub
- Inferno Mode: Brush chicken with spicy BBQ sauce and add sliced jalapeños to veggies
Vegetable Rotations By Season
- Spring: Asparagus, radishes, baby carrots
- Summer: Yellow squash, cherry tomatoes (add last 10 minutes), eggplant
- Fall: Brussels sprouts, sweet potato cubes, fennel
- Winter: Butternut squash, parsnips, baby potatoes
Keeping & Reheating Like a Pro
- Refrigerator (3-4 days): Store chicken and veggies separately if possible
- Freezer (2 months): Freeze chicken only—veggies become mushy upon thawing
Reheating Methods Ranked:
1. Oven (Best Texture): 375°F (190°C) for 10-12 minutes
2. Air Fryer: 350°F (175°C) for 5-7 minutes
3. Microwave (Last Resort): 60 seconds, then let rest 2 minutes
Your Sheet Pan BBQ Questions Answered
Can I use boneless chicken thighs?
Absolutely! Reduce initial cooking time to 10 minutes before flipping and adding veggies. Check for doneness at 160°F (71°C).
My BBQ sauce always burns—help!
Try these fixes:
– Choose sauces with less sugar (tomato-based vs. molasses-heavy)
– Mix 50/50 BBQ sauce with chicken broth to thin
– Apply sauce only during last 10 minutes
How do I make this spicier without changing sauce?
Add 1 tsp chipotle powder to the chicken rub or toss roasted veggies with chili crisp oil before serving.
Can I prep components ahead?
Yes! Chop veggies 2 days in advance (store dry in airtight containers). Dry-brine chicken with salt up to 24 hours ahead—this boosts flavor and juiciness.
What BBQ sauce brands do you recommend?
Opt for thicker varieties labeled “gluten-free” if needed. Look for “smoked” or “Kansas City” styles in ingredient lists.
Can I add pineapple to the sheet pan?
Yes—toss 1 cup pineapple chunks with veggies. The natural sugars caramelize beautifully!
Why This Recipe Earns Permanent Rotational Status
In a world of complicated recipes and mountain-high dish piles, this Sheet Pan BBQ Chicken & Veggies emerges as the weeknight hero we all deserve. It’s adaptable enough to please picky eaters, nutritious enough to feel good about, and flavorful enough to make leftovers something to celebrate.
Remember: cooking spray is optional if you sufficiently oil the pan, preheat your sheet pan religiously, and always season veggies AFTER tossing in oil (salt draws out moisture prematurely). Now go conquer dinner with that single pan confidence—and maybe keep this recipe bookmarked for those “I have zero energy but want amazing food” nights. They happen to the best of us!
Pro Move: Double the recipe on Sunday—leftovers make killer BBQ chicken wraps with coleslaw for next-day lunches.
")