Contents
Ever had a sudden craving for homemade candy but didn’t want to spend hours in the kitchen? That’s where Six Minute Caramels come in. These little squares of joy are soft, chewy, sweet, and unbelievably fast to make. With just a few simple pantry staples and a microwave, you can whip up an entire batch in no time—no candy thermometer, no stovetop fuss, and absolutely no stress.
Whether you’re looking to surprise guests, create a last-minute homemade gift, or just treat yourself, this recipe is your new go-to. In this guide, we’ll cover every step, from ingredients and preparation to creative variations, wrapping tips, and common mistakes to avoid. Oh, and did we mention it all happens in just six minutes?
So let’s dive into the sweet simplicity of this quick caramel recipe and unlock the secret to perfect homemade candy.
What Are Six Minute Caramels?
A Treat That’s Quick Yet Classic
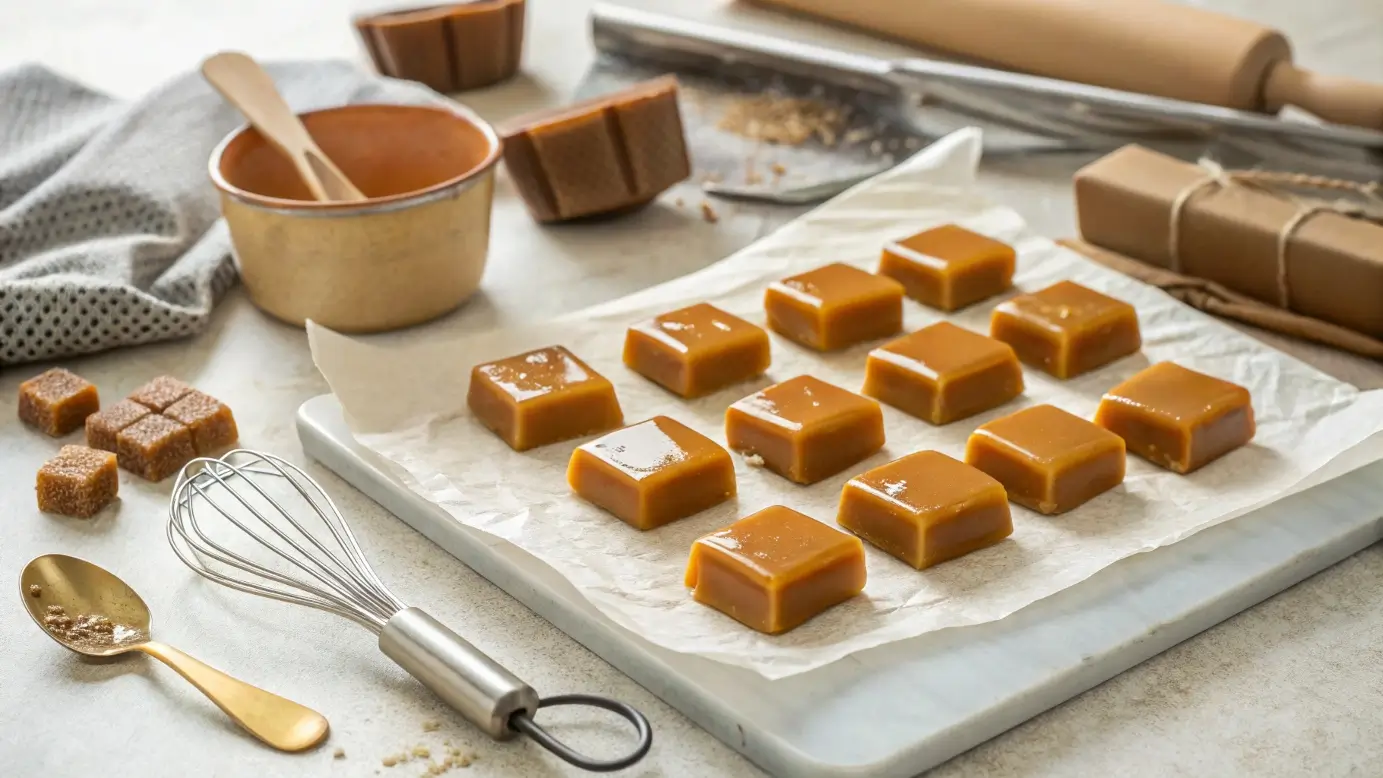
Six Minute Caramels are the answer to busy schedules and sugar cravings alike. They offer the same melt-in-your-mouth texture and rich buttery flavor of traditional caramels—but with a fraction of the time and effort. No boiling sugar mixtures for 30 minutes, no candy thermometers, and absolutely no hard work.
Instead, everything comes together in the microwave in—you guessed it—just six minutes. The end result? A soft, chewy candy that holds its shape beautifully and delivers that nostalgic caramel flavor with every bite.
Why These Caramels Are So Popular
Let’s be honest—traditional candy-making can feel intimidating. But this recipe simplifies everything:
-
Foolproof Process: Minimal steps, no complex tools.
-
Microwave Magic: Perfect for dorm kitchens, small apartments, or anyone without a stovetop.
-
Fast & Delicious: Ideal for holiday gifts, party treats, or quick weekday snacks.
These caramels don’t just save time—they elevate the whole homemade candy experience.
Perfect for Beginners and Pros Alike
Whether you’re just learning how to cook or you’ve got years of experience, this recipe is as welcoming as it is rewarding. It’s easy enough for kids to help with (supervised, of course), yet tasty enough to impress even the most seasoned candy lovers.
And here’s the kicker: once you’ve mastered the base, you can customize the recipe in dozens of fun ways—from sea salt toppings to chocolate dips and nutty add-ins.
Ingredients You’ll Need
If you’re ready to whip up a batch of these soft and chewy caramels, you’ll be happy to know you won’t need anything fancy. In fact, most of the ingredients are probably already sitting in your pantry.
Essential Ingredients
Let’s break it down:
-
1/2 cup salted butter (1 stick), melted
Adds that rich, buttery flavor and helps with the creamy texture. -
1/2 cup light corn syrup
Keeps the caramel smooth and prevents it from crystallizing. -
1/2 cup granulated sugar
Provides structure and sweetness. -
1/2 cup light brown sugar
Adds depth, color, and a hint of molasses richness. -
1/2 cup sweetened condensed milk
The magic ingredient that makes the caramels soft and creamy. -
1 teaspoon vanilla extract
Enhances the flavor and gives a warm, aromatic touch. -
1/4 teaspoon table salt (optional)
Balances the sweetness—skip it if you’re finishing with sea salt.
Optional Add-Ins (Mix & Match)
Want to take your caramels up a notch? Try these creative twists:
-
Sprinkle of sea salt on top before they set for a gourmet flair.
-
Dip in melted chocolate once cooled and cut for candy-shop vibes.
-
Chopped nuts like almonds, pecans, or walnuts for a little crunch.
Pro tip: Always use a microwave-safe bowl with at least 2-quart capacity to avoid overflow!
Step-by-Step Instructions
Making Six Minute Caramels is easier than you might think. All you need is a microwave, a few stirs, and some patience while they set. Here’s how to do it:
1. Prepare Your Dish
Start by buttering an 8×8-inch square baking dish (or lining it with parchment paper for easy removal). This ensures your caramels don’t stick when it’s time to slice.
2. Mix the Ingredients
In a large microwave-safe bowl, combine the following:
-
Melted butter
-
Corn syrup
-
Granulated sugar
-
Brown sugar
-
Sweetened condensed milk
Stir everything together until fully blended. The mixture should look smooth and glossy.
3. Microwave the Mixture
Microwave on high power for 6 minutes total, but pause every 2 minutes to stir. So you’ll:
-
Microwave for 2 minutes → stir
-
Microwave for another 2 minutes → stir again
-
Finish with the last 2 minutes of microwaving
👉 Be careful! The bowl and caramel will get very hot.
4. Check for Doneness
After the 6-minute mark, the mixture should be thick and bubbling. If you have a candy thermometer, check for 240°F (115°C)—the soft-ball stage.
If it’s not quite there or if you prefer firmer caramels, microwave for another 30 seconds to 1 minute, checking frequently.
5. Add Vanilla & Salt
Once it’s cooked to perfection, quickly stir in:
-
Vanilla extract
-
Salt, if using
Mix thoroughly.
6. Pour and Let Set
Pour the hot caramel into your prepared dish. Smooth it out with a spatula if needed. Let it cool at room temperature for 1–2 hours, or until fully set.
7. Cut & Wrap
Once firm:
-
Cut the caramel into small squares or rectangles using a sharp knife.
-
Wrap each piece in wax paper or parchment for storage or gifting.
That’s it! Homemade caramel perfection in under 10 minutes flat.
Tips for Perfect Caramels
Even the simplest recipes have their quirks, and this one’s no different. Here’s how to make sure your Six Minute Caramels turn out perfect every single time.
Adjust for Microwave Wattage
Microwaves vary—a 1,000-watt model might finish in 6 minutes, while a lower-wattage unit could take up to 8. If you’re unsure:
-
Start with 6 minutes total (as directed)
-
Test the consistency at the end
-
Add in 15-30 second bursts if needed
Test Without a Thermometer
No candy thermometer? No problem. Use the cold water test:
Drop a tiny bit of caramel into a glass of cold water. If it forms a soft ball that holds its shape when squeezed—it’s ready.
Prevent Sticking & Overflow
-
Use a large, deep microwave-safe bowl to prevent bubbling over.
-
Line your dish with parchment for easier removal.
-
Lightly butter your knife before cutting to avoid sticky messes.
How to Store Them
Store your caramels in an airtight container at room temperature for up to 2 weeks. Want them to last longer?
-
Refrigerate: Keeps for a month.
-
Freeze: Wrap individually and freeze for up to 3 months.
For more candy storage best practices, check out this guide to freezing sweets properly to keep your treats fresh and flavorful.
Creative Variations to Try
Once you’ve mastered the classic Six Minute Caramels, it’s time to have a little fun. Here are a few delicious ways to customize your batch and keep things interesting.
Sea Salt Caramels
Nothing complements rich, buttery caramel like a sprinkle of flaky sea salt. As soon as you pour the caramel into the dish, lightly dust the top with sea salt. Let it cool as usual and cut into pieces. The contrast of sweet and salty is divine.
Chocolate-Dipped Caramels
Feeling fancy? Once the caramels are cooled and cut:
-
Melt high-quality dark or milk chocolate.
-
Dip half of each caramel piece in the chocolate.
-
Place on wax paper to set.
Perfect for parties or holiday platters!
Nutty Caramel Bites
Add a bit of crunch by mixing 1/3 cup of finely chopped nuts (like pecans, almonds, or walnuts) into the caramel mixture just before microwaving.
Or, press chopped nuts gently into the top right after pouring it into the pan.
Festive Additions
-
Add a pinch of cinnamon or pumpkin pie spice for autumn flair.
-
Stir in a few drops of maple extract for a cozy winter twist.
-
Use pink Himalayan salt on top for a gourmet touch.
Frequently Asked Questions (FAQ)
To make sure your Six Minute Caramels turn out perfectly, here are answers to the most common questions people ask.
Can I use margarine instead of butter?
Yes, but we recommend sticking with salted butter for the best flavor and texture. Margarine can work in a pinch, though the taste may be slightly different.
Why did my caramels turn out too hard?
They were likely microwaved a little too long or at too high a power setting. Try reducing the time by 30 seconds and checking consistency earlier next time.
Can I double this recipe?
Absolutely! Just make sure your bowl is big enough. A 4-quart microwave-safe bowl works great for doubling. You might need to add 1 to 2 more minutes of cooking time.
Do I need a candy thermometer?
Nope! But if you have one, it can be useful. Aim for 240°F at the end of the cook time for the perfect soft-ball stage.
Can I freeze them?
Yes! Wrap individual caramels in wax paper and store in a freezer-safe bag for up to 3 months. Let them thaw at room temp before enjoying.
Serving & Gifting Ideas
These caramels aren’t just tasty—they’re adorable and giftable too! Here are some fun ways to enjoy and share them.
As Homemade Gifts
Wrapped in wax paper and tucked into a cute box or mason jar, these make a lovely homemade gift for:
-
Holidays
-
Birthdays
-
Teacher appreciation
-
Party favors
Add a label or ribbon for that extra thoughtful touch.
On Dessert Boards
Pair your caramels with:
-
Chocolate truffles
-
Shortbread cookies
-
Dried fruits
-
Pretzels
This creates an irresistible dessert platter for holidays or gatherings.
💡 Internal link tip: Planning a dessert board? Try adding Strawberry Cheesecake Nachos for a playful, fruity twist.
With Hot Drinks
Serve alongside:
-
Hot chocolate
-
Herbal tea
-
Warm milk with cinnamon
The buttery richness of the caramels pairs wonderfully with cozy sips on a cold day.
For Kids’ Lunches or Picnics
Wrap a few caramels in parchment, toss them in lunchboxes or picnic baskets, and you’ve got a little something sweet that’s easy to carry and fun to eat.


